background image

10

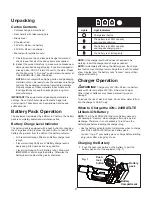
2.  Check that the source voltage is the same as that marked 

on the rating plate of the battery charger. Then, plug the 

charger adapter into an appropriate AC power outlet. 

Connect the charger plug into the charge socket of the 

battery to start charging (Fig. 2).

3.  The battery will take approximately 4.5 hours to charge. 

The battery indicator LEDs will twinkle and illuminate one 

by one during the charging process. Unplug the charger 

immediately when the 3 LEDs are all illuminated. 

m

CAUTION!

 FIRE HAZARD. When disconnecting the 

charger from the battery, be sure to unplug the charger from 

the outlet first, then disconnect the charger from the battery. 

m

WARNING!


This charger does not automatically turn off 

when the battery is fully charged. Please take care not to leave 

the battery plugged into the charger. Switch off or unplug the 

charger at the mains when charging is complete.

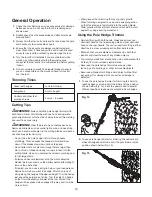
4.  Timely recharging of the battery will help prolong the 

battery's life. You must recharge the battery pack when 

you notice a drop in the equipment's power.

IMPORTANT! Never allow the battery pack to become fully 

discharged as this will cause irreversible damage to the 

battery. 

Assembly

m

WARNING!

 The pole hedge trimmer must be fully 

assembled before operation! Do not use a pole hedge trimmer 

that is only partly assembled or assembled with damaged 

parts!

m

WARNING! 

Do not install the battery until assembly is 

complete. Failure to comply could result in accidental starting 

and possible serious personal injury. 

Follow the assembly instructions step-by-step and use the 

figures provided as a visual guide to easily assemble the unit.

NOTE: Take care of small parts that are removed during 

assembly or when making adjustments. Keep them secure to 

avoid loss.

Assembling the Tool

The telescoping pole and trimmer head come unassembled. 

Ensure that the pole hedge trimmer is assembled properly 

before using.

1.  Align the telescoping pole with the trimmer head. 
2.  Insert the telescoping pole into the trimmer head locking 

base until the lock holes click into place (Fig. 3). 

3.  Slide the locking collar onto the locking base and turn 

clockwise to secure (Fig. 4).

4.  Make sure the rear handle is properly aligned with the 

blade.

m

WARNING!

 Make sure the telescoping pole is inserted 

to a full stop and the locking collar is properly tightened before 

using the pole hedge trimmer.

m

WARNING!

 Failure to lock the telescoping pole as 

directed above could result in serious injury or death.
NOTE: To disassemble the unit, screw the locking collar 

counterclockwise to unlock the trimmer head, and remove the 

screw on the lock base with a screwdriver. Then the trimmer 

head can be pulled out from the pole (Fig. 5).
 

Fig. 2

Battery 

indicators

Locking base

Lock hole

Trimmer head

Telescoping pole

Fig. 3

Fig. 4

Locking base

Locking collar

Summary of Contents for 24V-PHT17-LTE

Page 1: ...h as pipes radiators ranges and refrigerators There is an increased risk of electric shock if your body is earthed or grounded 3 Do not expose power tools to rain or wet conditions Water entering a power tool will increase the risk of electric shock 4 Do not abuse the cord Never use the cord for carrying pulling or unplugging the power tool Keep cord away from heat oil sharp edges or moving parts ...

Page 2: ...ion e g center fences Take care that the cutting device does not come in contact with wire or other metal objects 6 Service on the product must be performed by qualified repair personnel only Service or maintenance performed by unqualified personnel could result in injury to the user or damage to the product 7 Keep all parts of the body away from the cutting blade Do not remove cut material or hol...

Page 3: ...s use two hands to operate a pole hedge trimmer 10 Always be aware of your surroundings and stays alert for possible hazards of which you may not be aware due to the noise of the product 11 Take care against injury to feet and hands from the cutting device 12 Always ensure that the air vents are kept clear of debris 13 Wear slip resistant foot protection and protective clothing when using this pro...

Page 4: ...entilated area Do not block the charger vents Keep them clear to allow for proper ventilation Do not allow smoking or open flames near a charging battery pack Vented gases may explode NOTE The safe temperature range for the battery is 41 F 105ºF 5 C 40 5 C Do not charge the battery outside in freezing weather charge it at room temperature Maintain charger cord When unplugging the charger pull the ...

Page 5: ...posed to violent shocks even if the housing of the battery pack appears to be undamaged The battery cells inside the battery may have suffered serious damage In such instances please read the waste disposal information for proper battery disposal 10 If the battery pack suffers overloading and overheating the integrated protective cutoff will switch off the equipment for safety reasons IMPORTANT Do...

Page 6: ...harger near vapors and flammable liquids 4 Use the battery charger and cordless tools only in dry conditions and at an ambient temperature of 41ºF 105 F 5 C 40 5 C 5 Do not keep the battery charger in places where the temperature is liable to reach over 105 F 40 5 C In particular do not leave the battery charger in a car that is parked in the sunshine 6 Protect batteries from overheating Overloads...

Page 7: ...empting to assemble and operate WARNING Do not expose the unit to rain or wet conditions WEAR EYE AND HEARING PROTECTION For protection against injury wear ear defenders and safety goggles Wear protective gloves and non slip footwear when using the machine and handling debris DANGER ROTATING BLADES Keep hands and feet away from openings while the trimmer is running Keep bystanders a safe distance ...

Page 8: ...0º 30º 60º Blade Material Rust resistant steel blades Blade Length 17 in 43 2 cm Cutting Diameter Max 0 6 in 1 6 cm Telescoping Pole 6 5 ft to 7 9 ft 2 m to 2 4 m Weight without battery 7 4 lbs 3 4 kg Weight battery installed 8 4 lbs 3 8 kg Initial no load voltage when fully charged peaks at 24 volts nominal voltage under typical load is 21 6 volts 1 Cutting blade 2 Trimmer head 3 Pivot button 4 L...

Page 9: ... level monitoring LEDs are lit Battery charge level is decreasing Stop work as soon as possible 1 level monitoring LED is lit Battery is flat Stop work IMMEDIATELY and charge the battery Otherwise the battery s service life will be greatly shortened NOTE If the charge level button does not appear to be working insert the charger and charge as needed NOTE Immediately after using the battery pack th...

Page 10: ...ly assembled or assembled with damaged parts mWARNING Do not install the battery until assembly is complete Failure to comply could result in accidental starting and possible serious personal injury Follow the assembly instructions step by step and use the figures provided as a visual guide to easily assemble the unit NOTE Take care of small parts that are removed during assembly or when making ad...

Page 11: ...chments or accessories not recommended by the manufacturer of this product The use of attachments or accessories not recommended can result in serious personal injury Starting Stopping mWARNING Ensure the blade does not touch any objects before turning on the pole hedge trimmer mCAUTION Starting stopping and restarting a DC motor repeatedly within a few seconds can generate a great deal of heat an...

Page 12: ...ow you to achieve proper footing and balance at all times mWARNING Failure to lock the telescopic pole clamp as directed could result in personal injury Adjusting Pivoting Head The pole hedge trimmer head can be pivoted into 6 different cutting angles 1 Turn off the pole hedge trimmer and remove the battery 2 Place the pole hedge trimmer on a sturdy flat surface 3 Press and hold the pivot button a...

Page 13: ...ng saw to trim large stems If blades do become jammed stop the motor allow the blades to stop and remove the battery before attempting to remove the obstruction If desired you can use a string to help cut your hedge level Decide how high you want the hedge Stretch a piece of string along the hedge at the desired height Trim the hedge just above the guide line of string Trim the side of a hedge so ...

Page 14: ...ust oil grease etc mWARNING Blades are sharp When handling the blade assembly wear non slip heavy duty protective gloves Do not place your hand or fingers between blades or in any position where they could get pinched or cut NEVER touch the blades or service the unit with the battery inside the unit Store the pole hedge trimmer in the blade cover provided Store it in a dry location out of the reac...

Page 15: ...k 4 Do not mix old and new batteries 5 Do not mix Alkaline Standard Carbon Zinc or Rechargeable Nickel Cadmium Nickel Metal Hydride or Lithium Ion batteries 6 Do not dispose of batteries in fire 7 Batteries should be recycled or disposed of as per state and local guidelines Storage 1 Stop the motor and remove the battery 2 Clean the pole hedge trimmer thoroughly before storing 3 Always place the b...

Page 16: ...66 SNOWJOE 1 866 766 9563 Accessories Item Model 24V iON 2 0 Ah Lithium Ion Battery Battery Charge Time Max 24VCHRG AC 1 hr 20 min 24VCHRG QC 55 min 24VCHRG DPC 55 min Battery Runtime Max 50 min 24VBAT LTE 24V iON 2 5 Ah Lithium Ion Battery Battery Charge Time Max 24VCHRG AC 1 hr 40 min 24VCHRG QC 1 hr 10 min 24VCHRG DPC 1 hr 10 min Battery Runtime Max 1 hr 24VBAT LT 24V iON 4 0 Ah Lithium Ion Bat...

Page 17: ...17 NOTES ...

Page 18: ...18 NOTES ...

Page 19: ... the owner s manual Snow Joe Sun Joe will not be responsible for the cost of any unauthorized warranty repairs This warranty does not cover any cost or expense incurred by the purchaser in providing substitute equipment or service during reasonable periods of malfunction or non use of this product while waiting for a replacement part or unit under this warranty Wearing parts like belts augers chai...

Page 20: ...sunjoe com ...

Reviews: