background image

Assembly

1. 

Before attempting to assemble, empty carton and 
compare parts with packing list on page 2.

NOTE:
• 

Carefully remove the parts from the box.

• 

Inspect the parts to make sure no breakage or damage 
occurred during shipping.

• 

Do not discard the packing material until all parts are 
examined.

• 

If any parts are damaged or missing, please call 
1-866-766-9563 for assistance.

• 

Be sure to tighten the knobs when assembled to 
prevent the handle from rocking.

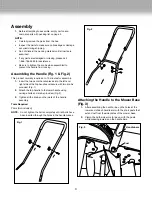
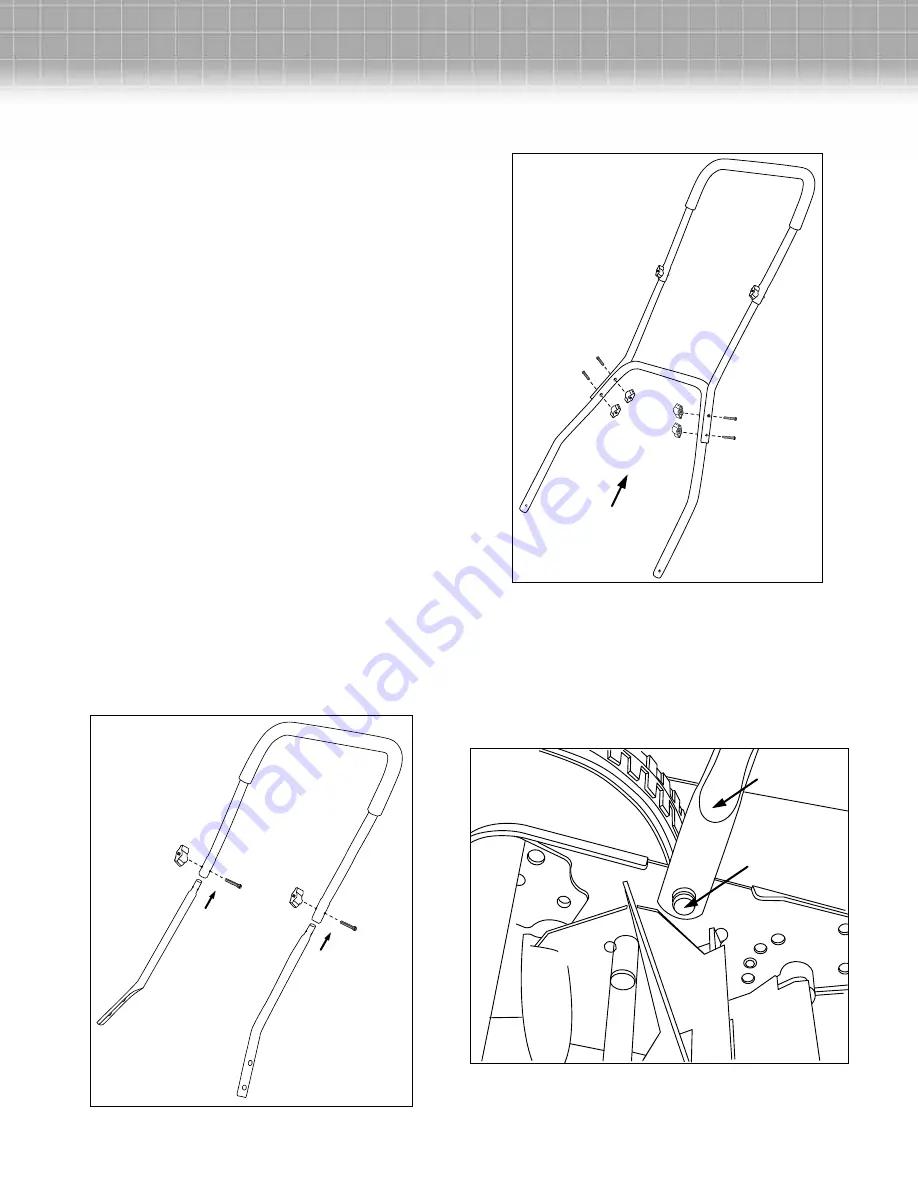
Assembling the Handle (Fig. 1 & Fig. 2)

This product normally requires 6 to 10 minutes for assembly.

1. 

Insert the two center handle pieces into the left and 
right side of the top handle and secure with two knobs 
provided. (Fig. 1) 

2. 

Attach the top handle to the lower handle using 
carriage bolts and knobs provided. (Fig. 2)

3. 

Tighten all the knobs on the joints of the handle 
assembly.

Tools Required

Pliers (Not included)

NOTE:

  Do not tighten the bolts completely until all bolts have  


been inserted through the holes in the handle pieces.

Attaching the Handle to the Mower Base 

(Fig. 3)

1. 

After assembling the handle, line up the holes at the 
lower end of each handle arm with the short posts that 
extend out from the side plates of the mower base.

2. 

Clamp the both side arms to line up with the posts 
while pressing inwards on the handle bars.

Fig. 1

Fig. 2

Fig. 3

3

Post

Handle bars

Summary of Contents for MJ502MRM

Page 1: ...ring sandals Walk behind never run while using reel mower Always make sure of your footing when using this reel mower Do not intentionally strike or hit trees fences etc This can cause injuries or severely damage the reel mower mechanisms Make sure your reel mower is in a safe operating condition Do not attempt to operate this reel mower if damaged Contact customer service or have the reel mower r...

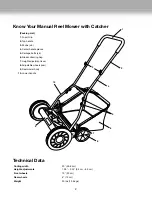
Page 2: ...le pieces 5 Carriage bolts x 6 6 Grass collecting bag 7 Height adjustment lever 8 Adjustable wheels rear 9 Reel mower body 10 Lower handle Technical Data Cutting width 20 50 8 cm Height adjustments 1 26 2 44 3 2 cm 6 2 cm Front wheels 10 25 cm Rear wheels 6 15 cm Weight 30 lbs 13 6 kgs 5 2 1 4 3 10 9 8 6 7 ...

Page 3: ...e two center handle pieces into the left and right side of the top handle and secure with two knobs provided Fig 1 2 Attach the top handle to the lower handle using carriage bolts and knobs provided Fig 2 3 Tighten all the knobs on the joints of the handle assembly Tools Required Pliers Not included NOTE Do not tighten the bolts completely until all bolts have been inserted through the holes in th...

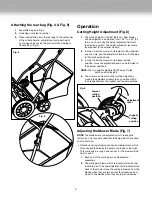
Page 4: ...r lowest positions NOTE The two height adjustors MUST be set to the same position height 4 The mower can be set to other cutting heights by moving the adjustment levers to any position within their range between the highest and lowest positions Adjusting the Mower Blade Fig 7 NOTE The blades were pre adjusted prior to leaving the factory but it is recommended that the adjustment be verified prior ...

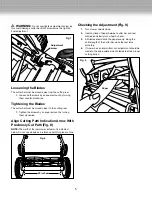
Page 5: ...n Cutting Path Indication Arrow With Previously Cut Path Fig 8 NOTE The width of the real mower actual cut is indicated below Do not use wheels as a reference point for grass cut line Checking the Adjustment Fig 9 1 Turn mower upside down 2 Insert a piece of paper between cutter bar and reel blades and slowly turn wheel by hand 3 All blades should slice the paper evenly along the entire length of ...

Page 6: ...Turn the mower on its side to clean the blade area WARNING Do not place hands in the mower near blades If grass cuttings are compacted in the blade area remove using a wood or plastic cleaning tool appropriate for the cleaning of the blades 3 Store the mower in a dry place Do not place other objects on top of the mower during storage Maintenance Tips Reel mowers are relatively low maintenance For ...

Page 7: ...7 NOTES ...

Page 8: ...is warranty Parts used that are not genuine Snow Joe parts are not covered by this warranty Damages resulting from misuse alteration improper assembly improper adjustment neglect or accident which requires repair is not covered under this warranty Belts augers and tines are not covered under warranty belts augers and tines wear out and can be purchased at www snowjoe com or by calling 1 866 766 95...

Reviews: