background image

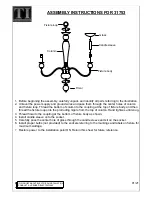
Assembly Instructions


10'x12' Aluminum Gazebo 

Item:


L-GZ399PAL-B


Our clear, easy-to-follow, step-by-step instructions will guide you through the project from start to finish. The 
final product will be a quality piece that will go together smoothly and give years of enjoyment. 


Important: 

Please read instructions thoroughly before assembly. Familiarize yourself with the inventory of 

parts and the accompanying illustrations to assure safe and proper assembly.   

Check inside all posts and other parts which are hollow as smaller parts are regularly packed inside 

them in order to reduce carton size wherever possible. 

Repeated assembly can weaken the locking ability of the washers. Periodically check all bolted connections 
on your gazebo to make sure they are tight and secure. Please keep the instructions for future reference.


All you will need is a screwdriver, a hammer and ladder


(not included) whose height is no less than 2.5m. 


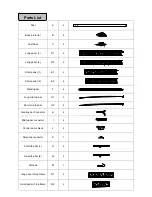
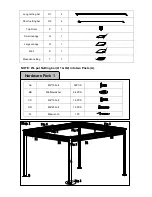
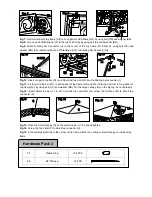
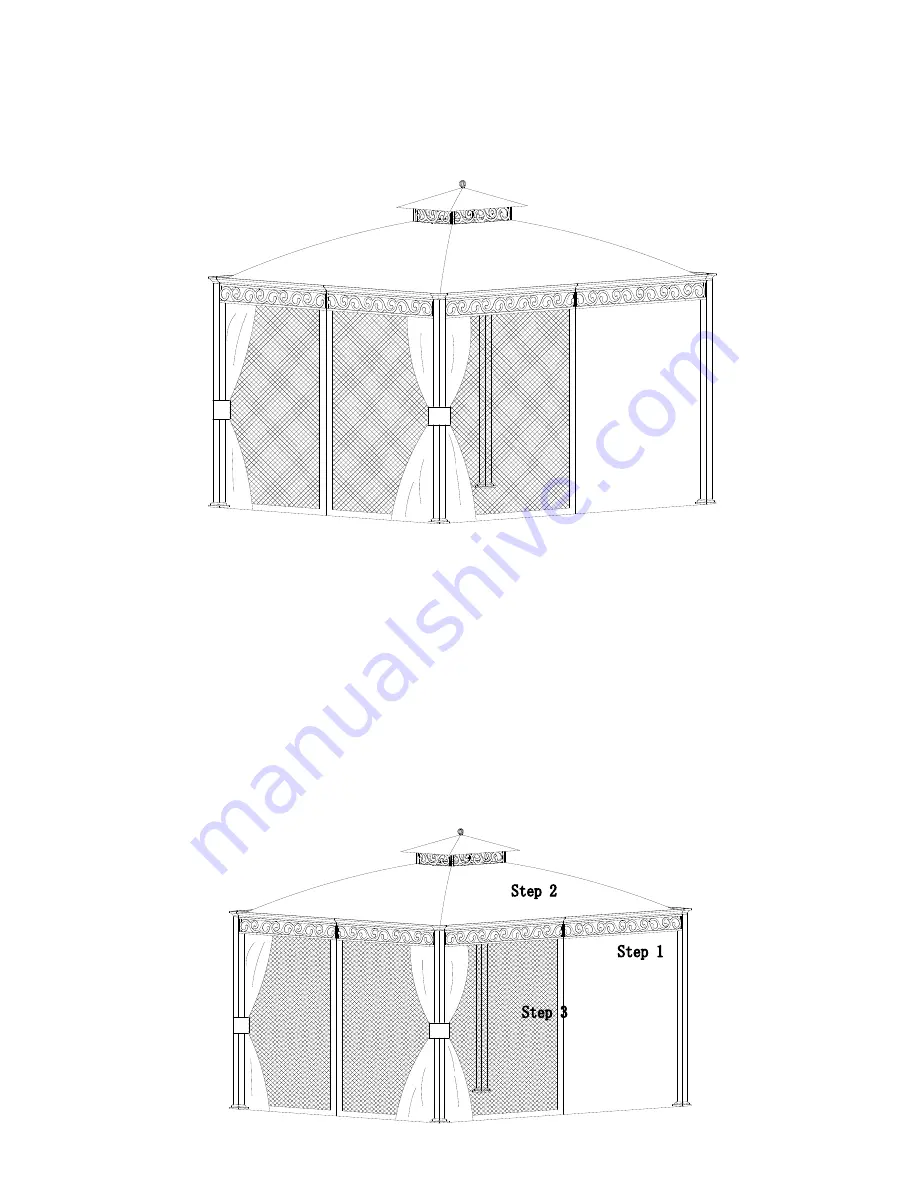
Item Identification: 

For ease of identification, all parts are labeled to correspond to the Step number in which 

the part is used. 


Summary of Contents for L-GZ399PAL-B

Page 1: ...sure safe and proper assembly Check inside all posts and other parts which are hollow as smaller parts are regularly packed inside them in order to reduce carton size wherever possible Repeated assembly can weaken the locking ability of the washers Periodically check all bolted connections on your gazebo to make sure they are tight and secure Please keep the instructions for future reference All y...

Page 2: ... 1 E1 2 Short panel 2 E2 2 Slanting bar F 4 Long mid top bar G1 2 Short mid top bar G2 2 Slanting bar Connector H 4 Mid top bar connector I 4 Conner decor block J 4 Small top connector K 1 Small top bar 1 L1 2 Small top bar 2 L2 2 Pothook M 1 Long panel of top frame N1 2 Small panel of top frame N2 2 ...

Page 3: ... Top Finial P 1 Small canopy Q 1 Large canopy R 1 Wall S 1 Mosquito netting T 1 NOTE We put Netting bar O1 O2 into two Posts A Hardware Pack 1 AA M6 15 bolt 32PCS BB M6 flat washer 64 PCS CC M6 15 bolt 16 PCS DD M6 25 bolt 16 PCS W M6 wrench 1 PC ...

Page 4: ...t the Short panels E1 E2 in the same way Please note the screw position Fig 4 Fix the Mid top bar connector I on the middle of the panels D1 D2 E1 E2 by bolt CC and washer BB Fig 5 Fix the long netting bar O1 to long panels short netting bar O2 to short panels by using bolt AA and flat washer BB Fig 6 Fix the assembled panels to the post A by using bolt DD and flat washer BB Hardware Pack 2 AA M6 ...

Page 5: ...id top bar connector I Fig 11 Fix long mid top bar G1 to short panel of top frame N2 and short mid top bar G2 to long panel of top frame N1 by using bolt CC and washer BB Put the Large canopy R on the big top do not spread it Fig 12 Insert Small top bar L1 L2 to Small top connector K screw the Pothook M to Small top connector K Fig 13 Place the Small canopy Q on the small top bar L1 L2 and tighten...

Page 6: ...ric may burn if left in continuous contact with any flame source The application of any foreign substance to the tent fabric may render the flame resistant properties ineffective This unit is heavy Do not assemble this item alone Fig 16 Spread the Large canopy R hang the pothooks of the large canopy into the holes on the panels Fig 17 Hang Mosquito netting T on the inside netting bar O1 O2 by usin...

Page 7: ...ge to the item which could also result in injury 11 This gazebo is intended for decorative and sunshade purposes only and is not meant to withstand extreme weather conditions including high winds torrential rain and snow Gazebo fabric is water resistant not water proof and may leak during exposure to precipitation LIMITED WARRANTY This limited warranty is extended to the original purchaser and app...

Reviews: