SunMaxx Solar | 5098 NY 206 Bainbridge NY 13733 | 1.877.786.6299 1.877.270.7875 fax | www.sunmaxxsolar.com
E.1 DISPLAY AND INPUT
E. Operation
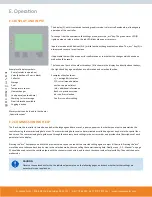
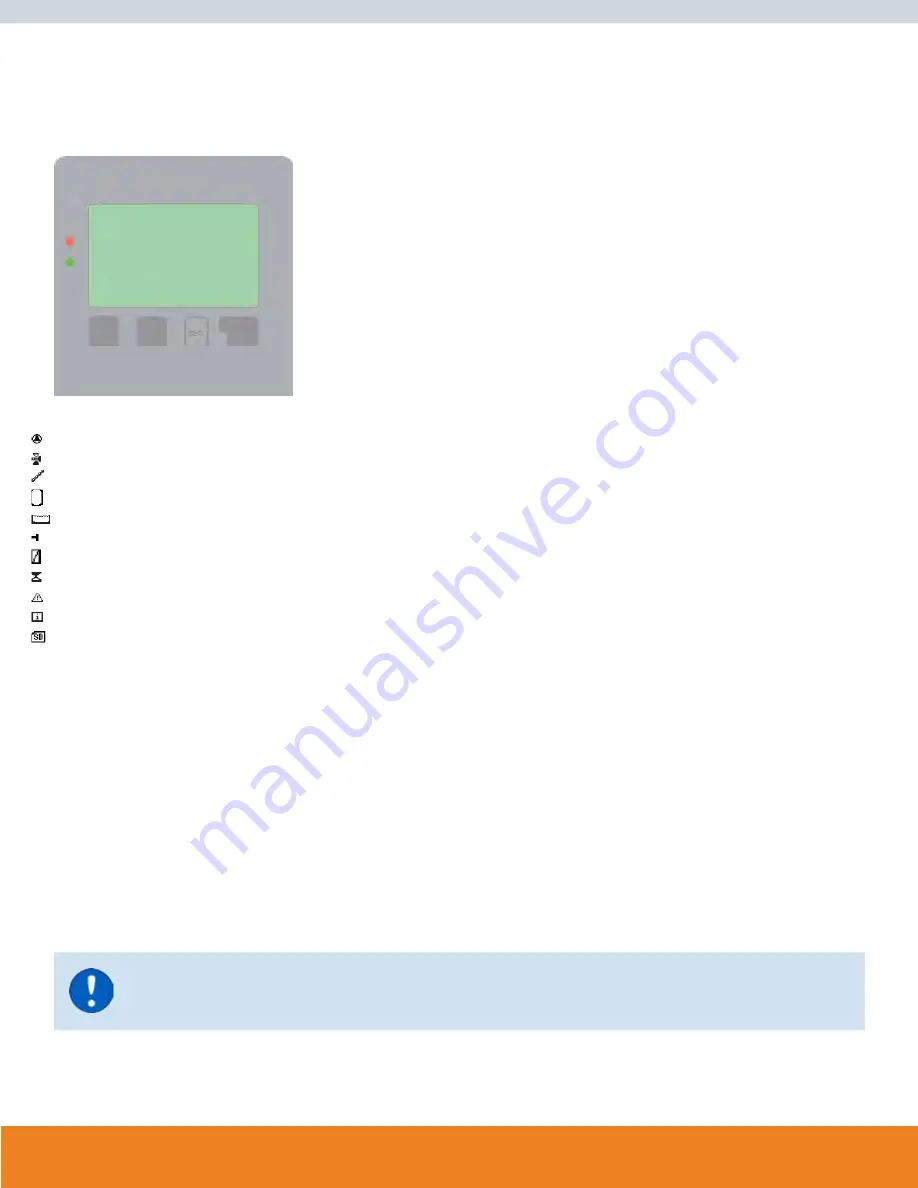
The display (1), with its extensive text and graphics mode, is almost self-explanatory, allowing easy
operation of the controller.
To change from the overview to the settings menu, press the „esc“ key. The green status LED (2)
lights up when a relay is active, the red LED blinks when an error occurs.
Inputs are made with 4 buttons (3+4), which functions change context sensitive. The „esc“ key (3) is
always used to cancel or exit a menu.
If applicable there will be a request for confirmation as to whether the changes which have been
made should be saved.
The function of each of the other three keys (4) is shown in the display line directly above the keys;
the right-hand key is generally has a confi rmation and selection function.
Examples of key functions:
+/- = enlarge/shrink values
▼/▼ = scroll menu down/up
yes/no = approve/reject
Info = additional information
Back = to previous screen
ok = confi rm selection
Confirm = confirm setting
Examples of display symbols:
Pump (rotates in operation)
Valve (direction of fl ow in black)
Collector
Storage
Pool
Temperature sensor
Heat exchanger
Load pause (see Load time)
Warning / error message
New information available
Logging is active
More symbols can be found in the chapter
„Special functions“
E.2 COMMISSIONING HELP
The fi rst time the controller is turned on and after the language and time are set, a query appears as to whether you want to parametrise the
controller using the commissioning help or not. The commissioning help can also be terminated or called up again at any time in the special func
-
tions menu. The commissioning help guides you through the necessary basic settings in the correct order, and provides brief descriptions of each
parameter in the display.
Pressing the “esc” key takes you back to the previous value so you can look at the selected setting again or adjust it if desired. Pressing the “esc“
more than once takes you back step by step to the selection mode, thus cancelling the commissioning help. Finally, menu „3.2. - Manual“ on page
22 should be used to test the switch outputs with the consumers connected, and to check the sensor values for plausibility. Then switch on auto
-
matic mode.
CAUTION
Observe the explanations for the the individual parameters on the following pages, and check whether further settings are
necessary for your application.

