8
We value your experience using Sunny Health and Fitness products. For assistance with parts or
troubleshooting, please contact us at
support@sunnyhealthfitness.com
(877-907-8669).
36
37
25
3
11
24
3
11
24
24
11
3
33
38
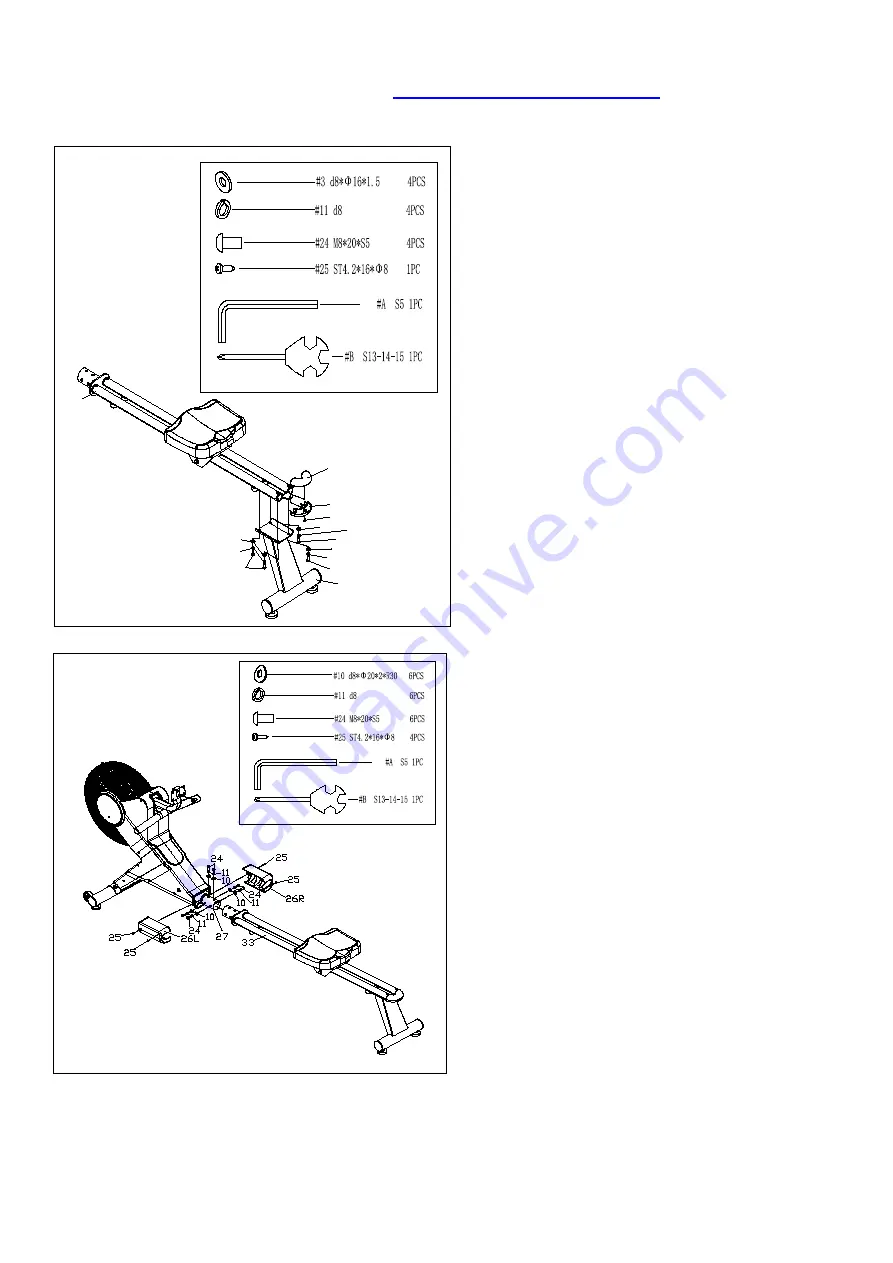
STEP 3:
Remove 1
Screw (No. 25)
from
Upper and
Bottom Sliding
Rail Covers (No. 36 & No.
37)
by
Spanner (No. B).
Attach
Upper and Bottom Sliding
Rail
Covers (No. 36 & No. 37)
to the
Sliding
Rail (No. 33)
with 1
Screw (No. 25)
that
was removed. Tighten and secure with
Spanner (No. B);
Attach
Rear Support (No. 38)
to
Sliding
Rail (No. 33)
with 4
Washers (No. 3)
, 4
Spring Washers (No. 11)
and 4
Bolts (No.
24).
Tighten and secure with
Allen Wrench
(No. A).
STEP 4:
Remove 6
Arc Washers (No. 10),
6
Spring Washers (No. 11)
and 6
Bolts
(No. 24)
from
Main Frame (No. 27)
by
Allen Wrench (No. A);
Remove the 4
Screws (No. 25)
from the
Left & Right
Sliding Rail Covers (No.
26L/R)
and
Main Frame (No. 27)
with
Spanner (No. B);
Attach
Sliding Rail (No. 33)
to
Main
Frame (No. 27)
using 6
Arc Washers (No.
10),
6
Spring Washers (No. 11)
and 6
Bolts (No. 24)
that were removed. Tighten
and secure with
Allen Wrench (No. A)
;
Attach the
Left & Right
Sliding Rail
Covers (No. 26L/R)
to the
Main Frame
(No. 27)
using 4
Screws (No. 25)
that
were removed. Tighten and secure with
Spanner (No. B).


