6
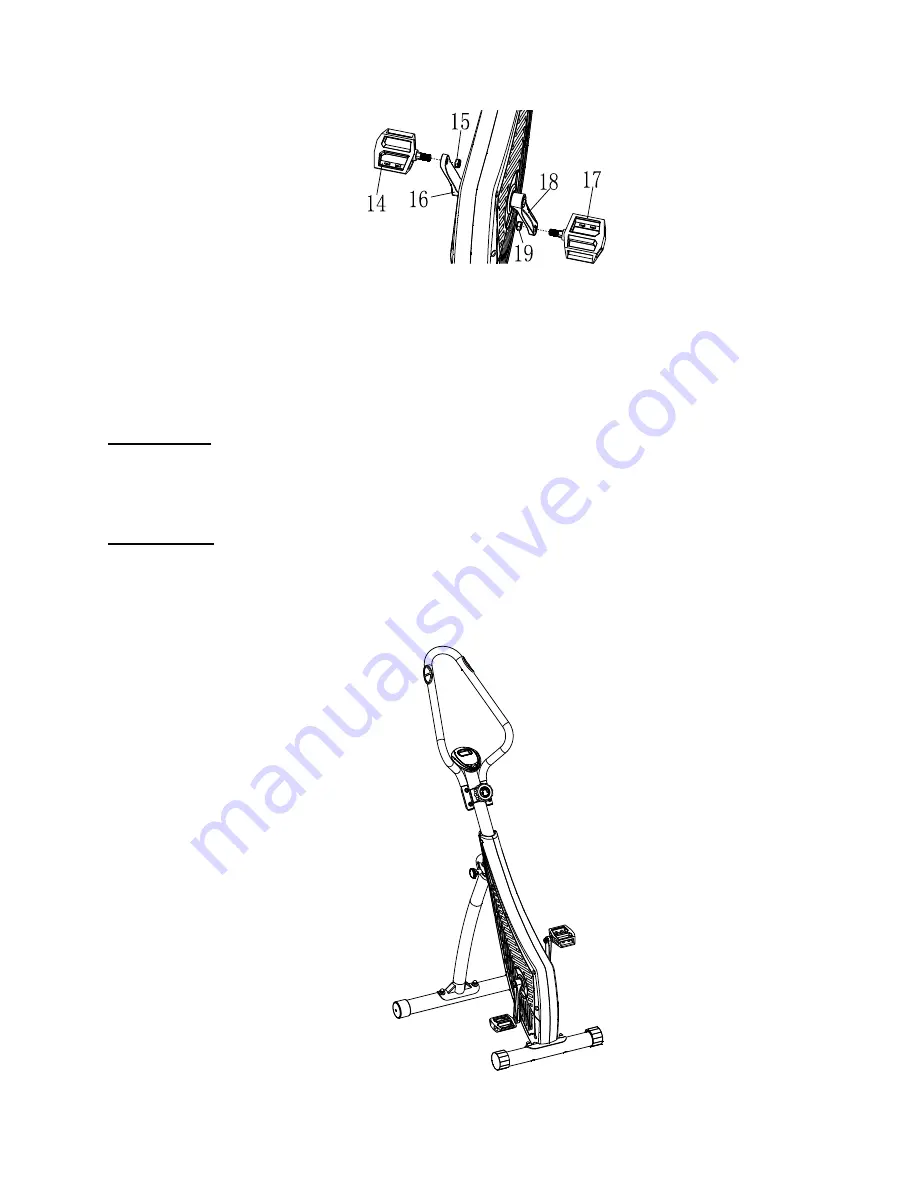
STEP: 4
Connect the
Left
and
Right Pedals (No. 14
14
and
No. 17)
onto the
Left
and
Right Crank
Arms (No. 16
and
No. 19)
. (Before you begin, immobilize the crank arms by turning the
tension knob all the way to the right).
Left Pedal:
Align the
Left Pedal (No. 14)
with the
Left Crank Arm (No. 16)
at 90
degrees. Gently insert the pedal into the crank arm, turn the pedal
counter-clockwise
as tightly as you can with your hand. Use
Nut (No. 15)
(Left Pedal Nut) to secure the
left pedal, tighten using
Spanner (B)
. (The
Left Pedal
is marked with “
L
”).
Right Pedal:
Align the
Right Pedal (No. 17)
with the
Right Crank Arm (No. 19)
at 90
degrees. Gently insert the pedal into the crank arm, turn the pedal
clockwise
as tightly
as you can with your hand. Use
Nut (No. 18)
(Right Pedal Nut) to secure the right pedal,
tighten using
Spanner (B)
. (The
Right Pedal
is marked with “
R
”).
STEP: 5
Assembly is complete!
Summary of Contents for SF-B0419
Page 3: ...2 EXPLODED DRAWING ...


