5
ASSEMBLY INSTRUCTIONS
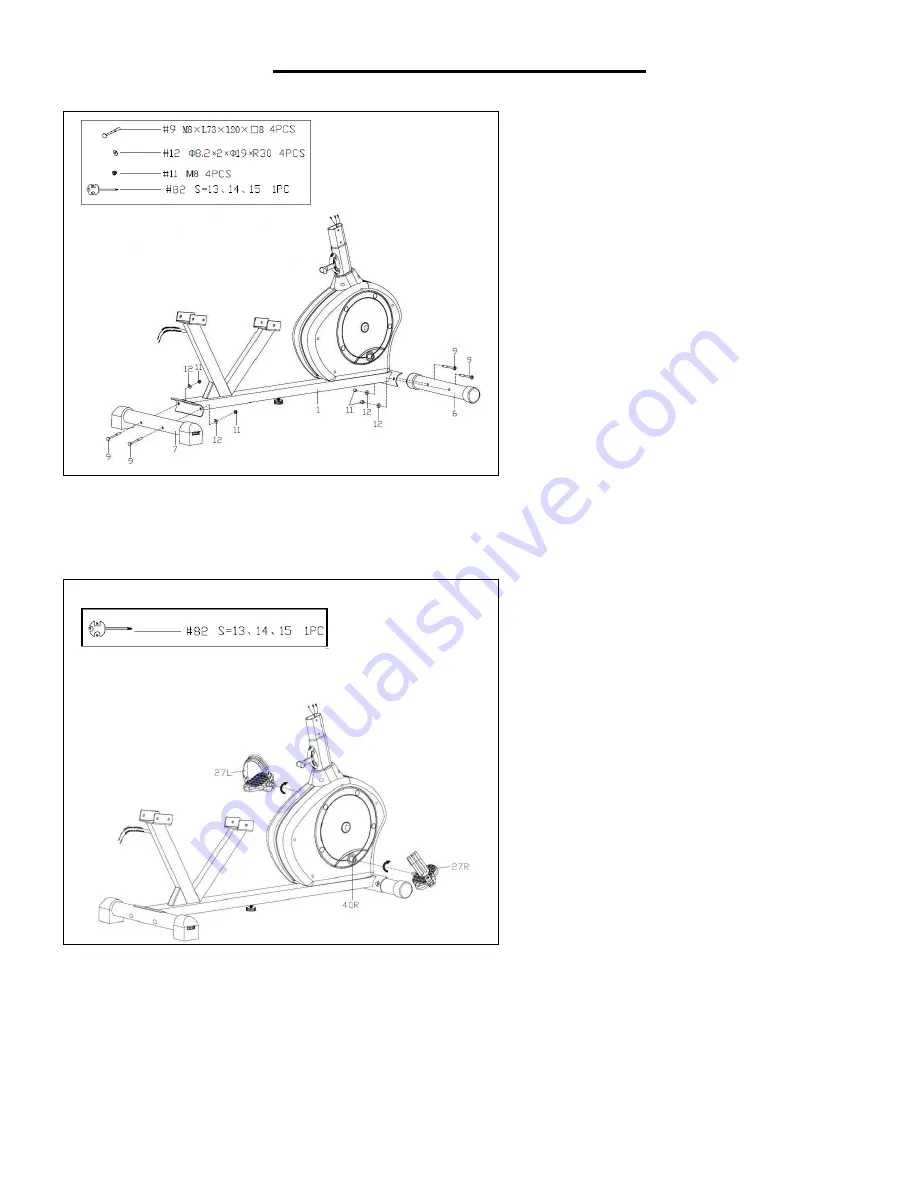
STEP 1
Attach the
Front Stabilizer (No. 6)
and
the
Rear Stabilizer (No. 7)
to the
Main
Frame (No. 1)
with the 4
Square Neck
Bolts (No. 9)
, 4
Arc Washers (No. 12)
and 4
Ball Cap Nuts (No. 11)
using
Spanner (No. 82)
.
STEP 2
Attach the
Pedal (No. 27L/R)
to the
Crank (No. 40L/R)
with the
Spanner (No.
82).
NOTE: Make sure to attach
Right Pedal
(No. 27R)
, marked (R), to the
Right
Crank (No. 40R)
and should be tightened
clockwise. Attach the
Left Pedal (No.
27L)
, marked (L), to the
Left Crank
(No.40L)
.
It
should
be
tightened
counter-clockwise. Attaching the
Pedal
(No. 27L/R)
to the wrong
Crank (No.
40L/R)
or turning it the wrong direction
can damage the Crank.
Summary of Contents for SF-RB4631
Page 3: ...2 EXPLODED DIAGRAM ...


