SUNPRO
®
3-3/8" TACHOMETERS
SST802R, FZ88R
INSTALLATION INSTRUCTIONS
GENERAL INFORMATION
These tachometers are designed for 12-volt negative
(-) ground 4-cycle engines. As sold they are compatible
with most distributor and distributorless ignition systems.
The CP7560 Tach Signal adapter is required to connect
the tachometer to Coil On Plug ignition systems and to
diesel engines with electronic injection.
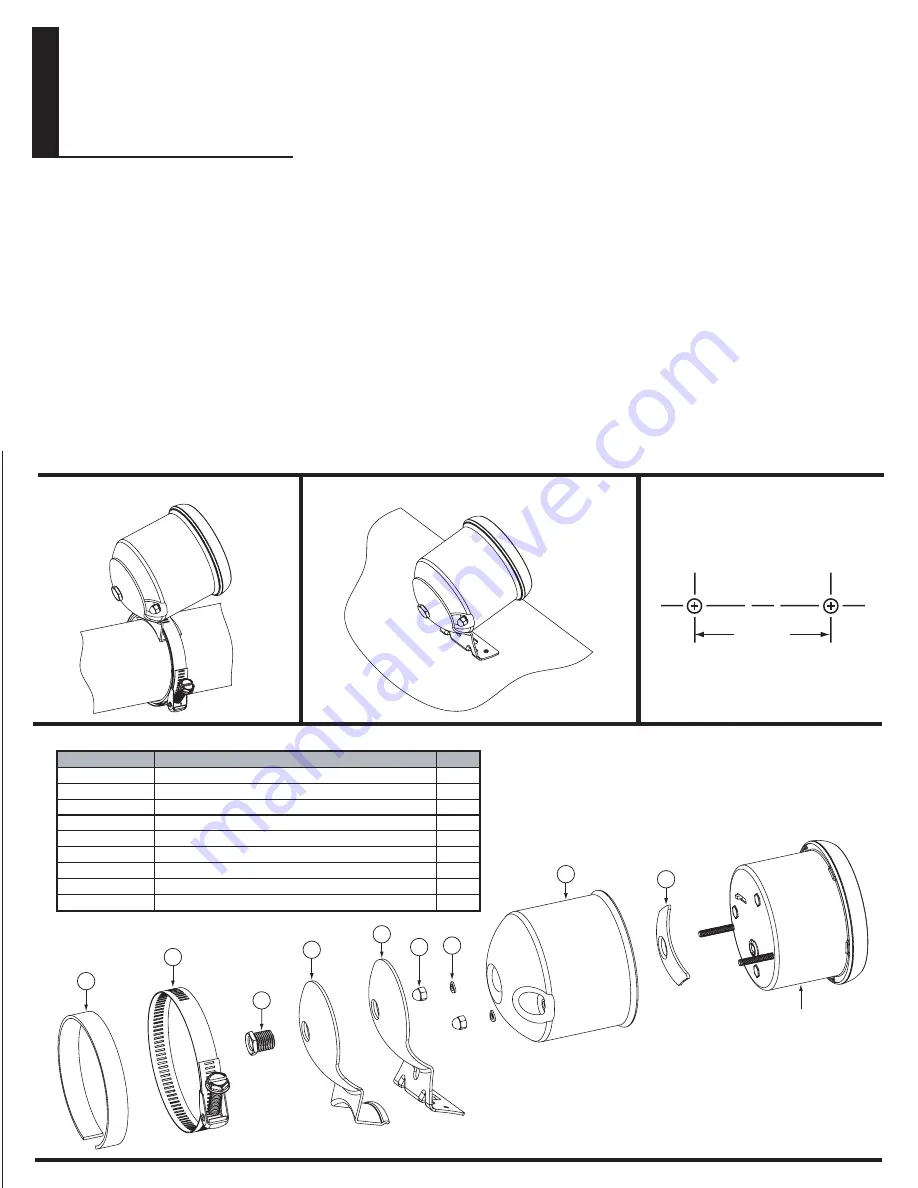
HARDWARE KIT CONTENTS
Dash Mount Bracket...................................................1 ea
Column Mount Bracket...............................................1 ea
Chrome Cup................................................................1 ea
Adjustable Clamp........................................................1 ea
Installation Kit .............................................................1 ea
STEERING COLUMN MOUNTING
INSTRUMENT PANEL MOUNTING
PANEL LAYOUT
2-1/4”
9
8
3
5
4
7
1
2
6
TACH
ITEM NO.
DESCRIPTION
QTY.
1
1
2
1
3
1
4
1
5
1
6
2
7
2
8
1
9
1
CUP
FEMALE NUT
MALE NUT
MOUNTING BRACKET
COLUMN BRACKET
#8 LOCK WASHER
#8-32 ACORN NUT
ADJUSTABLE CLAMP
RUBBER STRIP
CAUTION
Please read this instruction manual and review the
installation procedures carefully before attempting the
installation of your tachometer.
SAFETY GUIDELINES
To prevent accidents that could result in serious injury and/
or damage to your vehicle or tachometer, carefully follow
these safety rules and test procedures.
Wear safety goggles when working on your vehicle.
A l w a y s o p e r a t e v e h i c l e i n a
well-ventilated area. If vehicle is in an enclosed area,
exhaust should be routed directly to the outside via
leakproof exhaust hose.
Make sure that your vehicle is in Park or Neutral, and
that the parking brake is firmly set.
Avoid contact with hot surfaces such as exhaust
manifolds and pipes, mufflers (catalytic converters),
radiator and hoses.
FUNCTIONAL QUICK CHECK
It is suggested that the tachometer be electrically
connected to the vehicle, (using alligator clip leads or
other suitable means) following the steps below, and an
electrical functional check of the tachometer be made,
prior to making a permanent installation.
•
•
•
•
Start the vehicle’s engine. Confirm the operation of the
tachometer. Disconnect the tachometer.
INSTALLING MOUNT BRACKET
Your tachometer is designed to be mounted on any
flat or curved surface, or on the steering column
using the clamp kit.
Steering Column Mounting
1. Assemble steering column bracket (5) and cup (1)
using male nut (3) and female nut (2). Tighten male
nut only enough to still allow cup to be positioned to
proper angle.
2. Wrap rubber strip (9) around steering column.
3. Place assembled cup and column bracket on rubber
strip and secure to steering column with adjustable
clamp (8).
Instrument Panel Mounting
1. Select best possible mounting location for good vis-
ibility from a normal driving position.
2. Mounting bracket (4) can be used for a marking or
drill template.
3. Drill two 3/16” holes for #8 screws, lock washer and
nuts or two 5/32” holes for #8 self-tapping screws.
This picture is not to scale!


