71
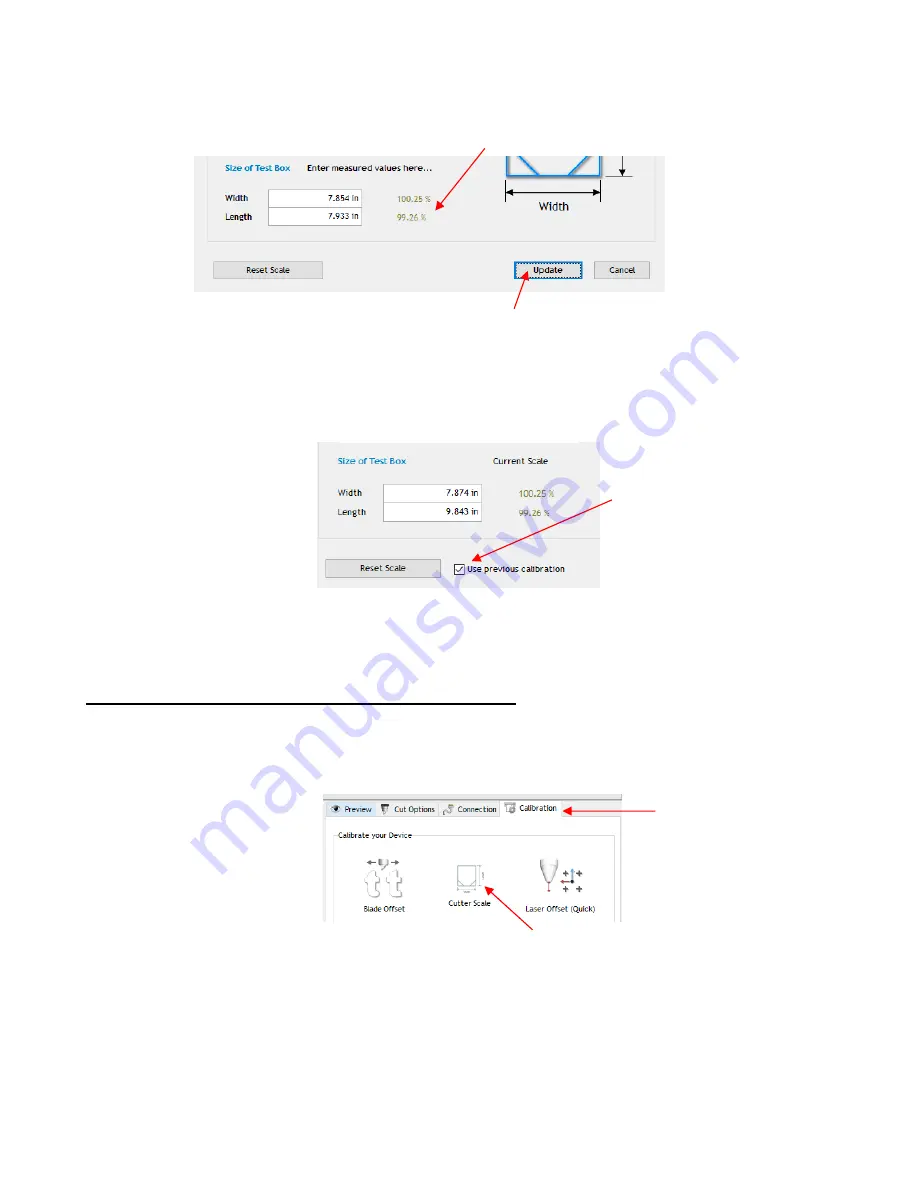
After entering each number, the scaling percentage is automatically calculated:
Click on
Update
and a prompt window will ask if you want to
Apply Scale Adjustment
. Click on
Yes
and you’ll be back in the
Vinyl Spooler
window. To verify the scaling, again click on
Cutter Scale
and
repeat the same steps. Make sure you leave your new scale factors in place by having the following
option marked:
Once your test rectangle is drawing at the correct size, the calibration process is complete.
2.08.2 Scale Calibration Using Inches for Measurement
•
SignMaster has a built-in resolution routine which can be used to easily perform this calibration:
Go to the
Vinyl Spooler
window and select the
Calibration
tab. Click on the
Cutter Scale
icon:
A new window opens where you can enter the dimensions of a square or rectangle to draw with the test
pen. It is highly recommended that the dimensions be at least 8 inches:
Calculated
Scale
values
Click on
Update
Leave this checked for
each repeated test
1. Select the
Calibration
tab
2. Click on the
Cutter Scale
icon


