background image

33

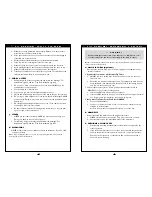
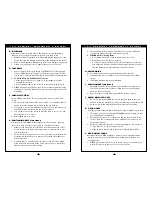
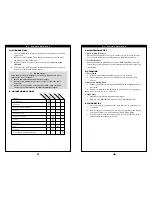
You will need to adjust your chair from time to time for best performance (espe-
cially if you alter the original settings). This chart gives you a first solution, then a
second and a third if needed. You may need to look farther to find the best solu-
tion for a specific problem.

Note:

To keep track of your progress, make only ONE change at a time.

Left 

Turn In Chair

Right 

Turn In Chair

Looseness In Chair

Sluggish T

urning

Squeaks And 

Rattles

Caster Flutter

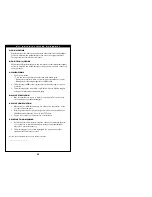
Add a spacer washer between the plastic saddle and the caster plate 
on the top of the left caster plate.

Make sure tire pressure is correct and equal in both rear tires and 
front caster tires, if pneumatic.

Make sure all nuts and bolts are snug. 

(Note: Do not overtighten, 

or aluminum tubes may be damaged).

Make sure all spokes and nipples are tight on radial spoke wheels.

Use Tri-Flow Lubricant (Teflon

®

-based) between all modular frame 

connections and parts.

Check for proper caster plate adjustment. See instructions for 
caster plate adjustment.

SYMPT

OMS

SOLUTIONS

✓ ✓ ✓ ✓

✓ ✓

✓ ✓ ✓

Add a spacer washer between the plastic saddle and the caster plate 
on the top of the right caster plate.

Add a spacer washer between the plastic saddle and the caster plate 
on the bottom right caster plate retaining bolts.

Add a spacer washer between the plastic saddle and the caster plate 
on the bottom right caster plate retaining bolts.

Make sure both front casters touch the ground simultaneously. If 
they do not, add the proper spacers between the bottom bearing of 
the caster plate and fork stem nut until they do. Make sure you 
check for this problem on a flat surface.

✓ ✓

X . T R O U B L E S H O O T I N G

I X .

S E T   U P   &   A D J U S T M E N T

32

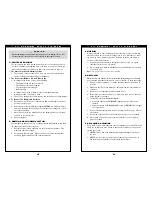
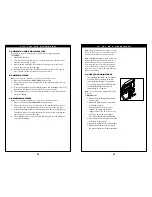
Important Note:

A front caster angle-adjust-

ment should be made to correspond with any
change in seat height.

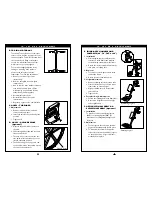
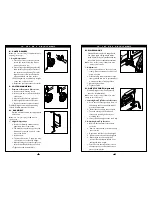
1. Standard Front Seat Height

a. To achieve an 18” or 19” front seat

height, position the front casters and
rear wheels in the bottom frame and
fork settings.

2. Low Front Seat Height

a. To achieve a 15” or 17 1/2” front seat

height, position the front casters and
rear wheels in the top frame and fork
settings.

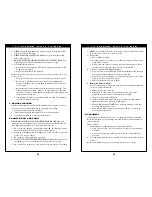
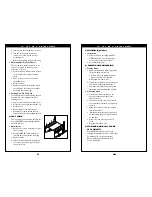
S. CHECK-OUT

After the wheelchair is assembled and

adjusted, it should roll smoothly and easily.
All accessories should also perform
smoothly. If you have any problems, follow
these procedures.

If you have any problems, follow these

procedures:

1. Review the set-up and check-out section

and operating guide to make sure chair
was properly prepared.

2. Review troubleshooting guide.
3. If your problem persists, contact your

authorized Quickie supplier. If you still
have a problem after contacting your
authorized Quickie supplier, contact
Quickie customer service. See the 
introduction page for details on how 
to contact your authorized Quickie 
supplier or Quickie customer service.

Summary of Contents for Quickie LXI

Page 1: ...User Instruction Manual Warranty Quickie LXI SUPPLIER THIS MANUAL MUST BE GIVEN TO THE RIDER OF THIS WHEELCHAIR RIDER BEFORE USING THIS WHEELCHAIR READ THIS ENTIRE MANUAL AND SAVE FOR FUTURE REFERENCE ...

Page 2: ... this wheelchair You will also receive a free subscription to Quickie Chronicles a newsletter just for Quickie users If you lose your warranty card call or write and we will gladly send you a new one FOR ANSWERS TO YOUR QUESTIONS Your authorized Quickie supplier knows your wheelchair best and can answer most of your questions about chair safety use and maintenance For future refer ence fill in the...

Page 3: ... Anti tip Tubes Rear anti tip tubes front anti tip tubes Standard Rear Wheels Std mag Opt spoke Tire Size Std 24 Opt 20 22 Tire types Std pneumatic Opt pneumatic with airless insert full profile polyurethane low profile polyurethane Handrims Std aluminum Opt plastic coated long tabs Projections Opt vertical oblique 6 8 10 12 Wheel Locks Std high push Opt high pull omit do not mount 6 extension han...

Page 4: ...ng Belts 18 h Power Drive 19 i Push Handles 19 j Quick Release Axles 19 k Rear Axles 19 l Rear Wheel Locks 19 m Modified Seat Systems 20 n Upholstery Fabric 20 VIII TIPS FOR ATTENDANTS 21 a Learning to do a Wheelie 21 b Descending a Curb or Single Step 21 c Climbing a Curb or Single Step 22 d Climbing Stairs 22 e Descending Stairs 22 IX SET UP AND ADJUSTMENTS 23 a Axle Plate Adjustable 23 b Toe in...

Page 5: ... combined weight of rider and items carried This may cause the chair to fail B WEIGHT TRAINING NEVER use this chair for weight training if total weight rider plus equipment exceeds 250 pounds This is likely to damage seat frame and fasteners and will void the warranty C GETTING TO KNOW YOUR CHAIR Every wheelchair is different Take the time to learn the feel of this chair before you begin riding St...

Page 6: ...cle seating 1 NEVER let anyone sit in this chair while in a moving vehicle a ALWAYS move the rider to an approved vehicle seat b ALWAYS secure the rider with proper motor vehicle restraints 2 In an accident or sudden stop the rider may be thrown from the chair Wheelchair seat belts will not prevent this and further injury may result from the belts or straps V G E N E R A L W A R N I N G S 3 NEVER ...

Page 7: ...cur and cause severe injury to the rider or others W A R N I N G S V I I W A R N I N G S F A L L S T I P O V E R S C WHEELIES Doing a wheelie means balancing on the rear wheels of your chair while the front casters are in the air It is dangerous to do a wheelie as a fall or tip over may occur However if you do it safely a wheelie can help you overcome curbs and obstacles 1 Consult your doctor nurs...

Page 8: ...rn or change direction on a slope 4 ALWAYS STAY IN THE CENTER OF THE RAMP Make sure ramp is wide enough that you are not at risk that a wheel may fall over the edge 5 Do not stop on a steep slope If you stop you may lose control of your chair V I I W A R N I N G S F A L L S T I P O V E R S 6 NEVER use rear wheel locks to try to slow or stop your chair This is like ly to cause your chair to veer ou...

Page 9: ...t If you do a fall or tip over is likely Note If you modify this chair or use parts not approved by Quickie it may void the warranty and create a safety hazard V I I I W A R N I N G S C O M P O N E N T S O P T I O N S A ANTI TIP TUBES Optional Anti tip tubes can help keep your chair from tipping over backward in most normal conditions 1 Quickie Recommends Use Of Anti Tip Tubes a UNLESS you are a s...

Page 10: ... rider 3 A pelvic wedge or a similar device can help keep the rider from sliding down in the seat Consult with the rider s doctor nurse or therapist to find out if the rider needs such a device V I I W A R N I N G S C O M P O N E N T S O P T I O N S 4 Use positioning belts only with a rider who can cooperate Make sure the rider can easily remove the belts in an emergency 5 NEVER Use Positioning Be...

Page 11: ...nings for WHEELIES See p 13 2 Stand at the rear of the chair You must be able to move with the chair to prevent a tip over 3 Keep your hands BENEATH the push handles ready to catch the rider if the chair tips too far back 4 When you are ready have the rider place his or her hands on the forward part of the handrims 5 Have the rider make a quick BACKWARD movement of the rear wheels quickly followed...

Page 12: ...step from the top and grasps the chair frame He or she lowers the chair one step at a time by letting the rear wheels roll over the stair edge 4 The attendants move to the next stair down Repeat for each stair until you reach the landing I X S E T U P A D J U S T M E N T Note Setting the wheelchair on a table or on a flat surface such as a table or on a flat surface such as a workbench helps make ...

Page 13: ...lly extended position d The ball bearing on the opposite end of the axle must be fully visible beyond the end of the axle sleeve E SWING AWAY HANGERS AND FOOTRESTS 60o 70o 70o V or 90o 1 Installation a Place swing away pivot saddle into the receiver on front frame tube with the footrest facing outward from the frame b Rotate the footrest inward until it locks into place on locking bolt 2 Removal a...

Page 14: ...Turn the set screws in or out until the desired fit is achieved G FLIP BACK ARMRESTS Flip back armrests are shipped standard on Quickie LXI wheelchairs They are installed at Quickie 1 Flipping Armrests Back a To flip armrests back depress the release latch and pull arm toward back of wheelchair H FLIP BACK HEIGHT ADJUSTABLE ARMRESTS Optional Flip back height adjustable armrests are installed at Qu...

Page 15: ...he metal upholstery tab to bolt f Tighten nut and bolt assembly 29 M WHEEL LOCKS Quickie LXI wheelchair are shipped with one of two types of high mount wheel locks Wheel locks are installed at the fac tory unless you have requested otherwise Note Use a torque setting of 100 in lbs when setting up wheel locks 1 Adjustment a Loosen the screws on the top of each clamp Do not attempt to remove one scr...

Page 16: ...al to increase the tension in the seat sling c Replace screws d If there is any difficulty in reattaching the screws try using a probe to help line up the holes I X S E T U P A D J U S T M E N T P CUSHION Optional 1 Installation a Place cushion on seat sling with VEL CRO side down The beveled edge of the cushion should be in front b Press firmly into place Q FOLDING AND UNFOLDING 1 Folding Chair a...

Page 17: ...ng bolts Add a spacer washer between the plastic saddle and the caster plate on the bottom right caster plate retaining bolts Make sure both front casters touch the ground simultaneously If they do not add the proper spacers between the bottom bearing of the caster plate and fork stem nut until they do Make sure you check for this problem on a flat surface X T R O U B L E S H O O T I N G I X S E T...

Page 18: ...ll items on the Maintenance Chart See p 34 3 If stored for more than three months have your chair inspected by an authorized Quickie supplier before use X I M A I N T E N A N C E 34 X I M A I N T E N A N C E A INTRODUCTION 1 Proper maintenance will improve performance and extend the useful life of your chair 2 Clean your chair regularly This will help you find loose or worn parts and make your cha...

Page 19: ...red 3 This warranty applies in the USA only Check with your Quickie supplier to find out if international warranties apply D WHAT WE WILL DO 1 Our sole liability is to repair or replace covered parts This is the exclu sive remedy for consequential damages E WHAT YOU MUST DO 1 Obtain from us while this warranty is in effect prior approval for return or repair of covered parts 2 Return the wheelchai...

Page 20: ...unrise Home Healthcare Group Mobility Products Division 7477 East Dry Creek Parkway Longmont Colorado 80503 USA 303 218 4500 or 800 456 8165 in Canada 800 263 3390 1997 Sunrise Medical 1 98 Rev A 930384 ...

Reviews: