Quickie
®
NITRUM
249817 Rev. A
20
S. LED AND BATTERY PACK
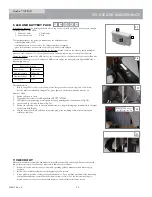
Switching the lights on: by pushing the button A on top of the control-Box (Fig.27), you can cycle through
operating-modes of the LEDs:
1. Full power mode
3. Flash-mode
2. Low-power mode
4. Off
The charging-status of the battery is indicated by the backlit button A :
• red: charging-status <50%
• red (when battery is connected to the charger): battery is charging
• green (when battery is connected to the charger): battery fully charged
Remove the control-box from the calf-strap for charging: detach cables on the sides by gently pulling the
pins out of the connectors (C ). Now pull the control-box upwards to remove it from the calf-strap.
Charge the battery: connect the USB-cable to the connector (B) on the front-side of the control-Box. Use
a standard USB-charger or your Computer´s USB-port to charge the battery. Green light will indicate a
fully charged battery.
Battery Specifi cation
Battery-type
Lithium-Ion
Nominal capacity
2600mAh
Nominal voltage
3.6V
Charging-time
3hrs
Checking batteries
•
Before using LED for the very fi rst time, please charge your batteries for a period of 24 hours.
•
Are the batteries suffi
ciently charged? The green lights on the battery indicator must be on.
Attach to Chair:
1.
Attach calf strap to chair.
2.
Clean adhesive surfaces for LED light with LOCTITE
®
SF7063.
3.
LED Light screw positioning, pressing, and screwing, pointing cable towards frame (Fig. 28).
4.
Lay the cable in calf strap as shown (Fig. 29).
5.
Attach the calf strap cover to the rear and shorten it to length, cutting edge immediately to the right
of the sewn fi eld (Fig. 30).
6.
Clip the battery pack into calf strap, mount the plug, place remaining cable in the calf strap and
attach the cable ties.
T. CHECK OUT
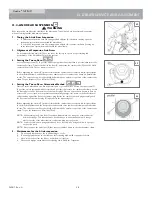
After the wheelchair is assembled and adjusted, it should roll smoothly and easily. All accessories should
also perform smoothly. If you have any problems, follow these procedures:
1.
Review the set-up and check-out sections and operating guide to make sure chair was properly
prepared.
2.
Review the troubleshooting chart at the beginning of this section.
3.
If your problem persists, contact your authorized dealer. If you still have a problem after contacting
your authorized dealer, contact Sunrise Medical customer service. See the Introduction Page for
details on how to contact your authorized dealer or Sunrise Medical customer service.
VIII. USE AND MAINTENANCE
27
27
28
29
30
31
28
29
30
31
Cutting edge immediately to
the right of the sewn fi eld
C
B
A
Summary of Contents for Quickie Nitrum
Page 33: ...249817 Rev A 33 NOTES...
Page 34: ...249817 Rev A 34 NOTES...
Page 35: ...249817 Rev A 35 NOTES...


