background image

75

Sedeo PRO   Rev.A

Quick release mechanism used on a reclining armrest

Preparation

Note!

 Switch off the wheelchair via remote control (power 

wheelchair only).

Instructions

Note!

 Suitable work area required!

• 

Follow the illustrated instruction for taking apart the quick 
release system used on a reclining armrest.

• 

Rebuild the wheelchair in reverse order once completed.

Tools used

24


5

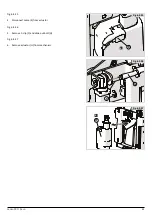
Fig. 6.3.63

1. 

Press button and pull out quick release pin (A)

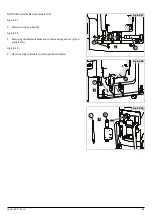
Fig. 6.3.64

2. 

Unscrew and remove screws (B) for wire to be changed

Tightening torque for bolts is 9Nm

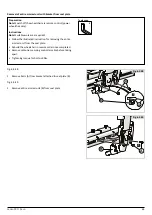
Fig. 6.3.65

3. 

To remove reclining armrest link mechanism, unscrew the quick 

release mechanism (C) from the shift piece using the spanner.

Tightening torque for bolts is 20Nm

1

A

2

B

3

C

Fig. 6.3.63 

Fig. 6.3.64 

Fig. 6.3.65 

Summary of Contents for QUICKIE Q400 F Sedeo Lite

Page 1: ...Service Instructions SedeoPro Lite Ergo Seating manual 000690840 01...

Page 2: ...ng maintenance 13 5 5 Cleaning and disinfection 13 6 0 Service Instructions 14 6 1 Assembly replacement and adjustment instructions 14 6 2 Assembling and replacement instructions Sedeo PRO LITE 16 Rem...

Page 3: ...t plate 69 Removal of armrest unit from bracket 70 Removal of upper armrest section from lower section 71 Removal of armrest pad from armrest 72 Removing reclining armrest parts 73 Quickreleasemechani...

Page 4: ...fication number Part number Name of the part concerned This information is provided on the identification plate See Identification of the product If you have any queries about the use maintenance or s...

Page 5: ...environment Reference symbol The symbol refers to a separate user manual This reference will indicate the specific user manual and the section to which is being referred SN Barcode Example 2081701001...

Page 6: ...ronment Where ever possible safety information is provided in the relevant chapter Temperature Avoid physical contact with the seating system s motors at all times Motors are continuously in motion du...

Page 7: ...s immediately Please contact your supplier for assistance This decal indicates that there are moving parts and therefore potential trap hazards When undertaking any service or maintenance the product...

Page 8: ...r local Sunrise medical service centre can be found on the inside front cover of this booklet National and International Website addresses are on the back cover 5 1 Maintenance WARNING Loose fasteners...

Page 9: ...been set to drive Chapter 5 8 of the owner s manual Checking seating Ensure that all the cushions are in place Make sure that the backrest is correctly fitted and adjusted Visually inspect the wheelch...

Page 10: ...nd indicators if fitted to make sure that they work correctly With the seating in an elevated position drive the wheelchair to make sure that the creep mode works which will slow the wheelchair Drive...

Page 11: ...ive wheels are inflated to equal pressures as a pair and likewise the rear The inflator pump provides the safest method of inflating your wheelchair tyres and the pressure can be checked with a standa...

Page 12: ...t on the wheelchair s performance Moving the wheelchair will require more energy making more demands on the batteries Furthermore wear on under inflated tyres is increased When inspecting the tyres fo...

Page 13: ...wet cloth and any fluff or dust that has accumulated around the motors should be blown or dusted away CAUTION Make sure that you dry all parts of your wheelchair if it becomes wet or damp after cleani...

Page 14: ...me Description To be carried out by User Supplier Monthly Cleaning the seating system x Cleaning the upholstery if necessary x Annually Inspecting the mechinical parts x Checking all fastenings and bo...

Page 15: ...Service Instructions Sedeo Pro Lite Seating manual...

Page 16: ...r via remote control power wheelchair only Instructions Note Suitable work area required Follow the illustrated instruction for removing the headrest unit from the backrest frame Rebuild the wheelchai...

Page 17: ...r only Instructions Note Suitable work area required Follow the illustrated instruction for removing the headrest cushion Rebuild the wheelchair in reverse order once completed Tightening torque for b...

Page 18: ...ated instruction for removing the Whitmyer headrest and cushion from the Whitmyer headrest mount Rebuild the wheelchair in reverse order once completed Tightening torque for bolts is 10Nm Tools used 3...

Page 19: ...tructions Note Suitable work area required Follow the illustrated instruction for removing the plastic caps and t nuts along the seat rail Rebuild the wheelchair in reverse order once completed Tools...

Page 20: ...remote control power wheelchair only Instructions Note Suitable work area required Follow the illustrated instruction for removing a swing away legrest from the hanger receiver Rebuild the wheelchair...

Page 21: ...ctions Note Suitable work area required Follow the illustrated instructions for removing the lower legrest assembly Rebuild the wheelchair in reverse order once completed Tightening torque for bolts i...

Page 22: ...lf pad and cushion from a swing away legrest Rebuild the wheelchair in reverse order once completed T nuts remain in the extrusion they can be removed through the wider slot section Tightening torque...

Page 23: ...23 Sedeo PRO LITE Rev A Fig 6 2 16 2 Unscrew and remove B bolts from C holes Fig 6 2 17 3 Remove cushion D from calf pad bracket B 2 C B D 3 Fig 6 2 16 Fig 6 2 17...

Page 24: ...d instruction for removing the gas strut actuator from a manual powered adjustable legrest Rebuild the wheelchair in reverse order once completed Tightening torque for bolts is 5Nm Tools used 4 Fig 6...

Page 25: ...re removed Fig 6 2 22 3 Remove the gas strut D or Whilst removing actuator E connector needs disconnecting from the legrest assembly NOTE When replacing be careful reconnecting the actuator cable so t...

Page 26: ...t plate Rebuild the wheelchair in reverse order once completed Tools used 5 Fig 6 2 23 1 Loosen A bolt NOTE Do not remove bolt The clamping mechanism may stick therefore it maybe necessary to gently t...

Page 27: ...table work area required Follow the illustrated instruction for removing a powered centre mount legrest from the seat Rebuild the wheelchair in reverse order once completed Disconnect cables before ta...

Page 28: ...moving the calf pad and cushion from a tool adjustable centre mount legrest Rebuild the wheelchair in reverse order once completed Tools used 5 Fig 6 2 27 1 Unscrew and remove 2 A bolts from both side...

Page 29: ...ns Note Suitable work area required Follow the illustrated instruction for removing the footplate from a powered centre mount legrest Rebuild the wheelchair in reverse order once completed Tightening...

Page 30: ...ered centre mount legrest Rebuild the wheelchair in reverse order once completed Disconnect cables before taking apart Tools used 5 4 15 Fig 6 2 30 1 Remove 2 A bolts and remove 2 plastic caps B Tight...

Page 31: ...for bolts is 15Nm Fig 6 2 34 5 Move rail upwards unscrew and remove bolt F and bush G to release first actuator Tightening torque for bolts is 6Nm Fig 6 2 35 6 Using a screwdriver remove the C clip H...

Page 32: ...emove the front cover of the legrest Tightening torque for bolts is 6Nm Fig 6 2 39 10 Unscrew and remove the 4 bolts M on the second actuator Tightening torque for bolts is 9Nm Fig 6 2 40 11 Unscrew a...

Page 33: ...33 Sedeo PRO LITE Rev A Fig 6 2 41 12 Unscrew and remove bolts P from the housing and then remove second actuator Q Tightening torque for bolts is 9Nm 12 Q P Fig 6 2 41...

Page 34: ...Instructions Note Suitable work area required Follow the illustrated instruction for removing the tool adjustable centre mount legrest from the seat Rebuild the wheelchair in reverse order once compl...

Page 35: ...ing the calf pad and cushion from a tool adjustable centre mount legrest Rebuild the wheelchair in reverse order once completed Tools used 5 Fig 6 2 43 1 Unscrew and remove A from both sides of the le...

Page 36: ...ction for removing the legrest cover for the tool adjustable centre mount legrest Rebuild the wheelchair in reverse order once completed Tightening torque for bolts is 9Nm Tools used 5 Fig 6 2 45 1 Un...

Page 37: ...Note Suitable work area required Follow the illustrated instruction for removing the footplate on a tool adjustable centre mount legrest Tightening torque for bolts is 9Nm Tools used 5 Fig 6 2 48 1 Un...

Page 38: ...ion of the t nuts when reassembling Fig 6 2 53 6 Slide the rest of the assembly over the top of the footplate until the t nut is visible through the bottom hole F The black plastic pin may be needed t...

Page 39: ...ed instruction for removing and the reassembly of the adjustment wheel set on a tool adjustable legrest Tightening torque for bolts is 9Nm Tools used 5 Fig 6 2 55 1 Remove bolt A from the adjustment w...

Page 40: ...E through the barrel from the upper legrest assembly Fig 6 2 60 6 Using Loctite liquid super glue replace new segment F by adhering to barrel Fig 6 2 61 7 Using Loctite liquid super glue replace new...

Page 41: ...her H Fig 6 2 63 9 Use a screwdriver to hold open the gap between the two segments aligned Fig 6 2 64 10 Compress new spring I and slide between the 2 new segments Fig 6 2 65 11 NOTE Make sure that th...

Page 42: ...66 12 Partially reinsert axle B to hold barrel in place Fig 6 2 67 13 Push axle in fully making sure the hexagon head engages with the hexagon recess Then reinsert bolt A throught the legrest assembly...

Page 43: ...Instructions Note Suitable work area required Follow the illustrated instructions for removing the armpad cushion from the armrest assembly Rebuild the wheelchair in reverse order once completed Tigh...

Page 44: ...llow the illustrated instructions for removing the skirt guard from the legrest assembly Rebuild the wheelchair in reverse order once completed Tightening torque for bolts is 6Nm Tools used 5 Fig 6 2...

Page 45: ...a required Follow the illustrated instructions for removing the skirt guard from the legrest assembly Rebuild the wheelchair in reverse order once completed Tightening torque for bolts is 9Nm Tools us...

Page 46: ...Suitable work area required Follow the illustrated instructions for removing the thigh support from the seat base Rebuild the wheelchair in reverse order once completed Tightening torque for bolts is...

Page 47: ...uctions Note Suitable work area required Follow the illustrated instructions for removing the cushion from the thigh support bracket Rebuild the wheelchair in reverse order once completed Tightening t...

Page 48: ...Service Instructions Sedeo Pro Seating manual...

Page 49: ...Follow the illustrated instructions for removing the backrest and seat rail from the seat interface Rebuild the wheelchair in reverse order once completed Disconnect cables before taking apart Tighte...

Page 50: ...r wheelchair only Instructions Note Suitable work area required Follow the illustrated instructions for removing the shift piece cover Rebuild the wheelchair in reverse order once completed Tightening...

Page 51: ...lchair only Instructions Note Suitable work area required Follow the illustrated instruction for removing the seat cushion from brackets on a tool adjustable backrest Rebuild the wheelchair in reverse...

Page 52: ...uired Follow the illustrated instructions for removing brackets from a tool adjustable backrest Rebuild the wheelchair in reverse order once completed T nuts remain in the extrusion they can be remove...

Page 53: ...tions Note Suitable work area required Follow the illustrated instruction for removing the seat cushion from brackets on a manual powered adjustable backrest Rebuild the wheelchair in reverse order on...

Page 54: ...structions Note Suitable work area required Follow the illustrated instructions for removing brackets from a manual powered adjustable backrest Rebuild the wheelchair in reverse order once completed T...

Page 55: ...removing the seat cushion with quick release system from backrest brackets Rebuild the wheelchair in reverse order once completed Tools used N A Fig 6 3 11 shows the starting position with the quick...

Page 56: ...e Suitable work area required Follow the illustrated instructions for removing the quick release pin from the backrest cushion Rebuild the wheelchair in reverse order once completed Tightening torque...

Page 57: ...Suitable work area required Follow the illustrated instruction for removing the backrest unit from the backrest frame Rebuild the wheelchair in reverse order once completed Disconnect cables before ta...

Page 58: ...ear backrest unit from the backrest frame Rebuild the wheelchair in reverse order once completed T nuts remain in the extrusion they can be removed through the wider slot section Tightening torque for...

Page 59: ...cting to the shift piece if required Fig 6 3 20 5 Remove arm E completely from back unit and shift piece if required Fig 6 3 21 6 Remove entire anti shear backrest mechanism F from backrest frame NOTE...

Page 60: ...it Rebuild the wheelchair in reverse order once completed Use small flat screwdriver to remove C clips and pliers to reinstall Tools used 17 The preferred situation is that the actuator is extended to...

Page 61: ...edeo PRO Rev A Fig 6 3 25 4 Disconnect cable E from actuator Fig 6 3 26 5 Remove C clip F and slide out bolt G Fig 6 3 27 6 Remove actuator H from mechanism 4 E 5 G F 6 H Fig 6 3 25 Fig 6 3 26 Fig 6 3...

Page 62: ...manual adjustable backrest unit Rebuild the wheelchair in reverse order once completed Use small flat screwdriver to remove C clips and pliers to reinstall Tightening torque for bolts is 6Nm Tools use...

Page 63: ...O Rev A Fig 6 3 31 shows the starting of the bottom bolt Fig 6 3 32 3 Remove C clip and bolt E and remove gas spring F Fig 6 3 33 4 Gas spring G removed from backrest 3 F E E 4 G Fig 6 3 31 Fig 6 3 32...

Page 64: ...Rebuild the wheelchair in reverse order once completed Disconnect cables before taking apart Use small flat screwdriver to remove C clips and pliers to reinstall Tools used 5 Fig 6 3 34 shows the sta...

Page 65: ...ator first Fig 6 3 37 3 Remove C clip and bolt E Fig 6 3 38 4 Removing the bolts will allow you to remove the gas strut F and actuator G Fig 6 3 39 5 Gas strut H and actuator I removed from backrest 3...

Page 66: ...instruction for removing the headrest mount and bracket from the backrest frame Rebuild the wheelchair in reverse order once completed Tightening torque for bolts is 4Nm Tools used Fig 6 3 40 1 Remove...

Page 67: ...upport Rebuild the wheelchair in reverse order once completed Tightening torque for bolts is 6Nm Tools used Fig 6 3 43 shows the starting position of the lateral thoracic support attached to the backr...

Page 68: ...a required Follow the illustrated instruction for removing the skirtguard from the armrest Rebuild the wheelchair in reverse order once completed Tightening torque for bolts is 6Nm Tools used 5 Fig 6...

Page 69: ...d Follow the illustrated instruction for removing the entire armrest unit from the seat plate Rebuild the wheelchair in reverse order once completed Remove cable ties securing controller cable before...

Page 70: ...ing the armrest from the bracket attached to the seat plate Rebuild the wheelchair in reverse order once completed Disconnect cables before taking apart Tightening torque for bolts is 9Nm Tools used 5...

Page 71: ...from the lower section Rebuild the wheelchair in reverse order once completed Remove cable ties securing controller cable before taking apart Tools used Fig 6 3 52 1 Loosen locking lever A and slide u...

Page 72: ...ons Note Suitable work area required Follow the illustrated instructions for removing the armrest pad from the armrest Rebuild the wheelchair in reverse order once completed Tightening torque for bolt...

Page 73: ...n for taking apart a reclining armrest Rebuild the wheelchair in reverse order once completed Tools used 5 13 Fig 6 3 57 1 Use a screwdriver to remove pivot cap A Fig 6 3 58 2 Remove bolt B using the...

Page 74: ...ve washer will come away at the same time Please note the orientation when reassembling Fig 6 3 61 5 Remove washer F Fig 6 3 62 6 Unscrew and remove bolt G then remove axle H from main frame Tightenin...

Page 75: ...tem used on a reclining armrest Rebuild the wheelchair in reverse order once completed Tools used 24 5 Fig 6 3 63 1 Press button and pull out quick release pin A Fig 6 3 64 2 Unscrew and remove screws...

Page 76: ...Service Instructions Sedeo Lite Seating manual...

Page 77: ...ructions Note Suitable work area required Follow the illustrated instructions for removing the legrest clamp from the legrest assembly Rebuild the wheelchair in reverse order once completed Tightening...

Page 78: ...ructions for removing the release mechanism from the legrest assembly Rebuild the wheelchair in reverse order once completed Tightening torque for bolts is 4Nm Tools used 3 Fig 6 4 4 1 Unscrew and rem...

Page 79: ...ollow the illustrated instructions for removing the release lever from the legrest assembly Rebuild the wheelchair in reverse order once completed Tightening torque for bolts is 6Nm Tools used Fig 6 4...

Page 80: ...te Suitable work area required Follow the illustrated instructions for removing the calf pad from the legrest assembly Rebuild the wheelchair in reverse order once completed Tightening torque for bolt...

Page 81: ...illustrated instructions for removing the knee pad from the legrest assembly Rebuild the wheelchair in reverse order once completed Tightening torque for bolts is 6Nm Tools used Fig 6 4 12 1 Using a s...

Page 82: ...power wheelchair only Instructions Note Suitable work area required Follow the illustrated instructions for removing the backrest plastic cover Rebuild the wheelchair in reverse order once completed...

Page 83: ...uctions Note Suitable work area required Follow the illustrated instructions for removing the sideguard from the seat base Rebuild the wheelchair in reverse order once completed Tightening torque for...

Page 84: ...ea required Follow the illustrated instructions for removing the shift piece from the seat base Rebuild the wheelchair in reverse order once completed Tightening torque for bolts is 9Nm Tools used 5 F...

Page 85: ...g the reclining armrest mechanism Rebuild the wheelchair in reverse order once completed Tools used 5 4 13 1 A 3 C 4 D 2 B Fig 6 4 20 Fig 6 4 22 Fig 6 4 21 Fig 6 4 20 1 Unscrew and remove components f...

Page 86: ...er A to the backrest receiver 2 Line up the centre hole of the bracket with the main shaft and the subshaft screwed into the pivot bracket with the bottom hole of the shift piece Fig 6 4 25 3 Once new...

Page 87: ...87 Sedeo LITE Rev A 5 G Fig 6 4 27 Fig 6 4 27 5 Screw in new bolt G Once the mechanism is fitted reinstall the armrest assembly and tighten to 15Nm...

Page 88: ...the illustrated instructions for removing the backrest cover kit from the backrest frame Rebuild the wheelchair in reverse order once completed Tightening torque for bolts is 6Nm Tools used N A Fig 6...

Page 89: ...he illustrated instructions for removing the backrest centre bracket from the backrest frame Rebuild the wheelchair in reverse order once completed Tools used 5 Fig 6 4 31 1 Remove locking levers A fr...

Page 90: ...90 Sedeo LITE Rev A 4 D D 5 E Fig 6 4 34 Fig 6 4 35 Fig 6 4 34 4 Push the two tubes D apart to remove the centre bracket Fig 6 4 35 5 Remove the centre bracket E from the backrest tubes...

Page 91: ...for removing the lateral thoracic support Rebuild the wheelchair in reverse order once completed Tightening torque for bolts is 10Nm Tools used 6 Fig 6 4 36 1 Unscrew and remove the locking levers A F...

Page 92: ...ote Suitable work area required Follow the illustrated instructions for removing the lateral thoracic support pad from the assembly Rebuild the wheelchair in reverse order once completed Tightening to...

Page 93: ...tructions for removing the back upholstery Rebuild the wheelchair in reverse order once completed Tightening torque for bolts is 3Nm Tools used 4 1 A 2 B 3 C C Fig 6 4 41 Fig 6 4 42 Fig 6 4 43 Fig 6 4...

Page 94: ...4 Fig 6 4 44 4 Pull front and rear cover velcro D up and remove from backrest frame Fig 6 4 45 NOTE Release pressure from tension adjustable straps E first 5 Slide each side F down the backrest frame...

Page 95: ...for fitting the recline receiver and manual powered adjustable options to the backrest Rebuild the wheelchair in reverse order once completed Tools used 4 1 A 2 B Fig 6 4 46 Fig 6 4 47 Fig 6 4 48 Fig...

Page 96: ...ne receiver frame 4 Once lined up screw in the axle and bolts E to secure tighten by hand Fig 6 4 50 5 This shows how the assembly F should look when completed tighten by hand Fig 6 4 51 6 Line the to...

Page 97: ...quired Follow the illustrated instructions for removing the quick release cushion from the backrest Rebuild the wheelchair in reverse order once completed Tightening torque for bolts is 6Nm Tools used...

Page 98: ...tions Note Suitable work area required Follow the illustrated instructions for removing the quick release brackets from the cushion Rebuild the wheelchair in reverse order once completed Tightening to...

Page 99: ...uctions for removing the quick release receiver from the backrest frame Rebuild the wheelchair in reverse order once completed Tightening torque for bolts is 3Nm Tools used 4 Fig 6 4 58 1 Unscrew and...

Page 100: ...Service Instructions Sedeo Ergo Seating manual...

Page 101: ...te Switch off the wheelchair via remote control power wheelchair only Instructions Note Suitable work area required Follow the illustrated instructions for removing the back cushion from the backrest...

Page 102: ...ctions Note Suitable work area required Follow the illustrated instructions for removing the side guard from the seat frame Rebuild the wheelchair in reverse order once completed Tools used 5 Fig 6 5...

Page 103: ...instructions for removing the side cushion and side cushion plastic trim attached Rebuild the wheelchair in reverse order once completed Tools used 3 1 A 2 B 3 B Fig 6 5 4 Fig 6 5 5 Fig 6 5 6 Fig 6 5...

Page 104: ...6 5 7 Fig 6 5 8 Fig 6 5 9 Fig 6 5 7 4 Peel cushion C off the Velcro on the assembly Fig 6 5 8 5 Unscrew and remove 3 x D bolts from the plastic trim Tightening torque for D bolts is 3Nm Fig 6 5 9 6 Re...

Page 105: ...build the wheelchair in reverse order once completed Tools used 5 Before completing you must first remove the back cushion as illustrated in Fig 6 5 1 and remove the headrest as illustrated in Fig 6 2...

Page 106: ...ackrest shell from the backrest Rebuild the wheelchair in reverse order once completed Tools used 5 Before completing you must first remove the back cushion as illustrated in Fig 6 5 1 Fig 6 5 13 1 Un...

Page 107: ...from the backrest Rebuild the wheelchair in reverse order once completed Tools used 5 Fig 6 5 15 1 Disconnect the potentiometer located in the complex seating module from port 1 A Fig 6 5 16 2 Unscre...

Page 108: ...r in reverse order once completed Tools used 5 4 1 A 2 B 3 C Fig 6 5 18 Fig 6 5 19 Fig 6 5 20 NOTE Before completing make sure that the back actuator is electrically disconnected before continuing Fig...

Page 109: ...emove 1 x D pivot shaft from each side of the back actuator Tightening torque for D bolts is 7Nm Fig 6 5 22 5 Using the screwdriver remove the C clip E located at the base of the back actuator use pli...

Page 110: ...required Follow the illustrated instructions for removing the armrest Rebuild the wheelchair in reverse order once completed Tools used 13 Fig 6 5 25 1 Using the screwdriver remove the plastic cap A...

Page 111: ...ceiver Rebuild the wheelchair in reverse order once completed Tools used 5 3 Fig 6 5 27 1 Unscrew and remove A bolt using the 5mm Hex key Tightening torque for A bolt is 10Nm Fig 6 5 28 2 Remove the a...

Page 112: ...ild the wheelchair in reverse order once completed Tools used 5 3 Fig 6 5 30 1 Loosen 2 x bolts A located on the underside of the armrest extrusion Tightening torque for A bolts is 7Nm Fig 6 5 31 2 Sl...

Page 113: ...ns Note Suitable work area required Follow the illustrated instructions for removing the armrest pad Rebuild the wheelchair in reverse order once completed Tools used 3 Fig 6 5 33 1 Unscrew and remove...

Page 114: ...s for removing the seat plates width adjustment plates Rebuild the wheelchair in reverse order once completed Tools used 5 NOTE Please remove the side cushion on both sides first as illustrated in Fig...

Page 115: ...trated instructions for removing the seat frame Rebuild the wheelchair in reverse order once completed Tools used 5 NOTE Please remove the side cushion on both sides first as illustrated in Fig 6 5 4...

Page 116: ...Note Suitable work area required Follow the illustrated instructions for removing the front caps from the seat rail Rebuild the wheelchair in reverse order once completed Tools used 3 Fig 6 5 39 1 Uns...

Page 117: ...117 7 0 Trouble shooting If the Sedeo seating system is not working or not working as it should contact your supplier...

Page 118: ...se warranty conditions for the remaining warranty period for the wheelchair in accordance with point 1 4 For original spare parts which have been fitted at the customer s expense these will have a 12...

Page 119: ...119...

Page 120: ...ue Micka l Faraday 37170 Chambray L s Tours Tel 33 0 247554400 Fax 30 0 247554403 www sunrisemedical fr Sunrise Medical S r l Via Riva 20 Montale 29122 Piacenza Italia Tel 39 0523 573111 Fax 39 0523 5...

Reviews: