249056 Rev.
C
6
Cool Cube
Zero Touch Sensor
1. To activate the sensor, place the body part near the sensor. It is ok to touch the sensor but not
necessary to activate it.
1.
Place Cool Cube u
p high on the chair on the back so it is out of the way but high enough for the user to
be able to hear the audible sounds from the device.
2.
Place Pro
Spot or other switches in a position that is easy for the user to access but at the same time can
be securely attached to the powerchair.
3.
Place Pro
Spot or other switches in a manner that is intuitive and easy for the user to use.
4.
Route the cables from the
s
witches to Cool Cube so that they are secure but also not in danger of being
snagged or pinched as the chair moves around and changes position.
5.
Make sure that the switch cables match the port that they are plug
ged
into
.
2 Switch Driving
1.
Activate the switch plug
ged
into the
l
eft port to turn the powerchair to the left.
2.
Activate the switch plug
ged
into the right port to turn the powerchair to the right.
3.
Activate both switches to move the powerchair forward.
4.
Tap both switches to switch the mode from driving forward to driving in reverse and then push both
switches to move the powerchair in reverse.
5.
With Pro
Spot switches press one switch harder than the other to move the chair in a diagonal direction.
Pro
Spot switch
1.
To activate
the switch, place the body part
on the top of the switch
.
With very little to slight
contact, the switch will start to activate.
2.
To
increase the input, increase the force on the switch up to the max force
.
Suggested Positioning
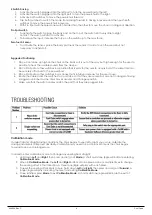
If under flat and straight driving conditions, the chair begins to veer left or right you can re-calibrate the
driving parameters to improve drivability. Calibration may need to be done over time as the chair begins
to wear down over prolonged use.
Calibration mode
In order to enter calibration mode to change any veering from straight:
1. Hold down
Left
and
Right
, then press and let go of
Mode
. A short multi-tone jingle will indicate entering
Calibration Mode
.
2. When in
Calibration Mode
, the
Left
and
Right
buttons can be pressed one or multiple times to change
the veering offset in that direction. A three tone jingle will play with each press.
3. To reset the veering offset back to zero, hold down
Left
and
Right
, then press and let go of
Forward
. A
longer jingle will play indicating the reset and exiting
Calibration Mode
.
4. Once satisfied, press
Mode
to exit
Calibration Mode
. A short multi-tone jingle will indicate the exit of
Calibration Mode
.
Summary of Contents for Switch-it Cool Cube
Page 1: ...249056 Rev C Switch It Cool Cube Owner s Manual...
Page 9: ...249056 Rev C 9 Cool Cube...
Page 10: ...249056 Rev C 10 Cool Cube...
Page 11: ...249056 Rev C 11 Cool Cube...


