S.O.F.T. Three Pad systems are completely adjustable and provide maximum lateral
cervical and occipital support.
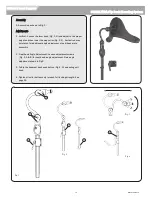
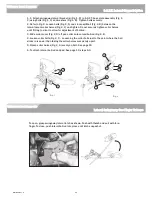
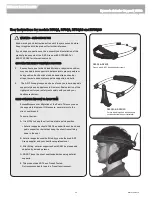
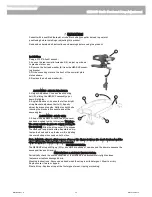
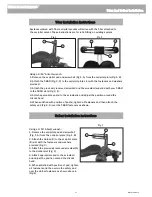
1. Simulation (Fig. 1): While holding the client’s head with your
hands in the desired position, observe the amount of balance,
types of movement and effects of pathological reflex activity.
Tip: A digital picture at this point could be very helpful during
the final adjustment.
Remember: All S.O.F.T. configurations universally fit the ONYX,
LINX, or PRO mounting systems. Pictures show a PRO
mounting system with a S.O.F.T. three pad configuration.
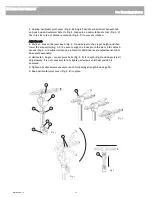
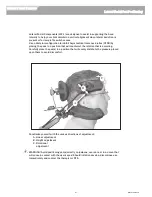
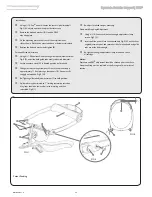
2. Prior to adjusting the head support to the user, familiarize yourself with the
following points of adjustment: (Fig. 2)
A. base plate assembly rotation
B. lateral adjustment of sub-occipital pads
C. sub-occipital pad rotation
D. occipital pad depth
E. occipital pad height
F. occipital pad
rotation
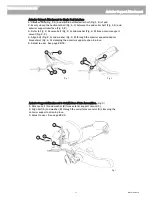
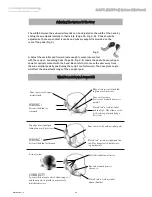
3. Adjust the height and depth of the mounting system to
place the head support in the general position of the sub-
occipital and occipital regions of the head. (Fig. 3)
4. Gently slide the head support forward allowing the sub-
occip-ital pads to make soft initial contact. Secure the position
of the mounting system. See pages 6-14 for mounting system
adjustments.
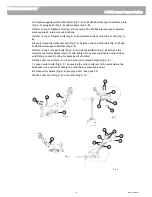
5. Rotate, pivot, and adjust the sub-occipital pads to ensure
good contact with the neck. Tip: Moving the occipital pad
completely rearward makes this adjustment easier.
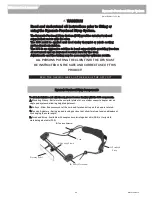
Adjust each sub-occipital pad to provide lateral cervical
support and lift under the occiput. The flared tips of the pads
should extend under the ears and below the mastoid process.
(Fig. 4) Tighten bolts to secure position.
B
A
B
C
C
D
E
F
Fig. 1
Fig. 3
Fig. 2
Fig. 4
Whitmyer Head Supports
S.O.F.T. (Multi-Pad) System Adjustment
27
MKT6100 Rev. C

