ENGLISH
20
Pluton Rev.2.0
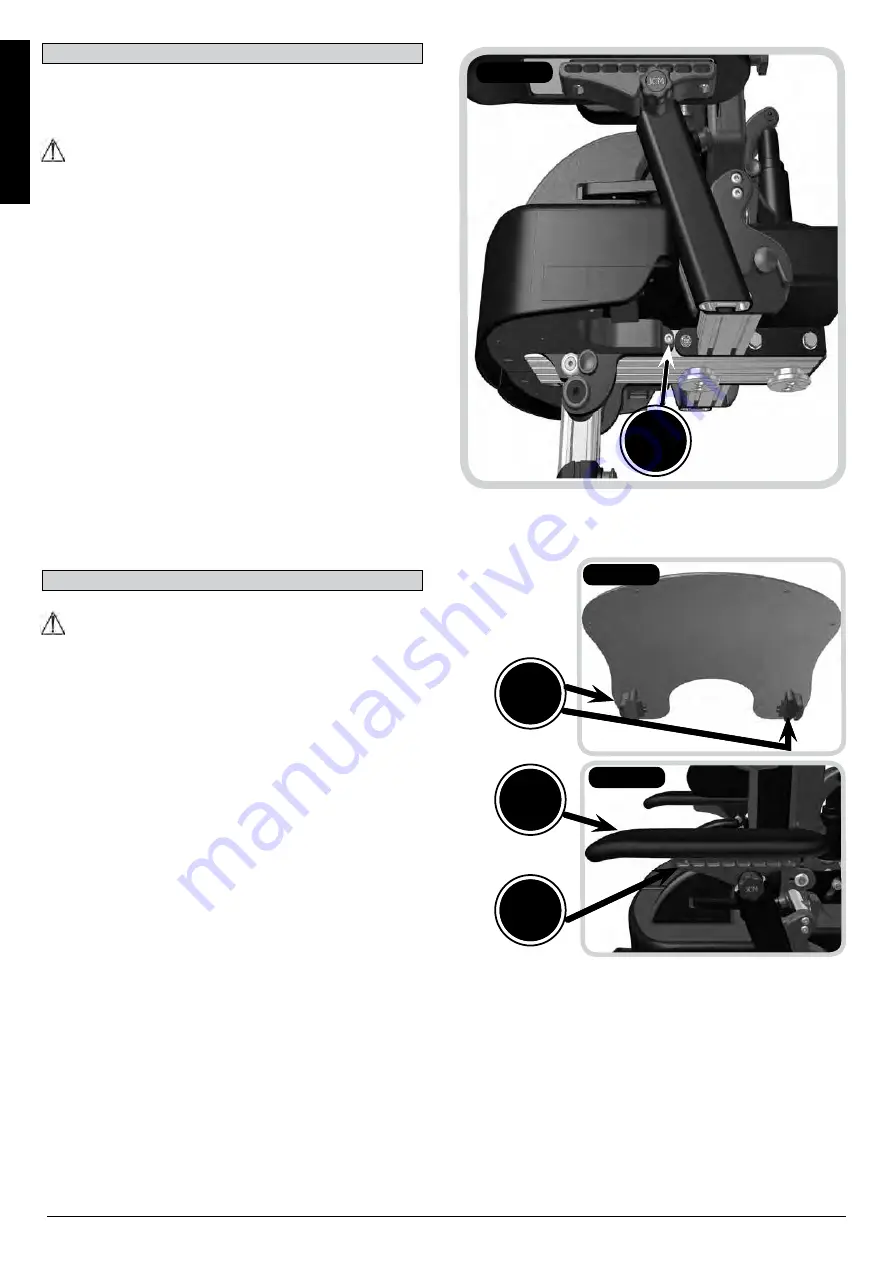
Adjusting The Seat depth (Fig14.1)
WARNING!
• When mounting the seating system to a base for the
first time, or when an adjustment has been made to
the size of the system, a stability assessment should
be carried out prior to use of the equipment.
• Once you have adjusted the seat length, always
ensure these points are firmly fixed and are checked
as part of maintenance of the chair.
NOTE:
The Pluton Seat is Split into 2 halves (Left &
Right) Follow the instructions below to adjust the seat
depth for the user. If the user has a leg length
discrepancy then you can adjust and lock off either sides
of the seat at any point within their range (150mm)
• Loosen (do not remove) the allen key bolts (A) on both
sides of the seat.
• Slide the seat in or out to change the length.
• Fix the position by tightening the allen key bolts
securely.
A
Fig.14.1
B
A
C
Fig.15.1
Fig.15.2
14.0 Seat Depth Adjustment
DANGER!
• Always ensure that the arms are fixed in position and
the tray is secure before leaving the user unattended.
• Never leave anything hot on the tray while the client is
unattended.
Tray Fitting Instructions (Fig 15.1-15.2)
NOTE:
Arms (optional accessory) are required
in order to fit a tray.
• Pick up the tray from the front, holding from the top
with the fingers of each hand engaged with the pull
latches A on either side of the tray.
• Place the tray onto the arm tops B, sliding the tray in
toward the occupant until the desired position is
reached.
• Release the latches (sprung loaded) to engage them,
ensuring the latch has fully locked into the closest
available engagement position C on the underside of
the Arm Top.
• Ensure both left and right latches are engaged and the
tray is secure before commencing use of the chair.
15.0 Fitting A Tray


