8
SUNPWR Power Module
Power Modules are an option for
expanding your SUNRNR system.
They are identical to SUNRNRs less
the inverters, therefore doubling the
energy generation and storage
when linked to a primary unit.
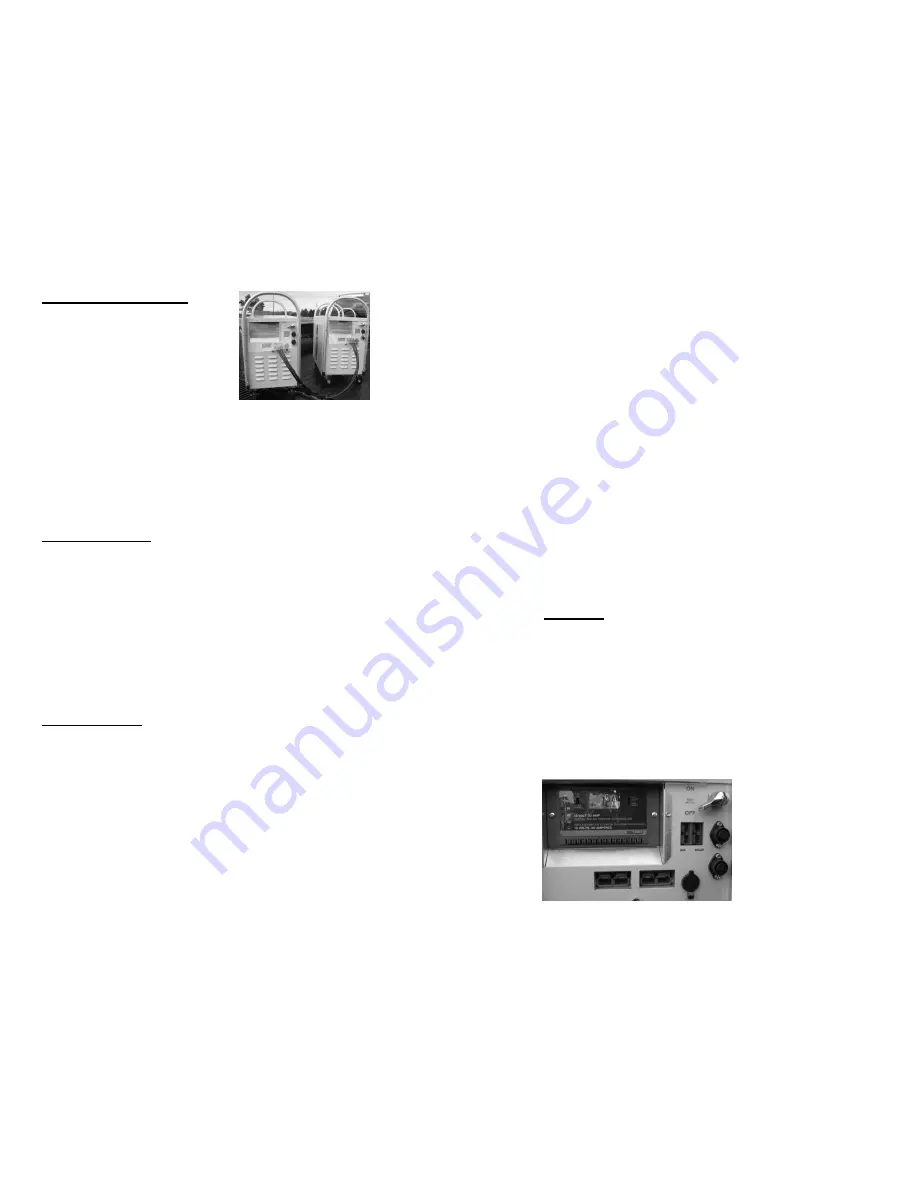
Connect a SUNPWR to a main unit
by the included large link cable with
the large red plugs (Fig 4). Plugs’
tabs prevent improper orientation. Turn master switch ON to
utilize the modules stored energy. The recharging procedure is
the same as above. A second power module may also be
connected (“daisy-chained”), tripling the system.
WARNING:
Turn SUNPWR unit off before connecting or disconnecting
any large red link plug.
Care/Maintenance
A SUNRNR is virtually maintenance-free as there are no
moving parts. However, using the unit and charging the battery
whenever convenient/possible will give the battery its longest life.
Dirt, dust, haze, or shadow will degrade solar charging
considerably. Wipe panel when necessary using soft cloth
(water and mild detergent may be used). The entire panel must
be exposed at the same time for maximum energy conversion –
even 5% shadow coverage will drastically reduce charge.
ALWAYS turn master switch at DC end to OFF when not in
use. The parasitic load if left ON will deplete a fully charged
battery by about 1-2 amp/hr (~10 days).
Troubleshooting
Inverter Problems
(Inverter power ON)
No output/Volt bar graph lower red: Battery <10 VDC (recharge)
No AC output/Over-temp indicator lit: Thermal shutdown (turn
off, reduce load, allow cool down, restart).
Motorized power tool will not start: Excessive start-up load – tool
incompatible with inverter.
Power tool operating speed not correct: Purely inductive load -
add resistive load by operating incandescent lamp concurrently.
Charging Problems
(Battery not recharging): Check 30-amp fuse
for charging portal in use (switch upper and lower to verify).
Replace with similar specification fuse if necessary.
Fig 4 – Linked units
5
that will allow battery gases (i.e. hydrogen) to escape if the
battery becomes over-pressurized due to faults. The battery will
normally NOT VENT any battery gases in normal use.
A SUNRNR unit includes one (or two) weatherproof solar
panel(s) with 30-foot, quick-connect cable. Each panel is rated
at 140 Watts/hour when exposed to bright sunlight. The solar
panel may still provide charge, but at a lesser rate, when
exposed to any light source. Moderate charging may possibly
be achieved even on cloudy days. Two panels are
recommended for reduced charging time. (Two panel
maximum.)
It takes almost 12 hours of bright sunlight to
fully charge a fully-depleted SUNRNR when using two
panels.
The anodized, rugged panel frames are made for
outside mounting or for use as portable, stand-alone panels
when placed anywhere facing the sun, even inside in a window.
ANY shade on any part of a panel decreases its
performance considerably.
The SUNRNR may also be charged by 12VDC sources other
than solar or by our AC/DC charger through the AUX portal.
Charging is limited to 30 amps by accessible fuses protecting
the small red plug portals. (See Manual Supplement.)
Operation
To operate a SUNRNR:
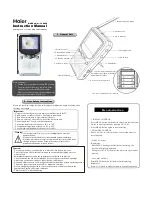
1) Turn on the main (12V DC) switch located in the upper right
hand corner of the DC end (Fig 1). This switch should be turned
"OFF" when the unit is not in use.
2) Turn on the inverter switch located at the AC end of the
SUNRNR (Figs 2a, 2b).
3) Ensure the AC appliance(s) are switched off and simply plug
into the outlets before using as desired. Try to avoid using
extension cords. If an extension cord is required, use a 12
gauge 3-prong grounded extension cord no longer in length than
necessary (lessens power loss).
Fig 1 – DC End
Charge controller (solar);
Master switch;
Charging portals;
30-amp fuses (top SOLAR,
bottom AUX);
Large 175-amp red link
portals;
12VDC auxiliary socket


