64
(2) Group B Parameter Specific Method of Use and Explanation (All types of output, Full-on Time/PWM Duty,
checking the input/output movements, sewing machine models and thread trimming sequence programming)
These are functions not used by general users and should be regulated by an A/S technician.
A.
Item No. B-1 ~ B-28
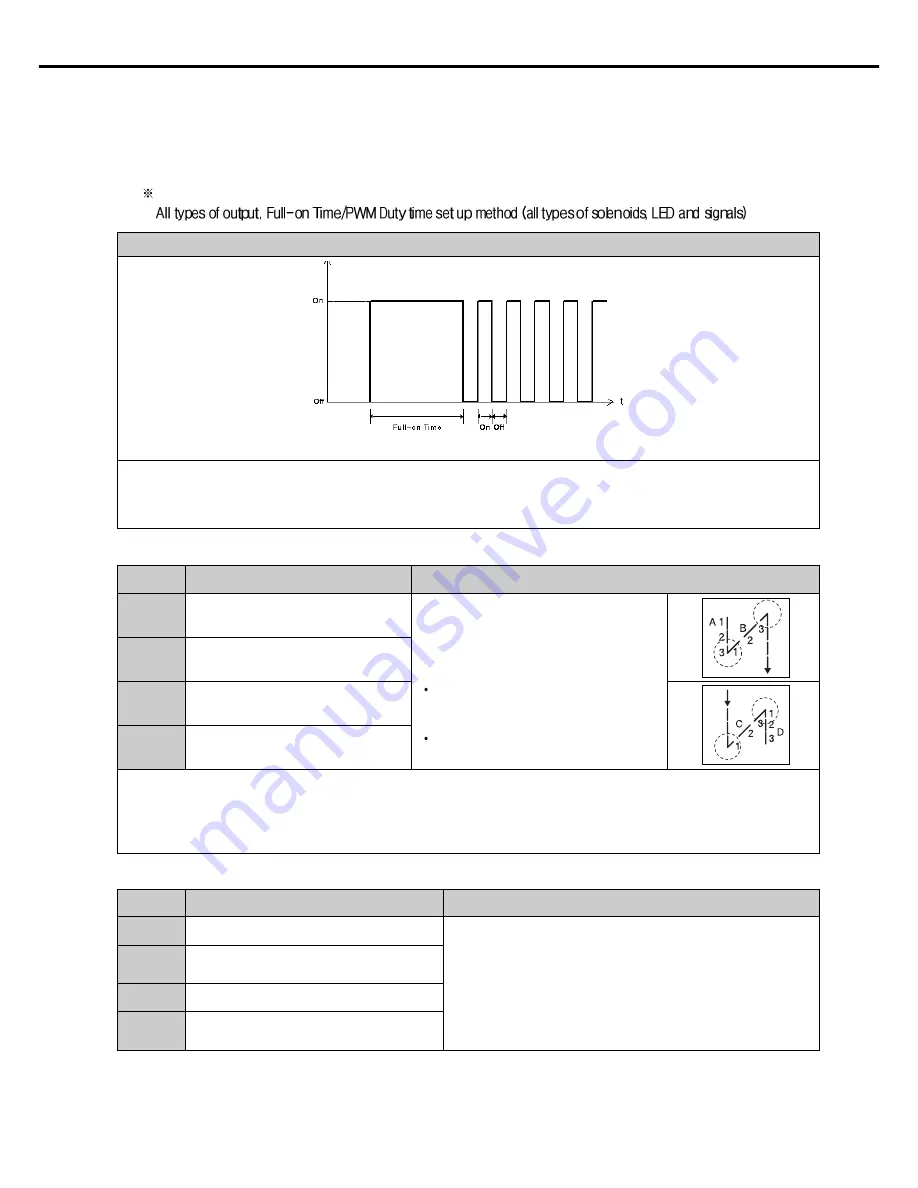
This figure explains the Full-on Time and PWM Duty. This figure shows the wave type graph where the machine maintains the
power 'ON' for a certain amount of time and when that 'Full-on Time' passes, changes itself to a PWM signal with a certain duty. In
other words, the certain amount of time that each device starts operating until they become completely, the output wave type
maintains itself "On", and when it maintains itself operating the output becomes the duty PWM wave type to maintain operation.
<Type of wave that has a certain amount of Full-on Time and 50% duty>
B. B/T stitch correction set up method
[ Caution ]
If the specific items of the parameter are changed carelessly, they could break down or damage the machine, so the user must be
well-trained before using it.
Item No.
B-30
B-31
B-32
B-33
Name of function
Method of use and explanation
If the stitch correction values is changed using the program unit, the item value will automatically change. Reversely, if you
change the programmed value of the items above, the stitch correction values will also automatically change.
Detailed correction principles and methods of use are the same as the program unit's stitch correction method.
Please refer to the program unit method of use of start/end B/T stitch correction method.
Start B/T A side stitch correction value
Start B/T B side stitch correction value
End B/T C side stitch correction value
End B/T D side stitch correction value
C. Counter function method of use
Item No.
B-35
B-36
B-37
B-38
Name of function
Method of use and explanation
This item has the function of correcting the B/T
sewing stitch that has not been shaped well, and
you can change the value of sides A, B, C, D.
The programmed value in the beginning
A : 3, B : 3, C : 4, D : 4
Program range : 0 ~ 9
Counter condition set up
For detailed method of use and explanation of counter function, refer to the
program unit's counter set up button method of use.
When using automatic counter after trimming,
select increasing/decreasing counter
After counter operation is over, set up the next operation
After counter operation is over, select the automatic
erasing operation
Summary of Contents for Fortuna series
Page 3: ...USER S MANUAL ...
Page 69: ...70 Category 3rd 2nd 1st Data Field Cmd Field Explanation ...
Page 72: ...73 for tinsel trimming ...
Page 75: ...76 ...
Page 76: ...77 PARTS BOOK ...


