17
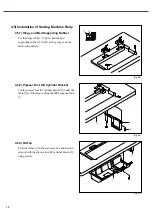
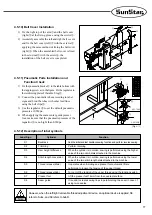
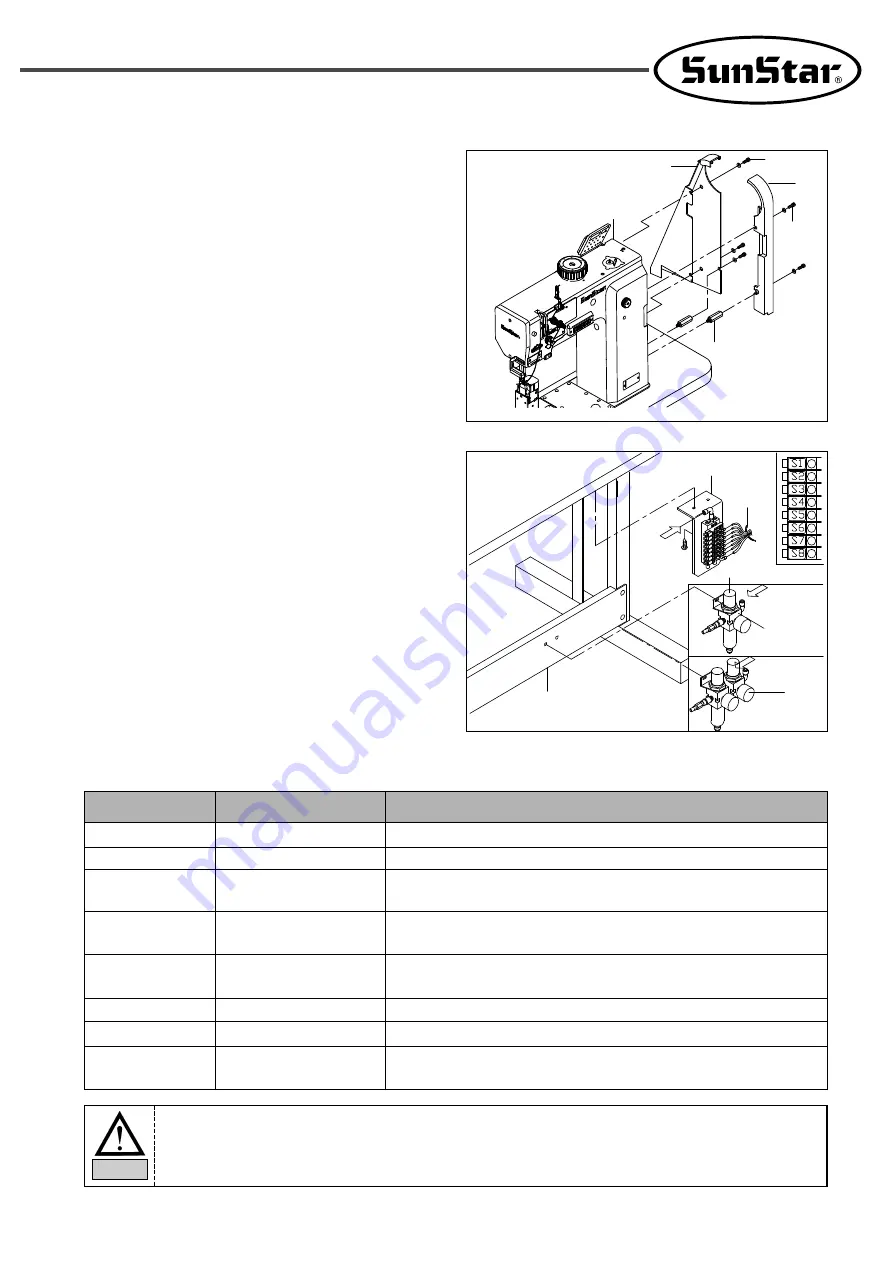
4.5.10) Belt Cover Installation
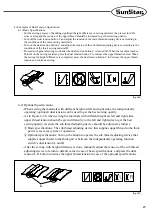
1) Fix the right top of the arm
①
and the belt cover
(right)
②
at the fixing groove using the screws
③
.
2) Accurately assemble the left and right belt covers
and fix the belt cover (left)
④
with the screws
③
applying the same method of fixing the belt cover
(right)
②
. When the assembled belt cover is fixed
to the stud nut
⑤
with the screw
⑥
, the
installation of the belt cover is completed.
4.5.11) Pneumatic Parts Installation and
Function Check
1) Fix the pneumatic bracket
①
to the table bottom with
the tapping screw as in the figure. Fix the regulator to
the reinforcing plate of the table T-leg
③
.
2) Connect the pneumatic tubes according to label
signs and bind the tubes with other lead lines
using the belt clips
②
.
3) Use the regulator
④
to set the default pneumatic
pressure at 0.5Mpa.
4) When applying the seam center guide presser
foot, make sure that the pneumatic pressure of the
regualtor
⑤
is no highr than 0.3Mpa.
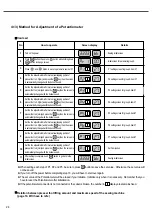
4.5.12) Description of label symbols
Label Sign
Cylinder Function
S1
S2
S3
S4
S5
S6
S7
S8
Backtack
Trimming
Hem height difference
Stitch length conversion
Thread release(Main)
Thread release(Sub)
Presser foot
Seam guide
Add the initial and last backtack sewing function and perform reverse sewing
Perform trimming
When the cylinder is in motion, sewing is performed using the higher
value of the two climb dials attached to the machine.
When the cylinder is in motion, sewing is performed using the lower
value of the two stitch length dials attached to the machine.
It operates when trimming and presser foot automatic lift are
performed to loosen the tension of the upper thread.
Turn on/off the tension of the upper thread using the function switch.
Lift the presser foot 18mm from the needle plate face.
It is used to create sewing lines in parallel along the seam in case of
using two needles.
However, when the left/right removable thread adjustment device, an optional device is applied, S6
refers to SubL, and S9 refers to SubR.
Note
[Fig.
4-15]
①
②
Ⓐ
Ⓐ
Ⓐ
KM-1080
KM-10823
④
③
①
②
③
④
⑥
⑤
Summary of Contents for KM-1080 Series
Page 2: ......
Page 13: ...13 4 4 2 Flat table Fig 4 4 ...

