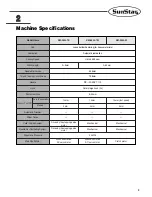


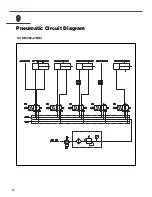

23
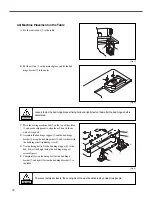
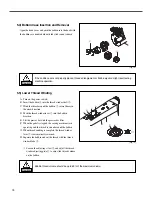
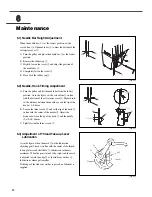
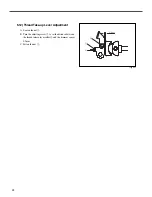
6.9) Pneumatic Wiper Adjustment
A. Release air pressure.
B. Turn the pulley to place the thread take-up lever at the
highest position.
C. Pull the wiper
①
and loosen the nut
②
. Adjust the wiper
position as in the figure and fasten the nut
②
.
D. Loosen the nut
③
and set the distance between the
needle tip and the wiper at some 1~2mm.
E. Return the wiper
①
back to the original place.
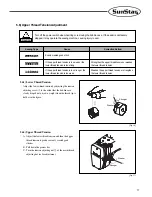
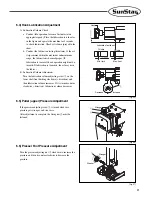
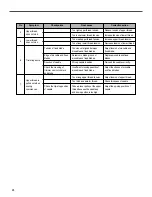
6.10) Trimmer Cam Adjustment
A. Turn the pulley and set the thread take-up lever at the
highest position.
B. Press the solenoid lever
③
to make the trimmer cam
roller
①
inserted into the trimmer cam
②
.
C. Turn the pulley to make the needle bar's carved line meet
the bottom of the oil reject cover
④
. Then adjust the
trimmer cam to make the trimmer main lever
⑤
move to
the left.
D. Loose the trimmer cam tightening screw
⑥
for
adjustment. When adjustment is complete, tightly fasten
the screw.
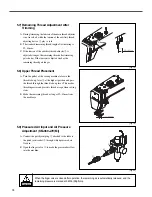
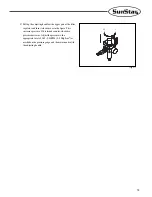
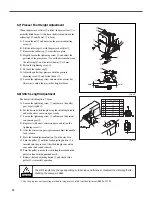
6.11) Blade Position Adjustment
A. Remove the rubber cap
①
.
B. Turn the pulley to place the thread take-up lever at the
highest position.
C. Push the trimmer cam roller
②
into the trimmer cam
③
and turn the pulley until the moving blade
④
can move
in full.
D. Loosen the trimmer lever screw
⑥
to set the distance
between the moving blade
④
and the roller (down)
⑤
at
0.5mm. When adjustment is complete, fasten the screw.
E. Reassemble the rubber cap
①
.
①
③
②
[Fig. 30]
[Fig. 31]
[Fig. 32]
④
⑤
①
⑥
②
③
⑥
①
②
③
④
⑤


