


10
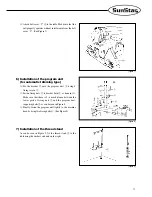
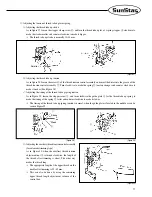
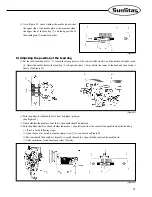
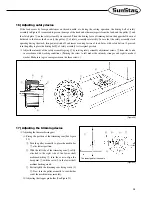
3) Installation of oil fan
※
Insert the projecting part of the oil fan
②
into the
respective machine holes on the lower side of the table
①
, and then push securely to the right. Fix the oil fan to
the four fixing spots
③
using 4 nails. (See Figure 3)
[Figure 3]
Nail
②
①
③
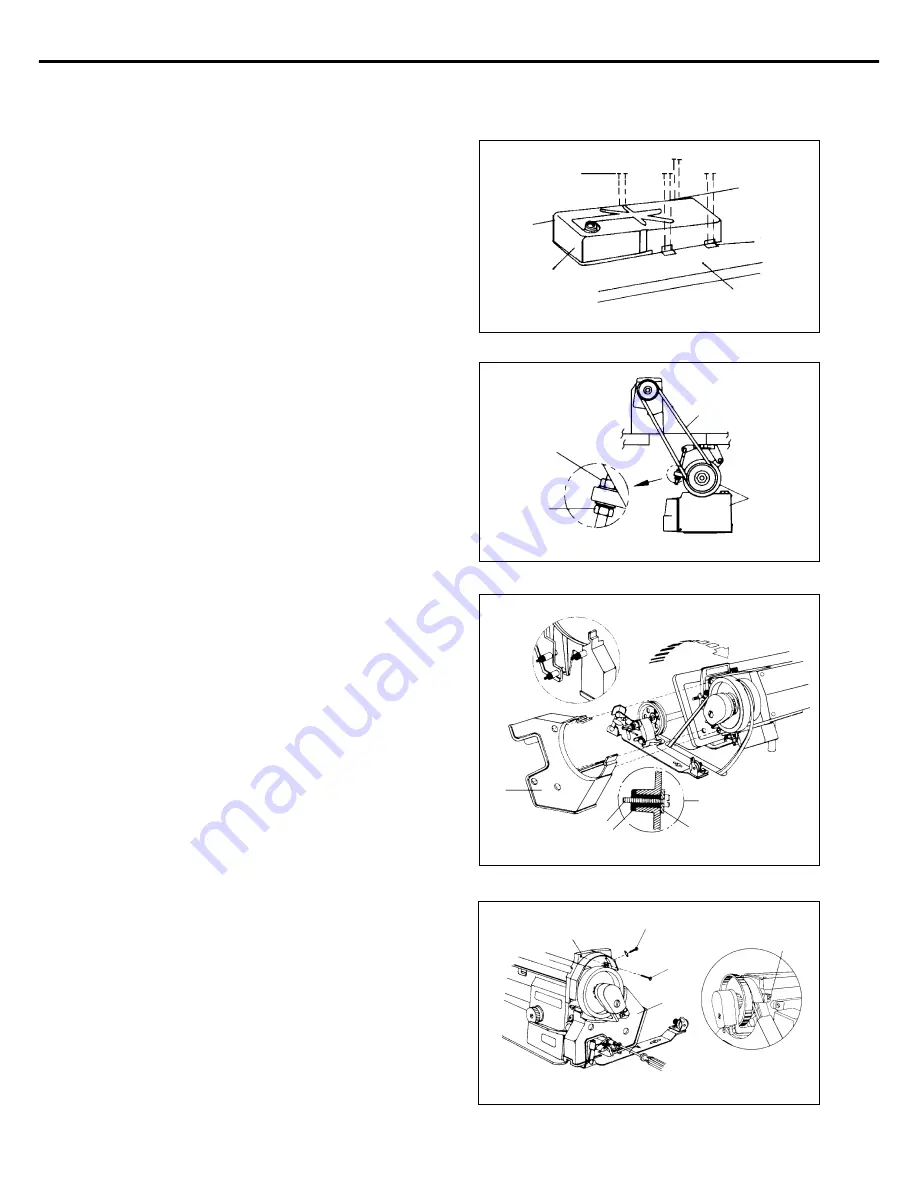
4) Adjustment of belt tension
Once the motor is installed, when the fixing nuts
①
,
②
are
fully unfastened on both sides, tension is created to the belt
④
due to the weight balance of the motor
③
. At this
moment, fasten the fixing nut
①
first, then fasten the fixing
nut
②
tightly. (See Figure 4)
[Figure 4]
④
③
①
①
“K”
②
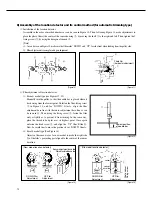
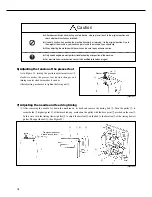
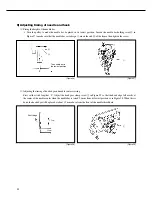
5) Installation of belt cover
⑴
Before attaching the belt cover
“
B
”①
to the machine
body, assemble in advance the rubber collar, fixing
washer and fixing screw on the to-be-attached side of the
cover as can be seen in picture
“
K
”
of Figure 5.
⑵
Lay down the machine on the back and then attach belt
cover
“
B
”①
onto the machine body. (See Figure 5)
[Figure 6]
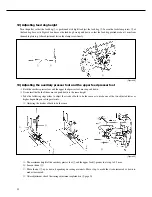
⑶
Fasten belt cover
“
A
”②
to the machine body and the
top cover with the fixing screw
③
, as can be seen in
Figure 6. And make sure that the belt cover “A”
②
keeps
balance with the belt cover “B”
①
that was already
attached. (See Figure 6)
[Figure 5]
Fixing screw
Rubber collar
Fixing washer
③
③
③
①
②
Summary of Contents for KM-560
Page 34: ...34 5 Table Drawing ...