
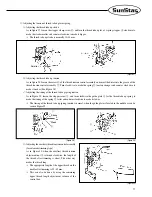


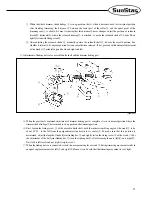


26
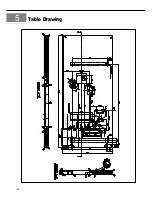
①
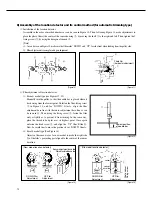
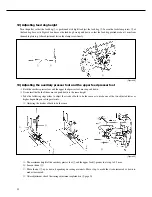
Make sure to turn the machine pulley to place the trimming cam
③
in the right position, so that the roller
①
can
enter the complementary straight line
②
range after finishing trimming marked in the trimming cam lead.
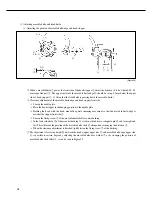
②
Press down the trimmer shake linkage
④
to make the roller
①
come inside the trimming cam,
※
Adjust the holder
⑦
to make the right equal point of the roller
①
adhere smoothly
⑧
to the inner right side of
the cam
’
s complementary straight line
②
, and the left equal point of the stopper pin
⑥
adhere
⑧
smoothly to
the inner left side of the stopper pin holder
⑦
. Once this is done, tightly fasten the fixing screw
⑨
.
※
Once such adjustments are made, the trimmer shake linkage
④
will not move even when shaken to its sides
(the roller is inside the cam). Make sure to check if the shake linkage
④
returns to up position
⑩
quickly and
smoothly when released. If not, proceed with horizontal adjustment of stopper pin holder.
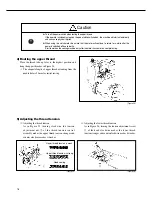
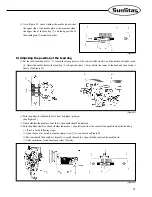
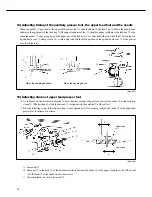
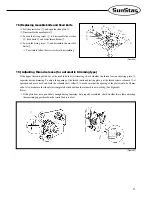
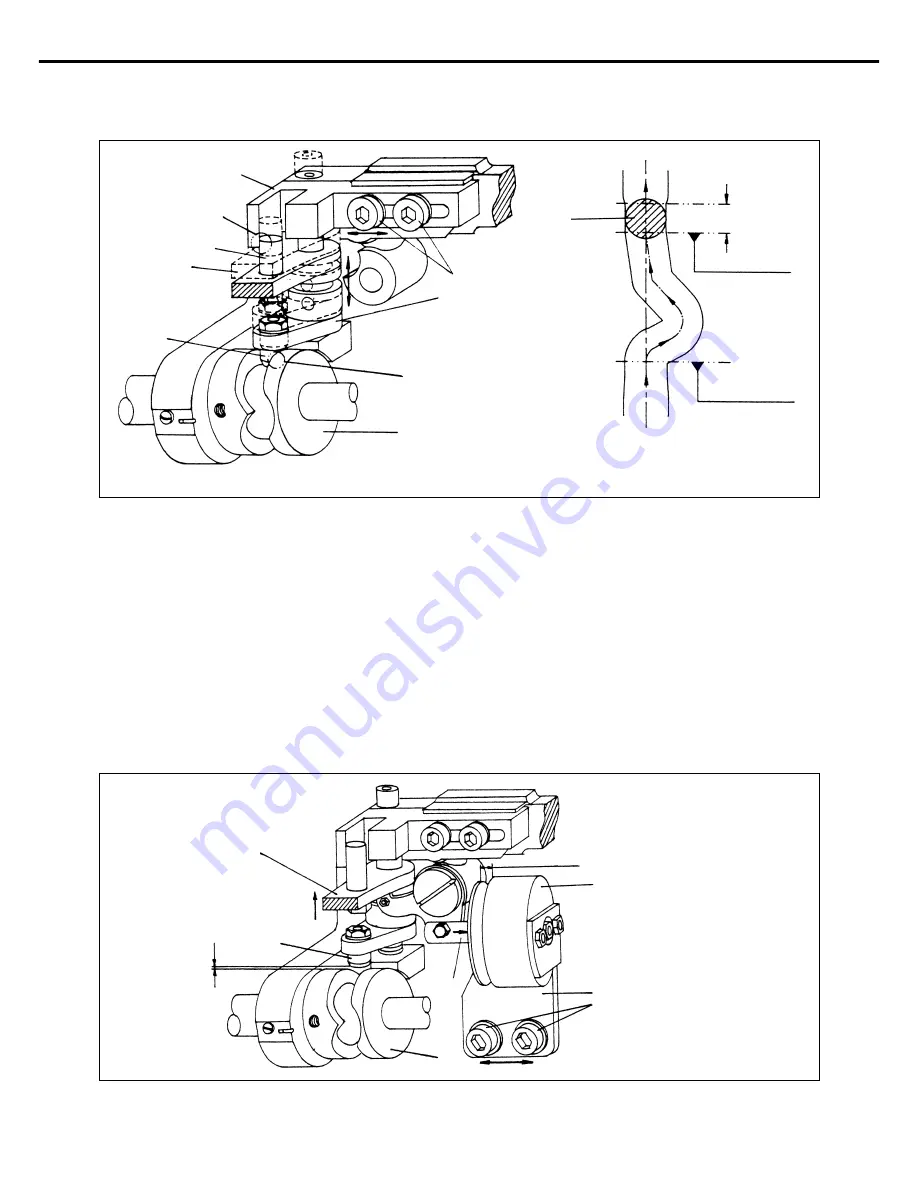
C) Fixing the position of the trimmer solenoid (See Figure 52)
[Figure 51]
⑦
[Figure 52]
①
③
⑨
⑥
4mm ⑤
Solenoid stroke
⑦
⑧
②
0.8~1mm
④
⑥
⑩
①
⑤
⑥
④
⑨
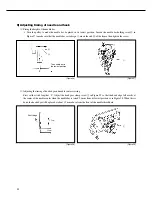
①
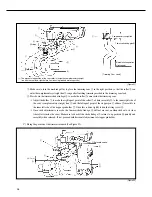
Complementary straight line
Trimming finishing point
②
Movable knife operation
starting point
[Trimming Cam Lead]
(
※
The present stop position of the cam: roller is inside the complementary straight
line with the cam lead, right before it exits having finished trimming action)
⑧
Summary of Contents for KM-560
Page 34: ...34 5 Table Drawing ...


