13
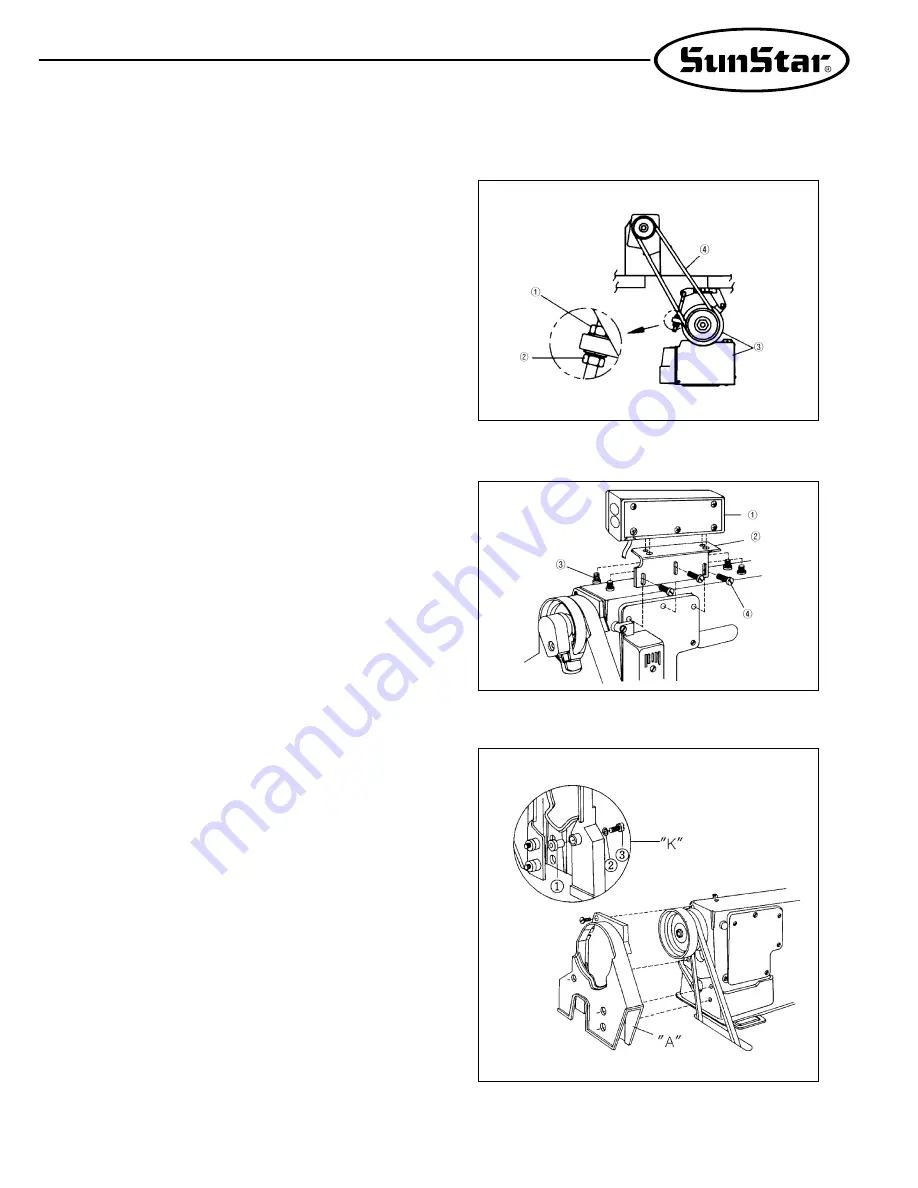
5) Adjustment of belt tension
After installing the motor, when the fixing nuts
①
,
②
are
unfastened to both sides with enough room, tension is
created to the belt
④
due to motor
③
due to the motor’s
own weight balance.
At this moment, fasten the fixing nut
①
first, then fasten the
fixing nut
②
tightly.
(See to figure 7)
6) Installation of the program unit
(automatic trimming type)
A. Fix the bracket
②
onto the program unit
①
, using 4
fixing nuts
③
.
B. Then, use 3 fixing bolts
④
to tightly fix the bracket
②
,
where the program unit
①
has been attached, along with
the back cover.
(see figure 8)
7) Installation of the belt cover
A. Before attaching the belt cover
“
A
”
to the machine body,
assemble in advance the rubber collar
①
and washer
②
and fixing nail
③
on the to-be-attached side of the cover
as can be seen in picture
“
K
”
of figure 9.
B. Attach belt cover
“
A
”
onto the machine body as can be
seen on figure 9. Now, if a bobbin winder is attached on
the table, lay down the machine body on its back and
attach the belt cover
“
A
”
.
[Figure 7]
[Figure 8]
[Figure 9]


