14
DE
EN
4 Electrical connection
Danger of death through electric
Touching live parts can result in death.
Make sure the polarity is correct when connecting
the modules. Reverse polarity can lead to destruction
of the protective diodes.
Before installing junction box check the cables and
connectors for obvious damage.
For safety reasons the junction box must not be
opened.
Do not use the plug connectors if the plug contacts
are dirty!
Do not install damaged solar modules!
The solar modules, and in particular the connectors
and tools, must be dry during installation.
In exposed locations, installation of lightning protec-
tion is recommended. If lightning protection equip-
ment is already present, the solar modules must be
integrated properly. Follow the respective current
regulations.
During normal conditions PV module may supply a
higher current and/or voltage than specified under
test conditions.
For determining the voltage design values of the
components, the current design values of the con-
ductors, the ratings of the fuses and the control units
connected to the solar module output, the values of
I
SC
and U
OC
specified on the module should be multi-
plied with a factor of 1.25.
The solar module is equipped with high-quality solar
cables and the Tyco plug connector system, which
is protected against reverse polarity and accidental
contact. The connection polarity is marked.
The maximum cable cross-section should be 4 mm
2
.
4.1 Connector system
CAUTION
The plug connectors must not be disconnected or
connected under load current! They may be con-
nected and disconnected while voltage is present.
4.2 Application class
Sunways Solar Modules conform to application class
A according to the international safety standard
EN 61730 and therefore meet the requirements of
protection class II.
Sunways Solar Modules can be used in systems with a
DC voltage in excess of 120 V
DC
.
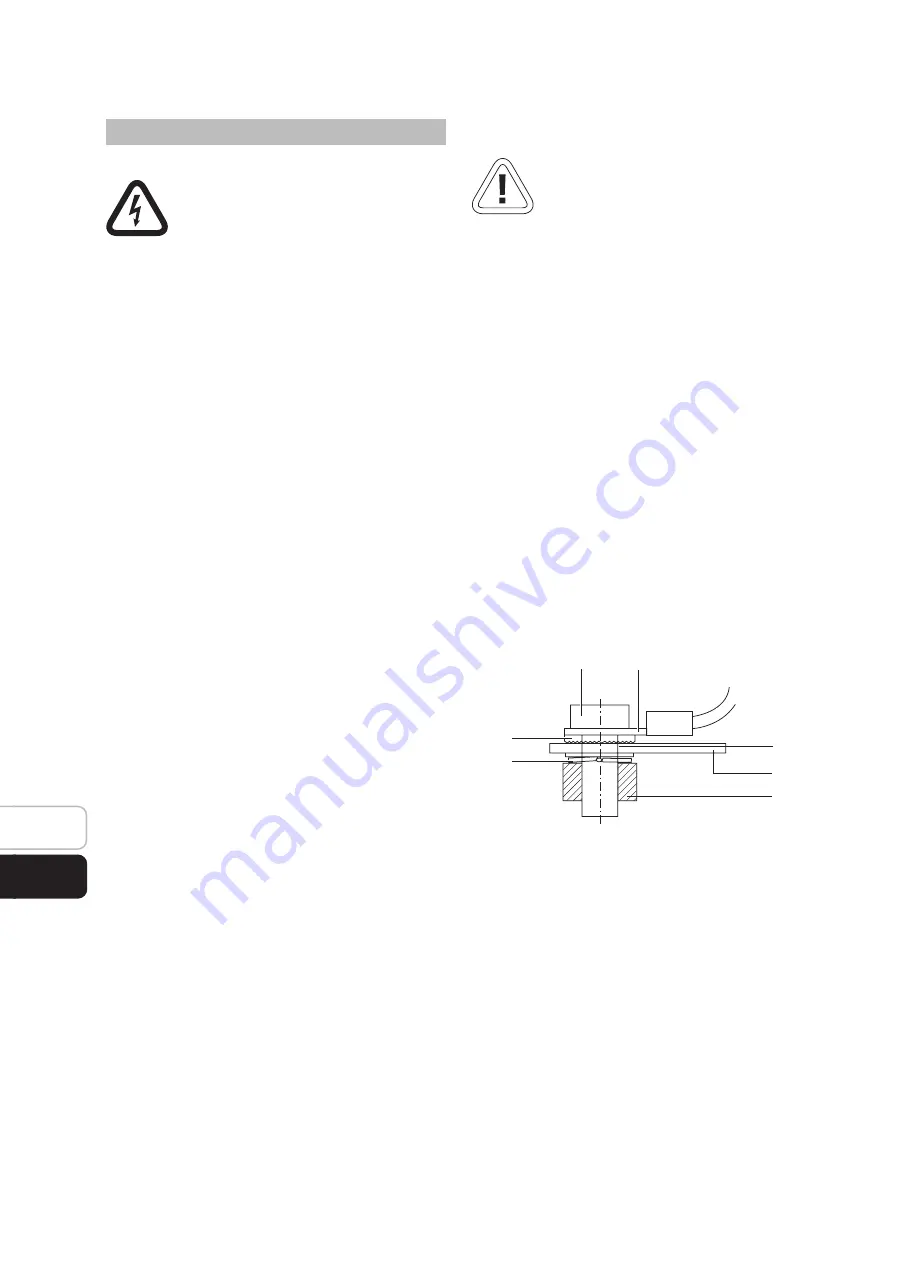
4.3 Earthing of the modules
An overview of the solar module can be found in sec-
tion 2, Your Solar Modules. A diagram indicates the
holes for connecting the earthing cables.
Detail view of the earthing cable connection
1 Fastening screw M4
2 Ring terminal with earthing cable
3 Hole for earthing
4 Lock washer
5 Module frame
6 Spring washer
7 Nut
Proceed as follows to ensure correct earthing of the
modules:
1.
Place the lock washer (4) and the ring terminal
with the earthing cable (2) over the earthing hole
(3) on the front of the module.
2.
Insert the fastening screw M4 (1).
3
4
5
2
6
7
1


