91
H.264 Video Surveillance System Setup Guide
APPENDIX C: HDD INSTALLATION
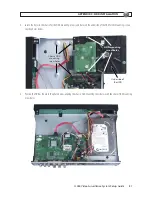
11. During the DVR initialization, follow the options displayed to initialize/reformat the HDD.
C.4 DMR91U/DMR92U: Installing a 2nd internal HDD
The DMR91U and DMR92U DVRs can include two internal HDD. For illustrations and additional details, refer to “C.3 DMR91U/
DMR92U: HDD installation” on page 88 above.
CAUTION
Follow recommended electrostatic discharge (ESD) guidelines while performing this procedure. Install the HDD in a static-free
environment, wearing a certified ESD wrist strap. If a static free environment and ESD wrist strap is not available, touch the bare
metal of the DVR chassis frequently when installing the drive to dissipate the static charge naturally generated on your skin and
clothing and avoid touching electronic components. .
To install a 2nd HDD, do the following.
1. If your DVR is powered on, follow the recommended procedure to power it off.
2. Remove the top cover from the DVR by removing the five cover screws on the back of the chassis, and the three on each side.
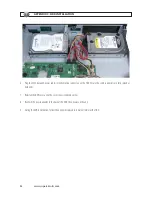
3. Remove the two HDD mounting brackets from one of the HDD bays in the chassis by removing the four screws. Retain the
screws to reattach the brackets later.
4. Attach a mounting bracket to each side of the HDD using the pan-head medium- thread screws provided (see above). Use two
screws for each bracket. After starting the screws, slide each brackets toward the front of the drive (away from the connector
end), then tighten until snug.
5. Position the HDD assembly in the HDD bay with the connector end toward the middle of the chassis. Secure the assembly using
the four screws removed earlier.

