Publication: 0028607
4-1
Chapter 4
4
Sewer Cleaning — Typical Sequence
Setting the Truck at the Job Site
1.
Position the truck at the job site.
2.
Wait for the air brake pressure to rise to the proper
level and make sure the red low air pressure warning
lights and alarm go out.
3.
Place the transmission in neutral (N). Both the
SELECT and MONITOR indicators will display NN.
4.
Apply the park brake.
5.
Turn on the appropriate strobe lights, work lights, and
traffic manager lights.
6.
Place wheel chocks in front of and behind one of the
rear tires. Place safety cones as needed.
Engaging Work and Vac Modes
at the Job Site
NOTICE
1.
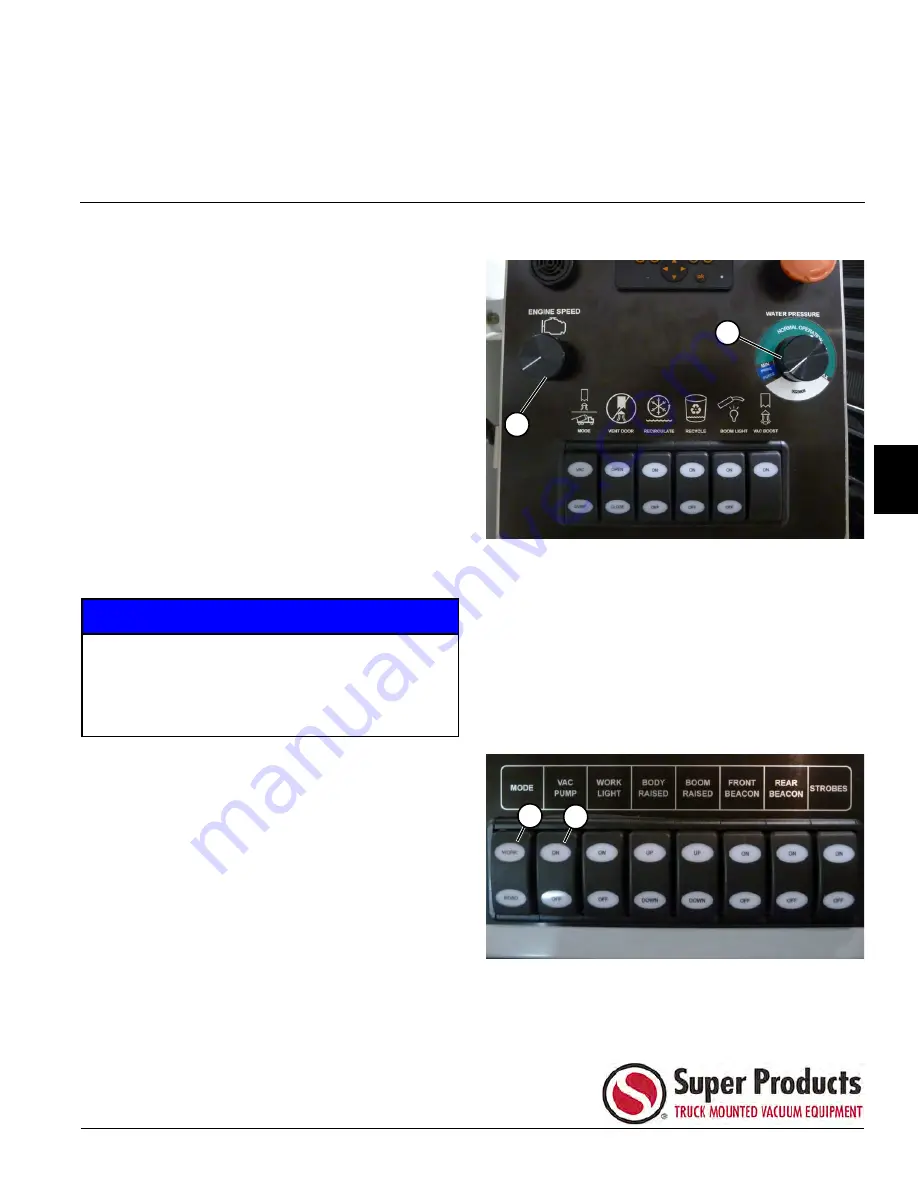
Make sure the ENGINE SPEED (1) and WATER
PRESSURE (2) dials on the front control panel are
set to their lowest settings (turned fully
counterclockwise) before proceeding.
Figure 4-1
2.
Press WORK (3) on the MODE rocker switch located
on the cab control panel. The selector switch will turn
green when the transfer case is fully engaged. A
flashing green light indicates the truck has shifted but
is waiting for the drive line to engage.
3.
Press ON (4) on the VAC PUMP rocker switch
located on the cab control panel. The selector switch
will flash green. This means that it has shifted but is
waiting for the drive line to move to fully engage.
Figure 4-2
Provided with every Camel™ are two
instructional placards that describe in detail
proper work and vacuum operation, as well as
purge/prime feature activation. Read this material
before operating the truck.
1
2
4
3
Summary of Contents for Camel 1200 (Dump Body)
Page 1: ......
Page 2: ......
Page 4: ......
Page 62: ...1 52 Publication 0028607 SAFETY 1...
Page 64: ...2 2 Publication 0028607 PRE OPERATION 2 Figure 2 1 Figure 2 2 1 3 2 5 6 4 7...
Page 106: ...4 18 Publication 0028607 SEWER CLEANING TYPICAL SEQUENCE 4...
Page 118: ...5 12 Publication 0028607 WATER RECYCLING SYSTEM 5...
Page 132: ...6 14 Publication 0028607 LUBRICATION AND MAINTENANCE 6...
Page 156: ...i vi Publication 0028607 IX...
Page 157: ......


