Installation
900079-02J, 05/2019
Innovative Hearth Products
DRL3000 Linear Direct-Vent Gas Fireplaces
44
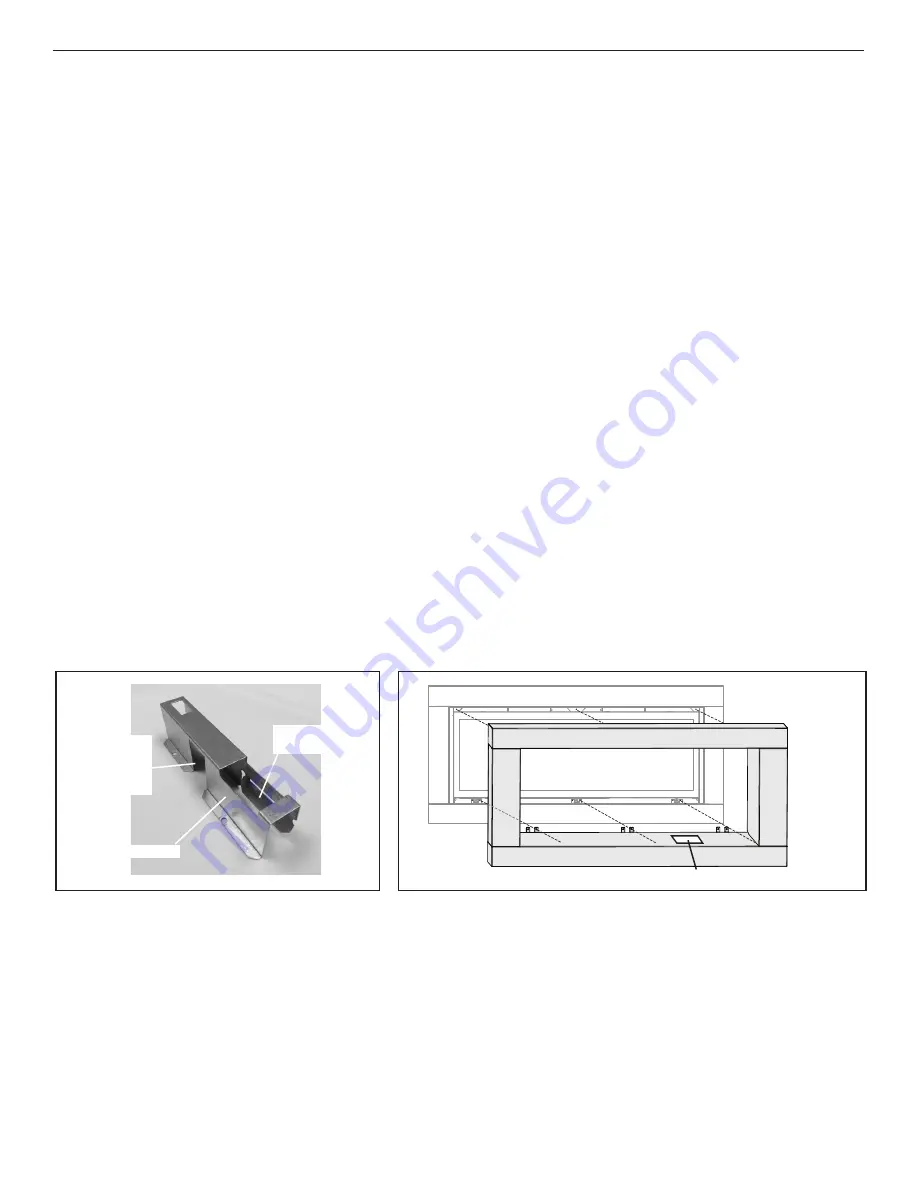
Figure 40 - Gas Shutoff Valve Bracket
Figure 41 - Installing the Surround
Back Side
Gap (thread
flex gas line
here)
Tab (bend up
to hold valve)
Gas Shutoff Valve Door
Finishing with optional Surround
1.
Remove clean-face frame
(
Figure 42
)
.
2.
Installing the gas shut-off valve;
a.
Pull gas flex line out from inside, beneath fireplace floor.
b.
Place shut-off valve in valve bracket, threading flex line through gap in back.
c.
Use coupler to attach additional flex line to shut-off valve.
d.
Bend up tab on the side of valve bracket to hold shut-off valve in place
(
Figure 40
).
e.
Attach valve bracket to unit with two screws.
f.
Attach shut-off valve to incoming gas line with field-supplied coupler.
3.
Place unit in wall framing.
NOTE:
The provided non-combustible fiberboard may be faced with any NON-combustible finish material
appropriate for use (brick, tile, stone, high-temperature paint, etc.). For painted wall finish, use two (2) coats of
quality primer and high-temperature paint on provided fiberboard.
4.
Secure nailing flanges to wall framing.
NOTE:
If skimming the non-combustible board to match drywall, use Sheetrock
®
brand Durabond
®
90 setting
type joint compound to fill all joints. These trademarks are owned by United States Gypsum Company or a
related company.
5.
Cut noncombustible fireboard to size and install flush with top of frame pieces.
6.
Finish out wall with 1/2” finishing materials – paint with high-temperature paint, etc. A total of 1” finish material
is needed to be flush with the surround back.
7.
Attach surround in frame using screws a minimum of six at specified locations
(
Figure 41
)
.
8.
Install barrier mounting brackets on side of surround.
9.
Reinstall door and secure with three screws.
10.
Install Gas Shutoff Valve Door
(
Figure 41
)
.
11.
Install barrier on barrier mounting brackets.


