
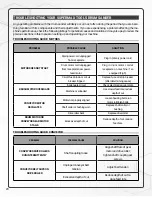

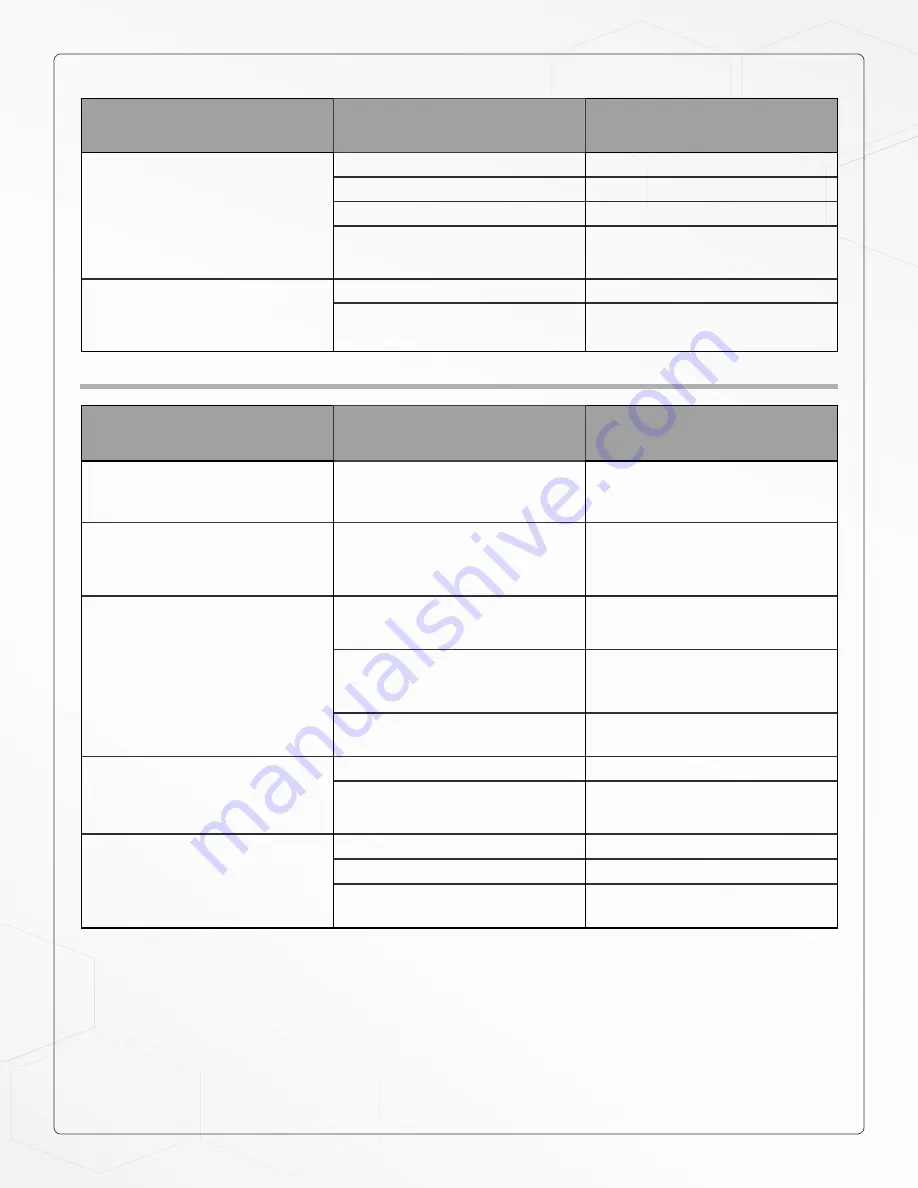
PROBLEM
POSSIBLE CAUSE
SOLUTION
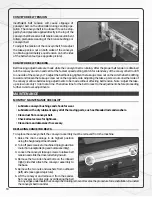
STOCK SLIPS ON
CONVEYOR BELT CAUSING
GOUGING
Excessive depth of cut
Reduce depth of cut
Tension rollers too high
Lower tension rollers
Excessive feed rate
Reduce feed rate
Dirty or worn conveyor belt
Clean or replace conveyor
belt
CONVEYOR MOTOR STALLS
Belt out of adjustment
Readjust belt
Roller bushings elongated
due to excessive wear
Replace bushings
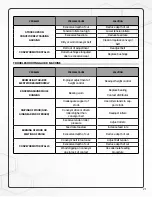
TROUBLESHOOTING GUIDE: MACHINE
PROBLEM
POSSIBLE CAUSE
SOLUTION
DRUM HEIGHT ADJUST-
MENT WORKS IMPROPERLY
Improper adjustment of
height control
Readjust height control
KNOCKING SOUND WHILE
RUNNING
Bearing worn
Replace bearing
Contact distributor
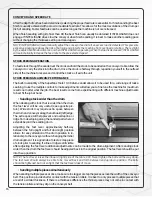
SNIPING OF WOOD (GOU-
GING NEAR END OF BOARD)
Inadequate support of
stock
Use roller stands to sup-
port stock
Conveyor drive or driven
rollers higher than
conveyor bed
Readjust rollers
Exessive tension roller
pressure
Adjust rollers
BURNING OF WOOD OR
MELTING OF FINISH
Feed rate too slow
Increase feed rate
Excessive depth of cut
Reduce depth of cut
CONVEYOR MOTOR STALLS
Conveyor belt is too loose
Adjust belt tension
Excessive depth of cut
Reduce depth of cut
Wood slipping on conveyor
due to lack of contact
Use alternate feeding
procedure
21


