background image

15 


2.


Receiver to TV and VCR 


Connect the satellite antenna cable to LNB IN. 


Connect the TV antenna to RF IN. 


Connect the RF OUT to RF IN of VCR. 


Connect RF OUT of VCR to RF IN of TV. 


Connect the TV SCART to SCART of TV. 


Connect the VCR SCART to SCART of VCR. 


Connect other jacks to the appropriate jacks of TV refer to above section, 

1. Receiver to TV 

with RF.


Summary of Contents for 9300 USC

Page 1: ...Digital Satellite Receiver Personal Video Recording User s Manual 9300 USC...

Page 2: ......

Page 3: ...gram 14 1 Receiver to TV with RF 14 2 Receiver to TV and VCR 15 3 Receiver to Digital Audio Equipment 16 4 Connecting to Dish 17 Guide of Functions 18 1 Selecting a Service 18 1 1 Using CH UP DOWN but...

Page 4: ...26 1 3 UI User Interface Setting 27 1 4 Parental Control 27 1 5 Language Setting 28 1 6 A V Output Setting 28 2 Installation 28 2 1 Dish Setting 28 2 2 Positioner Setting 29 2 3 Service Search 30 2 4...

Page 5: ...paratus Only use attachments accessories specified by the manufacturer Use only with the cart stand tripod bracket or table specified by the manufacturer or sold with the apparatus When a cart is used...

Page 6: ...eable parts are inside Refer servicing to qualified service personnel The Lightning Flash with arrowhead symbol within an equilateral triangle is intended to alert the user to the presence of un insul...

Page 7: ...via USB MPEG II Digital Fully DVB Compliant Blind scan Multi LNB Controlled by DiSEqC Control Version 1 0 1 1 1 2 and USALS Multi Satellite Search Support EPG Electronic Program Guide On Screen Displa...

Page 8: ...8 2 Accessories NOTE If any accessories listed above are missing contact the sales representative where you purchased this unit User s Manual AAA size Batteries X2 Remote Control RCA Cable...

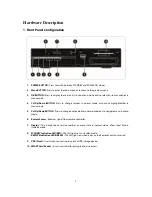
Page 9: ...highlighted bar in menu mode 5 Vol Up Down BUTTON Press to change audio volume in normal mode or to navigate menu in menu mode 6 Remote Sensor Receives signal from remote controller 7 Display The 4 di...

Page 10: ...AUDIO L R Use to connect audio left right of TV or VCR 5 SPDIF Use to connect SPDIF to digital audio equipment Optic 6 VCR SCART Use to connect to the VCR via a SCART cable 7 TV SCART Use to connect t...

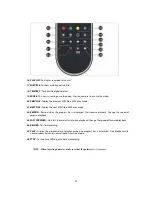
Page 11: ...output source between the cable input STB mode and UHF VHF antenna input TV mode d TV RADIO Switches between TV and Radio 4 NUMERIC Keys Controls the numerical operation and service numbers directly 5...

Page 12: ...revious page if more than one page are available PAGE UP key is also used as hot key to move to Timer Manager menu Refer to Page 26 1 2 Timer Manager And PAGE DOWN key is also used as hot key to move...

Page 13: ...play mode 22 REWIND Rewind when the progress bar is displayed Start reverse playback Change the speed of reverse playback 23 FAST FORWARD Start fast forward or fast motion playback Change the speed of...

Page 14: ...er to TV with RF Connect the satellite antenna cable to LNB IN Connect the TV antenna to RF IN Connect the RF OUT to RF IN of TV Connect the VIDEO and AUDIO L R to VIDEO IN and AUDIO L R IN of TV Conn...

Page 15: ...onnect the TV antenna to RF IN Connect the RF OUT to RF IN of VCR Connect RF OUT of VCR to RF IN of TV Connect the TV SCART to SCART of TV Connect the VCR SCART to SCART of VCR Connect other jacks to...

Page 16: ...u can use digital audio via coaxial cable If you have a digital audio equipment connect SPDIF to Digital audio input of the equipment Connect other jacks to the appropriate jacks of TV or VCR refers t...

Page 17: ...necting to Dish Using Single DISH Connect the Satellite Antenna cable to LNB IN Using DiSEqC switch Connect the cable of DiSEqC switch to LNB IN Using DiSEqC motor Connect the cable of DiSEqC motor to...

Page 18: ...red service and press OK button In the Service List window you can also use additional functions with COLOR buttons Press RED button you can sort the services by Alphabet Transponder Group and CAS Pre...

Page 19: ...nager Menu To cancel the reservation for recording by OK button at the appointed event To edit the reservation for recording by RECORD button at the appointed event 5 Satellite List Select the SAT sat...

Page 20: ...ay choose start date time duration service mode type Recording Play and simply press Yes button to reserve you recording schedule Also you must set you start time and end time to minimum of 3 minutes...

Page 21: ...you may press RECORD button to start you recoding instantly 1 3 Recording Edit During recording you may press RECORD button to edit recording duration time As it defaulted to 2 hours but you may incre...

Page 22: ...utton once again and event will resume from the pause time During recording press PLAY TIMESHIFT button to show Play bar screen While the Play bar is shown on your screen you may use the LEFT RIGHT AR...

Page 23: ...time While watching live TV press PLAY TIMESHIFT button to show the play bar on your screen When the play bar is displayed on your screen you may use the LEFT RIGHT ARROW buttons to move freely throu...

Page 24: ...t And you may press GREEN button to choose all event in the Play List In Play List screen BLUE button to delete or rename already recorded event In Play List screen press RIGHT LEFT ARROW button to ch...

Page 25: ...any Bookmarks go to that bookmark by pressing green button then press RED button to delete the current bookmarks 5 Trick mode During play press the FAST FORWARD button once to 2X faster than regular p...

Page 26: ...receiver to automatically power ON And you can choose one of Wake Up Mode as off or Once or Daily or Weekly Wake Up Date Select the date when STB is turn on Press OK button to display calendar Wake U...

Page 27: ...the time range which is displayed at the same time in the EPG window Zapping Mode You can set the zapping mode Black screen means display the black screen when channel changed Freeze means display the...

Page 28: ...audio mode which is output from the RCA jack Stereo Mono Left Right RF Type Select the RF type PAL G I K RF Service Select a RF service 21 69 Picture Adjust Adjust brightness contrast and color of scr...

Page 29: ...lite name is not listed then select User Defined Frequency Select frequency which you want to check the signal Positioner Select the positioner None No Positioner Using DiSEqC 1 2 Move To move the dis...

Page 30: ...ype Network Search You can select Off or On When you select On you can find more transponders using the home network As it refers to NIT during searching if there is the frequency information of other...

Page 31: ...tate 2 5 System Information This menu displays general information about the hardware and software version of your receiver 3 Utilities 3 1 USB MP3 Player Stick the external USB memory into the provid...

Page 32: ...Press OK button to download data 3 3 Recording Option Recording Stop Message Set On When you press STOP button in recording confirm window is displayed Set Off When you press STOP button in recording...

Page 33: ...oviders Insert a valid smart card into smart card slot The message of Smart card Initializing will appear on the screen After message disappear you can watch the service you want 4 2 Smart card inform...

Page 34: ...rvice Lists for moving will be shown on right Window Move the Service to Right window by using ARROW and OK button then right window services will be moved to related location when select desired loca...

Page 35: ...rvice List service will be played which you want But Service List still remains To remove Service List on screen press OK one more time Setting OFF If you change service and press OK in the Service Li...

Page 36: ...he RF Output check that you have correctly tuned the UHF channel of the STB or TV Check the brightness level of the TV Poor picture quality See No Picture above Check the signal level if this is low t...

Page 37: ...sport Stream Profile Level Input Rate Video Formats Video Resolution Audio Decoding Audio Mode Sampling Rate MPEG II ISO IEC 13818 MPEG II MP ML Max 15Mbit s 4 3 LetterBox 4 3 PanScan 16 9 720 x 576 7...

Page 38: ...Menu Front Panel Slot Buttons Display 1 Smart Card Slot 1 USB Host Slot 7 Buttons Power Menu OK CH Up Down Vol Up Down 7 Segment Power Supply Input Voltage Type Power Consumption Standby Power Protec...

Page 39: ...39...

Page 40: ...Digital Satellite Receiver 9300 USC V 11031Eng...

Reviews: