Chapter 7: BIOS
7-37
7-36
S
UPER
S
TORAGE
S
YSTEM 2028R-E1CR24L User's Manual
Serial Port for Out-of-Band Management/Windows Emergency Management
Services (EMS)
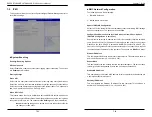
The submenu allows the user to configure Console Redirection settings to support
Out-of-Band Serial Port management.
(EMS) Console Redirection
Select Enabled to use a COM port selected by the user for EMS Console Redirec-
tion. The options are Enabled and
Disabled
.
*If the item above set to Enabled, the following items will become available for
user's configuration:
EMS Console Redirection Settings (Available when EMS
Console Redirection is enabled)
Use this feature to specify how the host computer will exchange data with the client
computer, which is the remote computer used by the user.
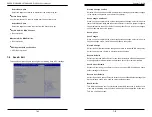
Out-of-Band Management Port
The feature selects a serial port in a client server to be used by the Windows
Emergency Management Services (EMS) to communicate with a remote host
server. The options are
COM1 (Console Redirection)
and COM2/SOL (Console
Redirection).
Terminal Type
Use this feature to select the target terminal emulation type for Console Redirec-
tion. Select VT100 to use the ASCII character set. Select VT100+ to add color
and function key support. Select ANSI to use the extended ASCII character set.
Select VT-UTF8 to use UTF8 encoding to map Unicode characters into one or
more bytes. The options are ANSI, VT100, VT100+, and
VT-UTF8
.
Bits Per Second
This item sets the transmission speed for a serial port used in Console Redirec-
tion. Make sure that the same speed is used in both host computer and the client
computer. A lower transmission speed may be required for long and busy lines.
The options are 9600, 19200, 57600, and
115200
(bits per second).
Flow Control
Use this item to set the flow control for Console Redirection to prevent data
loss caused by buffer overflow. Send a "Stop" signal to stop data-sending when
the receiving buffer is full. Send a "Start" signal to start data-sending when
the receiving buffer is empty. The options are
None,
Hardware RTS/CTS, and
Software Xon/Xoff.
The following settings will be displayed:
Data Bits, Parity, Stop Bits
Enabling TPM in the BIOS
The steps below describe the proper procedure on how to enable the TPM in the
BIOS. This process is necessary to activate support in the system before you can
start using the TPM.
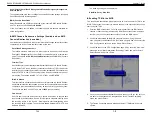
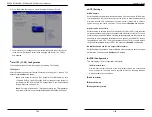
1. Enter the BIOS setup screen. You may do this either from the IPMI remote
console or from the server directly using KVM. Reboot the system and press
the <Del> key as the system boots until you reach the BIOS screen.
2. You will be presented with the BIOS setup main screen. Using the arrow
keys, navigate to the Advanced tab. From there, navigate down and select the
"CPU Configuration" option as shown below. Press <Enter>.
3.
You will be taken to the CPU Configuration page. Using the arrow keys, navi
-
gate down to the "Intel Virtualization Technology" option and press <Enter>.
Select "Enable" and press <Enter>.
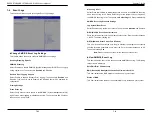
4. Once you have enabled virtualization support, press your <Esc> key until you
are back to the Advanced tab. Navigate down to the "Trusted Computing"
option and press <Enter>.
5. The Trusted Computing window will appear. Select "TPM State" and press
<Enter>.
Summary of Contents for 2028R-E1CR24L
Page 1: ...SUPER STORAGE SYSTEM 2028R E1CR24L USER S MANUAL 1 0a ...
Page 6: ...SUPERSTORAGESYSTEM 2028R E1CR24L User s Manual Notes x ...
Page 10: ...1 6 SUPERSTORAGESYSTEM 2028R E1CR24L User s Manual Notes ...
Page 16: ...2 10 SUPERSTORAGESYSTEM 2028R E1CR24L User s Manual Notes ...
Page 19: ...3 4 SUPERSTORAGESYSTEM 2028R E1CR24L User s Manual Notes ...
Page 77: ...7 48 SUPERSTORAGESYSTEM 2028R E1CR24L User s Manual Notes ...
Page 79: ...A 2 SUPERSTORAGESYSTEM 2028R E1CR24L User s Manual Notes ...
Page 82: ...B 4 SUPERSTORAGESYSTEM 2028R E1CR24L User s Manual Notes ...


