35
Chapter 3: Maintenance and Component Installation
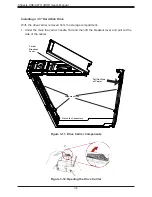
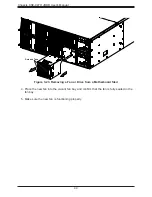
2. Remove the dummy drive from the carrier.
3. Insert the hard drive into the drive carrier. Orient the drive by matching the two
alignment pins on the side and by noting the notch in the carrier for the HDD
connectors. Close the side of the carrier until it snaps in place.
4. Slide the carrier assembly into its spot in the chassis until it clicks into place. Then press
the release button and push the drive carrier handle down into the locked position.
Figure 3-13. Removing the Drive
Figure 3-14. Inserting the Drive
Figure 3-15. Pressing the Release Button


