Chapter 5: Chassis Setup and Maintenance
5-13
6.
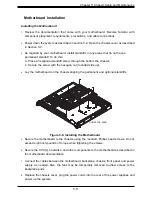
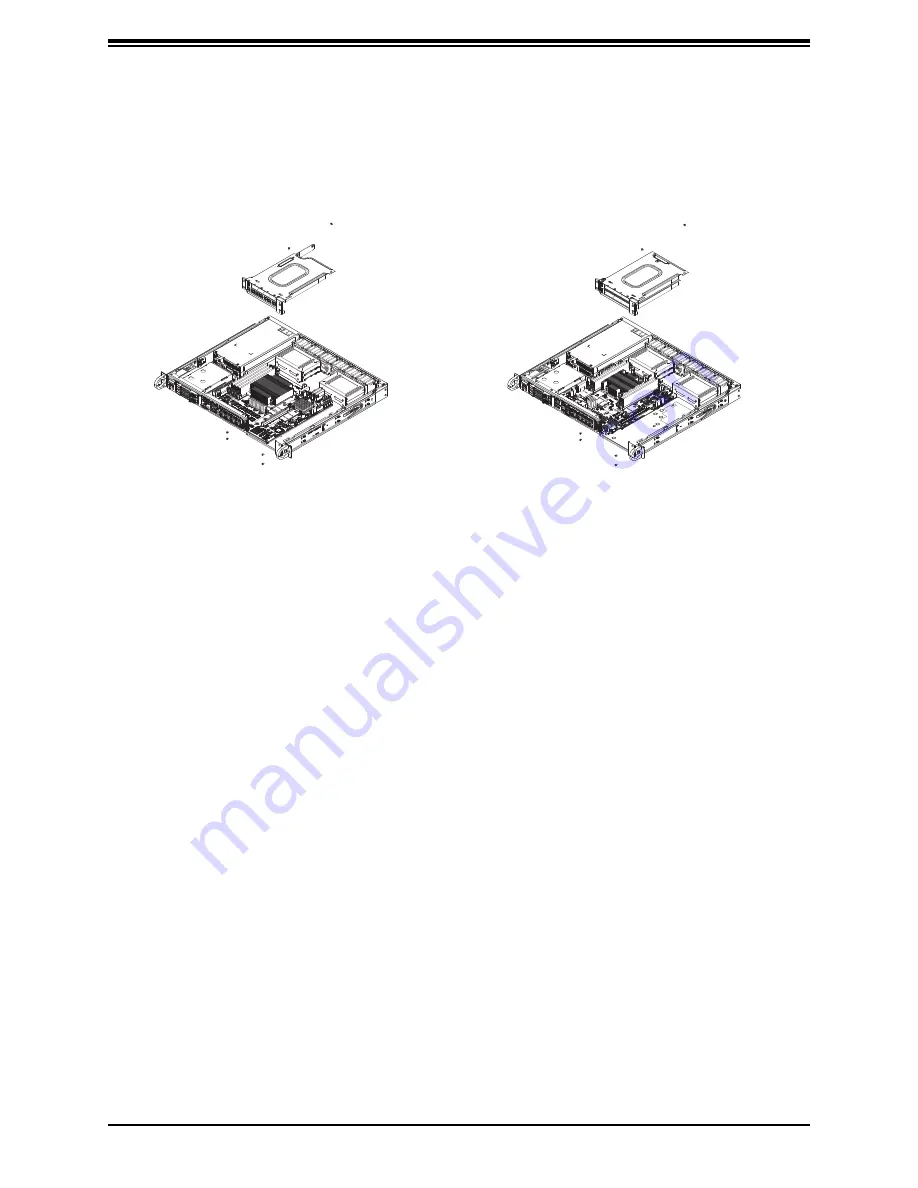
Insert the riser card into the serverboard expansion slots while aligning the expansion
card bracket with the openings in the rear of the chassis. Note: Always, make sure the
expansion card bracket is straight when either pulling up or pushing down.
7.
Secure the riser card bracket to the chassis and the expansion card bracket to the rear
of the chassis.
8.
Replace the chassis cover and power up the system.
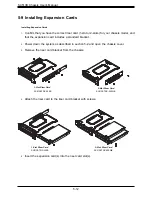
Figure 5-10. Expansion Card, Riser Card(s), Bracket and PCI Slot Cover
SC513BTQC-350B
5-10 Checking the Airflow
Checking the Server's Airflow
•
Make sure there are no objects to obstruct airflow in and out of the server.
•
Do not operate the server without drives or drive carriers in the drive bays. Use only
recommended server parts.
•
Make sure no wires or foreign objects obstruct airflow through the chassis. Pull all excess
cabling out of the airflow path or use shorter cables.
The control panel LEDs inform you of system status. See “Chapter 4: System Interface” for
details on the LEDs and the control panel buttons.
Installation Complete
In most cases, the chassis power supply and fans are pre-installed. If you need to install
fans or a power supply, continue to the following sections of this chapter. If the chassis will
be installed into a rack, skip to the next chapter for rack installation instructions.
SC513BTQC-350WB
With 1-Slot Riser Card
With 2-Slot Riser Card


