4-11
Chapter 4: Chassis Setup and Maintenance
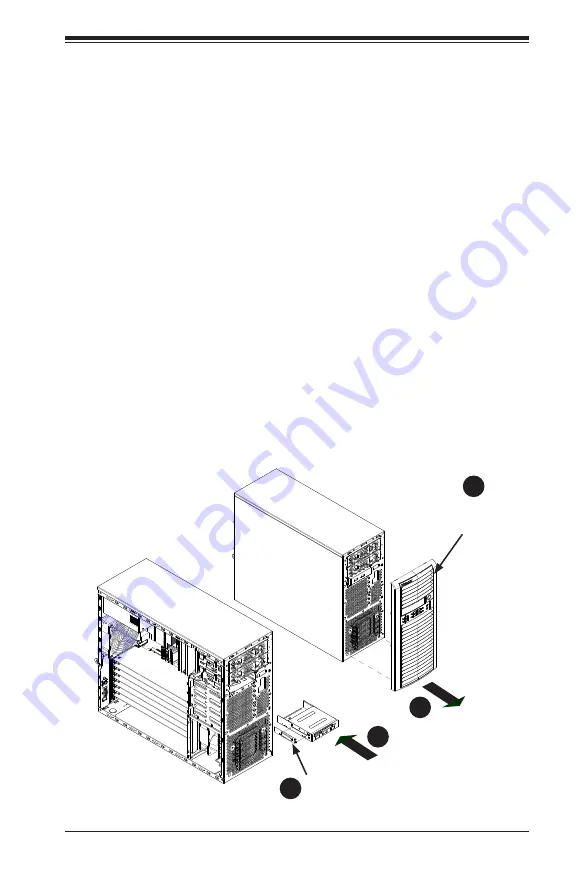
4-7 Installing a 3.5" Device (Optional)
The SC732D chassis has one 3.5" device slot, which supports an optional device,
such as an all-in-one card reader.
Installing a 3.5" Device
1. Power down the system and remove the power cord from the rear of the
power supply. Remove the chassis side cover as described in Section 4-2.
2. Remove the front bezel from the chassis by lifting it upwards from the bottom,
and pulling off the front of the chassis.
3. Remove the cover plate from the 3.5" device slot on the front of the chassis.
4. Install the bracket rail (A) which is included in the accessory box, onto one
side of the 3.5" device, by inserting the pins of the bracket into the mounting
holes on the sides of the optical device.
5. Slide the 3.5" device into the chassis.
6. See Section 4-10 Installing the Front Bezel. Plug the power cord back into the
power module, replace the chassis cover and power-up the system.
5
1
4
1
3
1
2
Figure 4-10. Installing the 3.5" Device
Bracket
Rail (A)
Remove
Cover Plate


