2-13
Chapter 2: Installation Procedures
K. Rack Installation
After you have installed the inner rails and chassis ears to the chassis, you
are ready to install the outer rails of rail assemblies to the rack.
P r o c e d u r e s
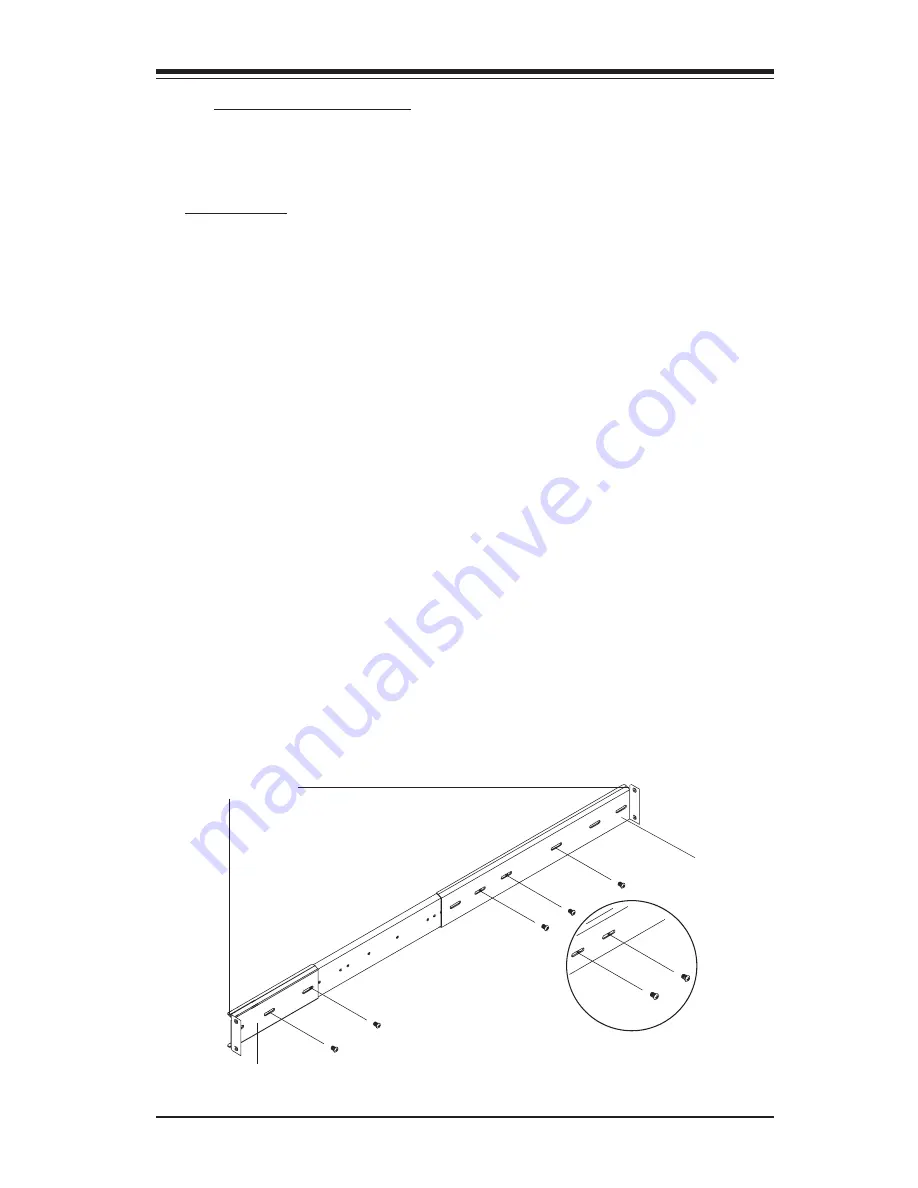
1. In the package, locate a pair of short brackets, and a pair of long brack-
ets. Please note that there are "R"(-Right) and "L"(-Left) marked on the
short and long brackets. Use the short bracket marked with "R" for the
outer rail that is going to be installed on the right side of the chassis (when
facing the front panel of the chassis.) However, use the long bracket
marked with "L" on the rear side of the same outer rail that you are going
to install on the right side of the chassis (since you are facing the rear
panel).
2. Align the holes on one of the short bracket against the holes located on
the front of the outer rail. Secure the short bracket to the front side of the
outer rail by putting two M4 screws through the bracket and the slide. (*Be
sure to adjust the distance between the long and short brackets so that the
outer rail can snugly fit into the depth of the racks before you tighten the
s c r e w s . )
3. Align the holes on one of the long bracket against the holes located on
the rear side of the outer rail. Secure the long bracket to the rear side of the
outer rail by putting three M4 screws through the bracket and the slide. (*Be
sure to adjust the distance between the long and short brackets so that the
outer rail can snugly fit into the depth of the racks before you tighten the
s c r e w s . )
4. Repeat the same steps for the other outer rail.
Front side
Short Bracket
Long Bracket
Rear side
Put two M4 Screws
through the bracket
and the outer rail
Put three M4 Screws
through the bracket and the
outer rail
Outer Rail

