


Chapter 6: Advanced Chassis Setup
6-5
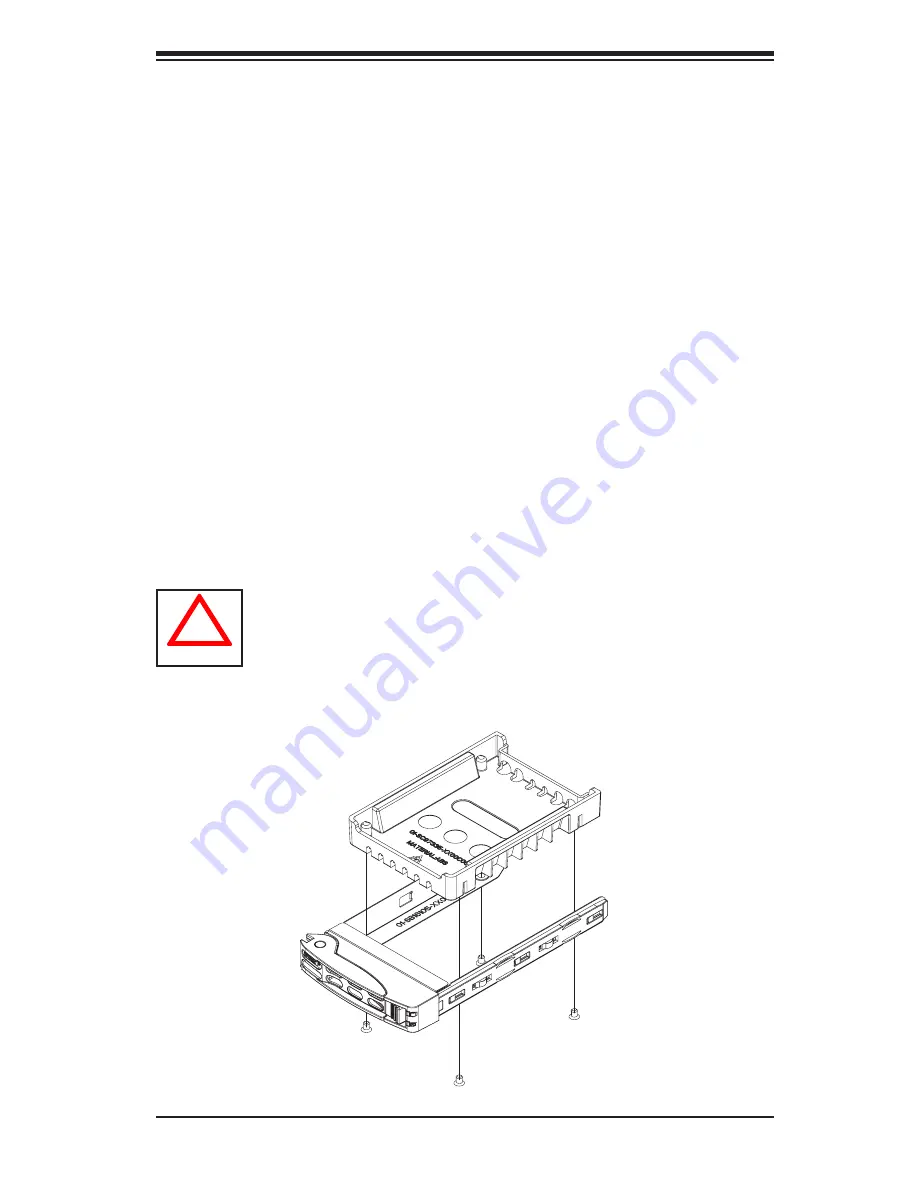
2. Align the drive in the carrier so that the screw holes of both line up. Note that
there are holes in the carrier marked “SATA” to aid in correct installation.
3. Secure the drive to the carrier with four screws as illustrated below.
4. Insert the drive carrier into its bay, keeping the carrier oriented so that the
hard drive is on the top of the carrier and the release button is on the right
side. When the carrier reaches the rear of the bay, the release handle will
retract.
5. Push the handle in until it clicks into its locked position
Removing a Hard Drive (Figure 6-4)
1. To remove a carrier, push the release button located beside the drive LEDs.
2. Swing the handle fully out and use it to pull the unit straight out (see Figure
6-4).
Caution: Except for short periods of time (such as for swapping hard
drives), do not operate the server with the hard drive carriers empty.
!
Figure 6-3: Installing a Hard Drive into a Carrier
Summary of Contents for 1027R-73DARF
Page 1: ... SUPERSERVER 1027R 73DARF SUPER USER S MANUAL 1 0 ...
Page 5: ...Notes Preface v ...
Page 14: ...1 6 SUPERSERVER 1027R 73DARF User s Manual Notes ...
Page 24: ...2 10 SUPERSERVER 1027R 73DARF User s Manual Notes ...
Page 62: ...5 30 SUPERSERVER 1027R 73DARF User s Manual Notes ...
Page 104: ...A 2 SUPERSERVER 1027R 73DARF User s Manual Notes ...


