SC825 Chassis Manual
5-4
5-5
Chapter 5: Chassis Setup and Maintenance
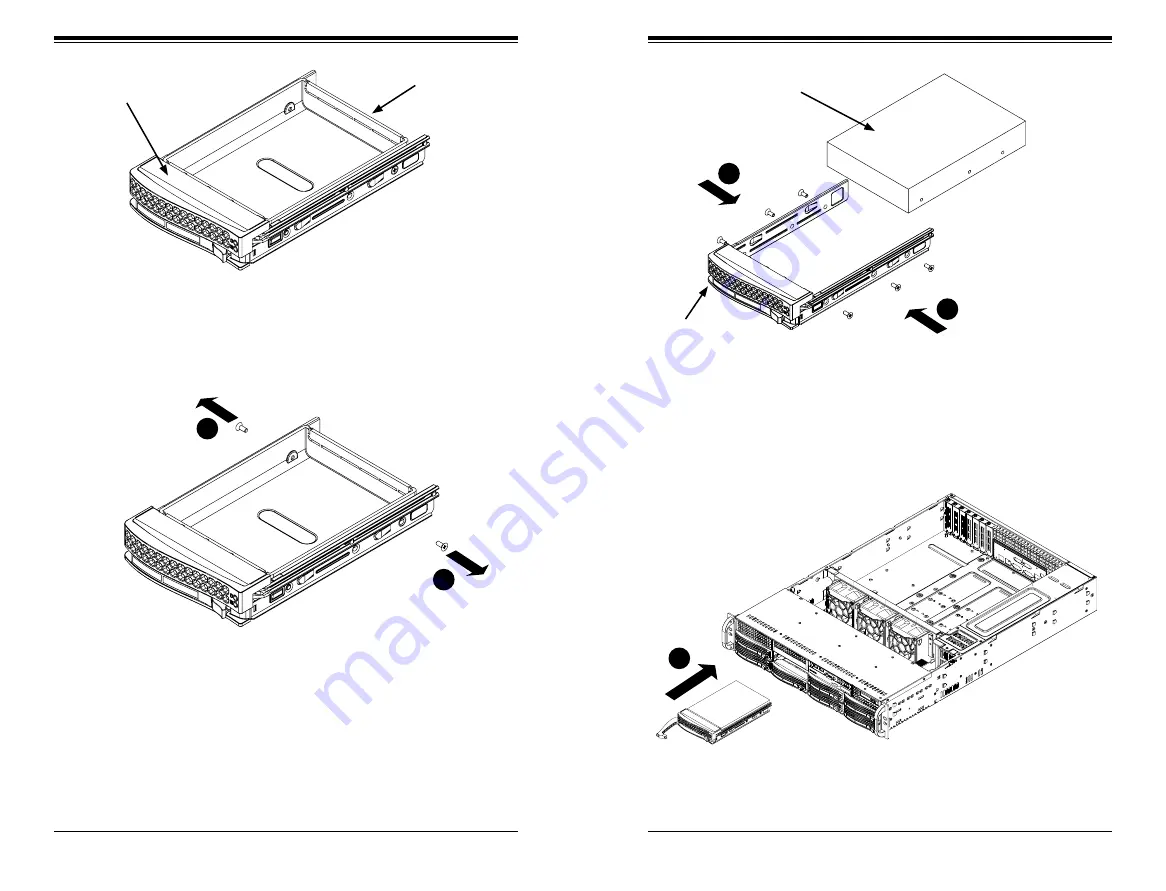
The drives are mounted in drive carriers to simplify their installation and removal
from the chassis. These carriers also help promote proper airflow for the drive
bays.
Figure 5-3. Chassis Drive Carrier
Installing a Hard Drive to the Hard Drive Carrier
1. Remove the screws securing the dummy drive to the carrier.
2. Remove the dummy drive from the carrier.
Warning: Except for short periods of time (swapping hard drives), do not operate the
server with the hard drives removed from the bays.
Figure 5-4. Removing Dummy Drive from Carrier
Drive Carrier
Dummy Drive
3. Install a new drive into the carrier with the printed circuit board side facing
down so that the mounting holes align with those in the carrier.
4. Secure the hard drive by tightening all six screws.
5. Replace the drive carrier into the chassis bay, making sure that the drive car-
rier handle is completely closed.
Drive Carrier
SAS/SATA
Hard Drive
Figure 5-5. Removing the Hard Drive
Figure 5-6. Installing the Hard Drive
1
1
4
4
5
Warning! Enterprise level hard disk drives are recommended for use in Supermicro
chassis and servers.
Summary of Contents for SC825TQ-560LP
Page 5: ...SC825 Chassis Manual viii Notes...
Page 9: ...SC825 Chassis Manual 1 6 Notes...
Page 20: ...2 20 SC825 Chassis Manual Notes...
Page 37: ...SC825 Chassis Manual 5 22 Notes...
Page 42: ...SC825 Chassis Manual 6 8 Notes...
Page 46: ...SC825 Chassis Manual A 6 Notes...


