


4-5
Chapter 4: Chassis Setup and Maintenance
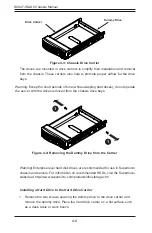
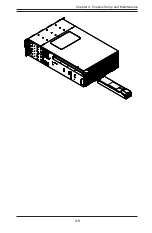
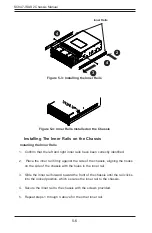
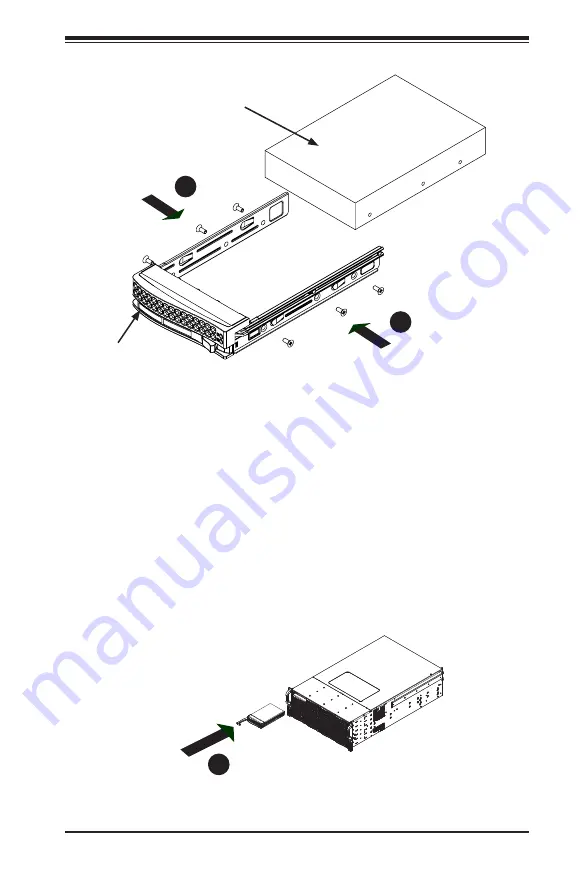
1. Slide the hard drive into the carrier with the printed circuit board side facing
down.
2. Carefully align the mounting holes in both the drive carrier and the hard drive.
3. Secure the hard drive to the carrier using six screws.
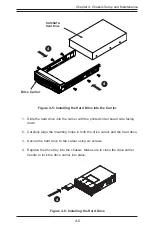
4. Replace the drive tray into the chassis. Make sure to close the drive carrier
handle to lock the drive carrier into place.
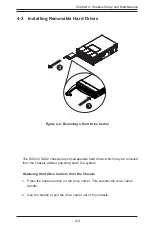
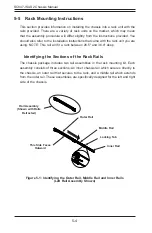
Drive Carrier
SAS/SATA
Hard Drive
Figure 4-5: Installing the Hard Drive into the Carrier
Figure 4-6: Installing the Hard Drive
4
4
4
Summary of Contents for SC847E16-R1K28JBOD
Page 12: ...SC847J SAS2 Chassis Manual 1 4 Notes ...
Page 40: ...SC847J SAS2 Chassis Manual 4 2 ...
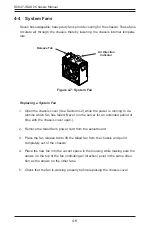
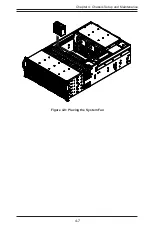
Page 45: ...4 7 Chapter 4 Chassis Setup and Maintenance Figure 4 8 Placing the System Fan ...
Page 47: ...4 9 Chapter 4 Chassis Setup and Maintenance ...
Page 48: ...SC847J SAS2 Chassis Manual 4 10 Notes ...
Page 58: ...SC847J SAS2 Chassis Manual 5 10 Notes ...
Page 64: ...SC847J SAS2 Chassis Manual B 2 Notes ...
Page 87: ...C 24 SC847J SAS2 Chassis Manual Notes ...
Page 111: ...D 24 SC847J Chassis Manual Notes ...
Page 120: ...E 9 Appendix E SC847J Chassis Internals and Externals Notes ...


