background image

7-18

SUPERSERVER 2026TT-HxRF User's Manual

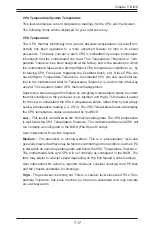
User intervention: If the system buzzer and Overheat LED has activated, take action 

immediately by checking the system fans, chassis ventilation and room temperature 

to correct any problems. 

Notes

The system may shut down if it continues for a long period to prevent 

1. 

damage to the CPU.

The information provided above is for your reference only. For more 

2. 

information on thermal management, please refer to Intel’s Web site at www.

Intel.com.

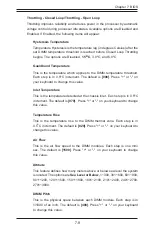
System Temperature: 

The system temperature will be displayed (in degrees in 

Celsius and Fahrenheit) as it is detected by the BIOS. 

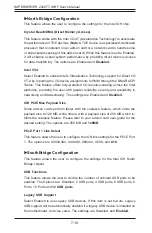
Fan Speed Control Monitor

This feature allows the user to decide how the system controls the speeds of the 

onboard fans. The CPU temperature and the fan speed are correlative. When 

the CPU on-die temperature increases, the fan speed will also increase, and vice 

versa. Select Workstation if your system is used as a Workstation. Select Server if 

your  system is used as a Server. Select “Disabled, (Full Speed @12V)” to disable 

the fan speed control function and allow the onboard fans to constantly run at the 

full speed (12V). The Options are: 1. 

Disabled (Full Speed)

, 2. Server Mode, 3. 

Workstation Mode.

Fan1 ~ Fan 4 Reading

This feature displays the fan speed readings from fan interfaces Fan1 through 

Fan5.

CPU1 Vcore, CPU2 Vcore, +5Vin, +12Vcc (V), VP1 DIMM, VP2 DIMM, 3.3Vcc (V), 

and Battery Voltage.

X

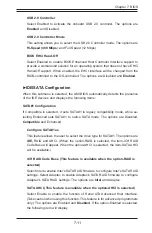
ACPI Confi guration

Use this feature to confi gure Advanced  Confi guration and Power Interface (ACPI) 

power management settings for your system. 

ACPI Version Features

The options are 

ACPI v1.0

, ACPI v2.0 and ACPI v3.0. Please refer to ACPI's website 

for further explanation: http://www.acpi.info/.

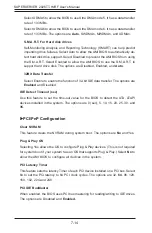
ACPI APIC Support

Select Enabled to include the ACPI APIC Table Pointer in the RSDT (Root System 

Description Table) pointer list. The options are 

Enabled 

and Disabled. 

Summary of Contents for SuperServer 2026TT-H6IBQRF

Page 1: ...SUPER USER S MANUAL Revision 1 0a SuperServer 2026TT HTRF SuperServer 2026TT HIBXRF SuperServer 2026TT HIBQRF SuperServer 2026TT H6RF SuperServer 2026TT H6IBXRF SuperServer 2026TT H6IBQRF...

Page 2: ...ny such disputes Super Micro s total liability for all claims will not exceed the price paid for the hardware product FCC Statement This equipment has been tested and found to comply with the limits f...

Page 3: ...n is shown in the table below Model Variations Differences between X8DTT x Models X8DTT HF X8DTT HIBXF X8DTT HIBQF IPMI 2 0 w KVM Over LAN Yes Yes Yes InfiniBand Connection No Yes Yes DDR IB No Yes No...

Page 4: ...the X8DTT HF X8DTT HIBXF X8DTT HIBQF serverboard including the locations and functions of connectors headers and jumpers Refer to this chapter when adding or removing processors or main memory and whe...

Page 5: ...v Preface Notes...

Page 6: ...1 5 SATA Subsystem 1 5 Control Panel 1 5 Rear I O Panel 1 5 Cooling System 1 5 1 4 2U Twin System Notes 1 6 Nodes 1 6 System Power 1 6 SAS SATA Backplane Drives 1 6 1 5 Contacting Supermicro 1 7 Chapt...

Page 7: ...l Panel LEDs 3 2 Alert LED 3 2 NIC 3 2 3 4 Drive Carrier LEDs 3 3 Chapter 4 System Safety 4 1 Electrical Safety Precautions 4 1 4 2 General Safety Precautions 4 2 4 3 ESD Precautions 4 3 4 4 Operating...

Page 8: ...nstalling and Removing Hard Drives 6 4 6 5 Node Installation Removal 6 7 6 6 Installing the Air Shrouds 6 9 Air Shrouds 6 9 6 7 Power Supply 6 9 Chapter 7 BIOS 7 1 Introduction 7 1 Starting BIOS Setup...

Page 9: ...82710 0B SAS SATA Accessories Twelve hard drive carriers six per node MCP 220 00075 0B One internal HDD backplane BPN SAS 217HQ Four SAS daughter cards 2026TT H6 models only BPN ADP SAS2 H8iR Four SA...

Page 10: ...r the system See Chapter 5 Section 6 for more details on installing memory into the system Onboard SAS 2026TT H6 models only An LSI 2108 SAS controller is integrated into a daughter card to provide si...

Page 11: ...IBQRF only Up to four USB 2 0 Universal Serial Bus connections 2 Rear USB Ports and 1 Type A Header w 2 USB connections supported are on each of the servers There are two sets of I O ports included in...

Page 12: ...1 4 SUPERSERVER 2026TT HxRF User s Manual Figure 1 1 Intel 5520 Chipset System Block Diagram Note1 This is a general block diagram Please see Chapter 5 for details...

Page 13: ...l Panel The SC217HQ R1400BP features four independant control panels Each control panel has LEDs to indicate power on network activity power fail fan fail system overheat conditions and the UID LED fo...

Page 14: ...ected to the server backplane by means of an adapter card System Power The server has an additional 1400W power supply module two total for power redundancy If a power supply module fails the other ba...

Page 15: ...per Micro Computer B V Het Sterrenbeeld 28 5215 ML s Hertogenbosch The Netherlands Tel 31 0 73 6400390 Fax 31 0 73 6416525 Email sales supermicro nl General Information support supermicro nl Technical...

Page 16: ...1 8 SUPERSERVER 2026TT HxRF User s Manual Notes...

Page 17: ...d in and note if it was damaged in any way If the server itself shows damage you should file a damage claim with the carrier who delivered it Decide on a suitable location for the rack unit that will...

Page 18: ...tom of the rack are fully extended to the floor with the full weight of the rack resting on them In single rack installation stabilizers should be attached to the rack In multiple rack installations t...

Page 19: ...manufacturer s maximum rated ambient tempera ture Tmra Reduced Airflow Equipment should be mounted into a rack so that the amount of airflow required for safe operation is not compromised Mechanical L...

Page 20: ...ting the server for the first time it is important to remove the protec tive film covering the top of the chassis in order to allow for proper ventilation and cooling Removing the Protective Film Peel...

Page 21: ...he Sections of the Rack Rails The chassis package includes two rail assemblies in the rack mounting kit Each assembly consists of two sections an inner fixed chassis rail that secures directly to the...

Page 22: ...ntified 1 Place the inner rail firmly against the side of the chassis aligning the hooks 2 on the side of the chassis with the holes in the inner rail Slide the inner rail forward toward the front of...

Page 23: ...f 3 the rack If necessary use screws to secure the outer rails to the rack as illustrated above Pull out the rear of the outer rail adjusting the length until it fits within the 4 posts of the rack Ha...

Page 24: ...he front locking position of the middle rail Align the chassis inner rails with the front of the middle rails 4 Slide the inner rails on the chassis into the middle rails keeping the pressure 5 even o...

Page 25: ...locking tabs in 5 the chassis rails push the right side tab down and the left side tab up to continue to pull the system out past the locked position Checking the Components and Setup You may have on...

Page 26: ...to install hard drives please refer to Chapter 6 Checking the Airflow Airflow is provided by four 8 cm PWM fans and for each serverboard one 1 air shroud The system component layout was carefully desi...

Page 27: ...Chapter 2 Server Installation 2 11 Figure 2 6 Removing a Node from the System 1 1 1 1 1 2 1 2 1 1...

Page 28: ...2 12 SUPERSERVER 2026TT HxRF User s Manual Notes...

Page 29: ...ol panel a power on off button and a UID button Power This is the main power button which is used to apply or turn off the main system power only to the node it is connected to Depressing this button...

Page 30: ...solid red light indicates an overheat condition in the system A red light that flashes in one second inter vals indicates a fan failure A red light which flashes in four second intervals indi cates a...

Page 31: ...is blue LED on the front of the drive carrier indicates drive activity A connection to the SAS SATA backplane enables this LED to blink on and off when that particular drive is being accessed Red The...

Page 32: ...3 4 SUPERSERVER 2026TT HxRF User s Manual Notes...
Page 33: ...st power down the system with the operating system The unit may have more than one power supply cord Disconnect both power supply cords before servicing to avoid electrical shock When working around e...

Page 34: ...This product may be connected to an IT power system In all cases make sure that the unit is also reliably connected to Earth ground Serverboard Battery CAUTION There is a danger of explosion if the o...

Page 35: ...ag Do not let components or PCBs come into contact with your clothing which may retain a charge even if you are wearing a wrist strap Handle a board by its edges only do not touch its components perip...

Page 36: ...e environment Do not discard a used battery in the garbage or a public landfill Please comply with the regulations set up by your local hazardous waste management agency to dispose of your used batter...

Page 37: ...important to handle them very carefully see previous chapter To prevent the serverboard from bending keep one hand under the center of the board to support it when handling The following measures are...

Page 38: ...gure 5 1 I O Ports Note The InfiniBand port is included on the 2026TT H6IBXRF and 2026TT H6IBQRF only 1 Dedicated IPMI LAN 6 COM1 Port 2 USB Port 1 7 VGA Port 3 USB Port 0 8 InfiniBand Port 4 LAN1 9 U...

Page 39: ...otherwise contact your retailer immediately Refer to the Supermicro web site for updates on CPU support When handling the processor avoid placing direct pressure on the label area of the fan Also do n...

Page 40: ...ging the CPU or the socket With the CPU in the socket 4 inspect the four corners of the CPU to make sure that it sits level and is properly installed Once the CPU is securely seated 5 in the socket lo...

Page 41: ...PU so that the four mounting holes are aligned with those on the preinstalled heatsink retention mechanism Screw in two diagonal screws i e 4 the 1 and the 2 screws until just snug Do not fully tighte...

Page 42: ...it from the CPU Do not use excessive force when wriggling the heatsink Once the heatsink is loose 4 remove it from the CPU socket To reinstall the CPU and the 5 heatsink clean the surface of the CPU...

Page 43: ...ing it incorrectly Gently 2 press down on the DIMM until it snaps into place in the slot see Figure 5 2 Repeat for all DIMMs See tables below and on following pages 3 CAUTION Exercise extreme care whe...

Page 44: ...Figure 5 2 DIMM Installation Top View of DDR3 Slot Release Tab Release Tab Note Notch should align with the receptive key point on the slot Notch Notch Front View DIMM Population Table DIMM Slots per...

Page 45: ...rd with the locking tab 3 Possible System Memory Allocation Availability System Device Size Physical Memory Remaining Available 3 GB Total System Memory Physical Memory Remaining Available 4 GB Total...

Page 46: ...K1 USB0 1 IPMI_LAN P1 DIMM1A P1 DIMM1B P1 DIMM2A P1 DIMM2B P1 DIMM3B P1 DIMM3A InfiniBand Connector P2 DIMM2A P2 DIMM2B P2 DIMM1A P2 DIMM1B CPU1 CPU2 LAN1 LAN2 IPMB COM1 VGA Battery P2 DIMM3A P2 DIMM3...

Page 47: ...for IPMI 2 0 X8DTT HF HIBXF HIBQF IPMB IPMB Header X8DTT HF HIBXF HIBQF JF2 Supermicro Proprietary Slot for Power Control Panel I SATA Connections JNMI1 NMI Non Maskable Interrupt Header JRST1 System...

Page 48: ...be used to provide audible alarms for various beep codes See the table on the right for pin definitions Internal Buzzer Pin Definitions Pin Definition Pin 1 Pos Beep In Pin 2 Neg Alarm Speaker NMI He...

Page 49: ...control is only available for 4 pin fans The fan speeds are controlled by Thermal Management via Hardware Monitoring in the Advanced Setting in the BIOS The default setting is disabled See the table...

Page 50: ...Ground 9 TD3 88 Ground NC No Connection Note The G pins are for ground InfiniBand Connection X8DTT HIBXF HIBQF The onboard InfiniBand connector is located on the serverboard backplane This connec tion...

Page 51: ...the UID switch again to turn off both LED Indicators These UID Indi cators provide easy identification of a system unit that may be in need of service See the table on the right for pin definitions No...

Page 52: ...both pins and Open means the jumper is either on only one pin or com pletely removed CMOS Clear JBT1 is used to clear CMOS which will also clear any passwords Instead of pins this jumper consists of c...

Page 53: ...will have Watch Dog reboot the system if a program freezes Jumping pins 2 3 will generate a non maskable inter rupt for the program that has frozen See the table on the right for jumper settings Watch...

Page 54: ...When this LED is on the system power is on Be sure to turn off the system and unplug the power cord before removing or installing components See the table at right for more information Onboard PWR LED...

Page 55: ...is LED indicates the status of hard drive activitiy or SATA drive activity supported by the South Bridge Rear UID LED LE4 The Rear UID LED is located at LE4 on the serverboard Refer to Section 5 7 for...

Page 56: ...er installing each item you must re boot the system before proceeding with the next item on the list The bottom icon with a CD on it allows you to view the entire contents of the CD 5 11 Installing Ad...

Page 57: ...tor III displays crucial system information such as CPU temperature system voltages and fan status See the Figure below for a display of the Super Doctor III interface Notes The default User Name and...

Page 58: ...evision 1 0 can be downloaded from our Web site at ftp ftp supermicro com utility Supero_Doctor_III You can also download SDIII User s Guide at http www supermicro com manuals other SDIII_User_Guide p...

Page 59: ...efully The following measures are generally sufficient to protect your equipment from ESD discharge Precautions Use a grounded wrist strap designed to prevent static discharge Touch a grounded metal o...

Page 60: ...s inform you of system status for the serverboard it is connected to See Chapter 3 for details on the LEDs and the control panel buttons 6 3 System Fans The system has four hot swappable 8 cm PWM fans...

Page 61: ...up to full speed and the overheat fan fail LED on the control panel will blink on and off about once per second Replace any failed fan at your earliest convenience with the same type and model See not...

Page 62: ...all twelve drive carriers must remain in the chassis to maintain proper airflow 6 4 Hard Drive Installation Removal Overview The hard drives are mounted in drive carriers to simplify their installatio...

Page 63: ...ase button located beside the drive LEDs 1 Swing the handle fully out and use it to pull the unit straight out see Figure 2 6 4 Be aware that powering down a node will power down all the hard drives t...

Page 64: ...s Manual Figure 6 4 Removing a Hard Drive Figure 6 5 Drives and Nodes Logical Configuration Note see Figure 6 1 for the locations of the control panels that are associated with each node Node B Node...

Page 65: ...ugh out the system For this reason nodes should be removed serviced and replaced as quickly as possible Also note that powering down a node will power down all the hard drives that are logically assoc...

Page 66: ...6 8 SUPERSERVER 2026TT HxRF User s Manual Figure 6 7 Removing a System Node 1 2 1 2 1 3 1 3 Note numbers correspond to the procedural steps as described on the previous page...

Page 67: ...ill take the full load and allow the system to continue operation without interruption The LED on the control panel will flash slowly about 4 seconds on and 4 off and remain flashing until the failed...

Page 68: ...6 10 SUPERSERVER 2026TT HxRF User s Manual Figure 6 8 Removing the Power Supply Release Tab...

Page 69: ...cannot be configured Options in blue can be configured by the user The right frame displays the key legend Above the key legend is an area reserved for a text message When an option is selected in th...

Page 70: ...liable for direct indirect special incidental or consequential damages arising from a BIOS update If you have to update the BIOS do not shut down or reset the system while the BIOS is updating This i...

Page 71: ...e AMI BIOS will automatically display the status of the processor used in your system CPU Type This item displays the type of CPU used in the motherboard Speed This item displays the speed of the CPU...

Page 72: ...en options to be modified between POST mes sages or the OEM logo Select Disabled to display the POST messages Select Enabled to display the OEM logo instead of the normal POST messages The op tions ar...

Page 73: ...ds or longer The options are Instant_Off and 4_Second_Override Restore on AC Power Loss Use this feature to set the power state after a power outage Select Power Off for the system power to remain off...

Page 74: ...puter The options are Enabled and Disabled Note If there is any change to this setting you will need to power off and restart the system for the change to take effect Please refer to Intel s web site...

Page 75: ...e C3 C6 or C7 requests to C1 based on un core auto demote information The options are Disabled and Enabled C3 Auto Demotion When enabled the CPU will conditionally demote C6 or C7 requests to C3 based...

Page 76: ...f memory to run the same set of operations in parallel Sparing A preset threshold of correctable errors is used to trigger fail over The spare memory is put online and used as active memory in place o...

Page 77: ...this value Inlet Temperature This is the temperature detected at the chassis inlet Each step is in 0 5o C increment The default is 070 Press or on your keyboard to change this value Temperature Rise...

Page 78: ...iability security and availability in networking and data sharing The settings are Enabled and Disabled IOH PCIE Max Payload Size Some add on cards perform faster with the coalesce feature which limit...

Page 79: ...acy compatibility mode while se lecting Enhanced sets SATA 1 to native SATA mode The options are Disabled Compatible and Enhanced Configure SATA 1 as This feature allows the user to select the drive t...

Page 80: ...the LBA mode the maximum drive capacity is 137 GB For drive capacities over 137 GB your system must be equipped with a 48 bit LBA mode addressing If not contact your manufacturer or install an ATA 13...

Page 81: ...DMA mode 1 It has a data transfer rate of 4 2 MBs Select SWDMA2 to allow the BIOS to use Single Word DMA mode 2 It has a data transfer rate of 8 3 MBs Select MWDMA0 to allow the BIOS to use Multi Word...

Page 82: ...unction of 32 bit IDE data transfer The options are Enabled and Disabled IDE Detect Timeout sec Use this feature to set the time out value for the BIOS to detect the ATA ATAPI devices installed in the...

Page 83: ...XRemote Access Configuration Remote Access This allows the user to enable the Remote Access feature The options are Disabled and Enabled If Remote Access is set to Enabled the following items will di...

Page 84: ...sible CPU overheat Warning 1 Any temperature that exceeds the CPU threshold tempera ture predefined by the CPU manufacturer may result in CPU overheat or system instability When the CPU temperature re...

Page 85: ...rtain thermal conditions in the processor Low Medium and High This makes it easier for the user to understand the CPU s temperature status rather than by just simply seeing a temperature reading i e 2...

Page 86: ...increases the fan speed will also increase and vice versa Select Workstation if your system is used as a Workstation Select Server if your system is used as a Server Select Disabled Full Speed 12V to...

Page 87: ...d and Disabled XGeneral WHEA Configuration WHEA Support Select Enabled to enable Windows Hardware Error Architecture WHEA sup port which will provide a common infrastructure for handling hardware erro...

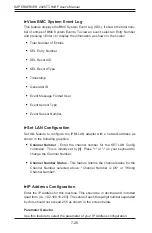
Page 88: ...IPMI LAN adapter with a network address as shown in the following graphics Channel Number Enter the channel number for the SET LAN Config command This is initially set to 1 Press or on your keyboard t...

Page 89: ...rent IP address used for your IPMI connection XMAC Address Configuration Enter the Mac address for this machine This should be in decimal and in dotted quad form i e 192 168 10 253 The value of each t...

Page 90: ...in dotted quad form i e 192 168 10 253 The value of each three digit number separated by dots should not exceed 255 as shown in the screen below Parameter Selector Use this feature to select the param...

Page 91: ...rd has been entered for the system Not In stalled means that a user password has not been used Change Supervisor Password Select this feature and press Enter to access the submenu and then type in a n...

Page 92: ...Disk Format command or attempts to write to the boot sector of the hard disk drive The options are Enabled and Disabled 7 5 Boot Configuration Use this feature to configure boot settings XBoot Device...

Page 93: ...detected i e 1st Drive 2nd Drive 3rd Drive etc 1st Drive SATA XXXXXXXXX XRemovable Drives This feature allows the user to specify the boot sequence from available Removable Drives The settings are 1s...

Page 94: ...ity Program Load Optimal Defaults To set this feature select Load Optimal Defaults from the Exit menu and press Enter Then select OK to allow the AMI BIOS to automatically load Optimal De faults to th...

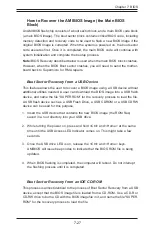
Page 95: ...nload the BIOS image into a USB flash device and name the file SUPER ROM for the recovery process to load the file A USB flash device such as a USB Flash Drive a USB CDROM or a USB CDRW device can be...

Page 96: ...al Flash support embedded in the BIOS image file The Host system should also have a serial port and a terminal program that supports XModem Transfer protocol Hyper Terminal for the Windows operating s...

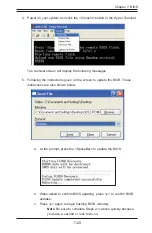
Page 97: ...the instructions given on the screen to update the BIOS These instructions are also shown below a At the prompt press the SpaceBar to update the BIOS b When asked to confirm BIOS updating press y to...

Page 98: ...r Send b Specify the location of the ROM file and select the proper protocol XMo dem c Press Send to start ROM File extraction See the picture below d Once the ROM file extraction is completed the mes...

Page 99: ...l not allow the system to continue the boot up procedure If a fatal error occurs you should consult with your system manufac turer for possible repairs A 1 BIOS Error Beep Codes BIOS Error Beep Codes...

Page 100: ...A 2 SUPERSERVER 2026TT HxRF User s Manual Notes...
Page 101: ...ys When the Windows XP 2003 Setup screen appears press S to specify 3 additional device s Insert the driver diskette Intel AA RAID XP 2000 2003 Driver for ICH10R into 4 the floppy drive and press the...

Page 102: ...ws OS Setup screen will display 2 From the Windows XP 2003 Setup screen press the Enter key The 3 XP 2003 Setup will automatically load all device files and then continue with the Windows XP 2003 inst...

Page 103: ...d Memory Capacity each Serverboard Twelve DIMM sockets that can support up to 192 GB of registered ECC or 48 GB of unbuffered ECC Non ECC DDR3 1333 1066 800 SDRAM Note Refer to Section 5 6 for details...

Page 104: ...lbs 38 6 kg System Cooling Four 8 cm PWM Pulse Width Modulated fans System Input Requirements AC Input Voltage 100 240V AC auto range Rated Input Current 11 5 5 5A max Rated Input Frequency 50 to 60 H...

Page 105: ...1000 4 4 EN 61000 4 5 EN 61000 4 6 EN 61000 4 8 EN 61000 4 11 Safety CSA EN IEC UL 60950 1 Compliant UL or CSA Listed USA and Canada CE Marking Europe California Best Management Practices Regulations...

Page 106: ...erform be reasonably expected to result in significant injury or loss of life or catastrophic property damage Accordingly Supermicro dis claims any and all liability and should buyer use or sell such...

Reviews: