B-3
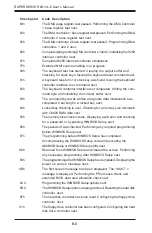
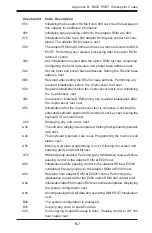
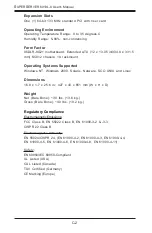
Appendix B: BIOS POST Checkpoint Codes
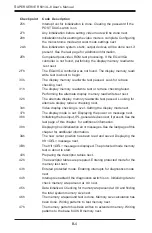
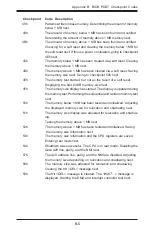
initialization before the keyboard BAT command is issued.
0Ch
The keyboard controller input buffer is free. Next, issuing the BAT
command to the keyboard controller.
0Eh
The keyboard controller BAT command result has been verified.
Next, performing any necessary initialization after the keyboard
controller BAT command test.
0Fh
The initialization after the keyboard controller BAT command test is
done. The keyboard command byte is written next.
10h
The keyboard controller command byte is written. Next, issuing the
Pin 23 and 24 blocking and unblocking command.
11h
Next, checking if <End or <Ins> keys were pressed during power on.
Initializing CMOS RAM if the
Initialize CMOS RAM in every boot
AMIBIOS POST option was set in AMIBCP or the <End> key was
pressed.
12h
Next, disabling DMA controllers 1 and 2 and interrupt controllers 1 and
2.
13h
The video display has been disabled. Port B has been initialized. Next,
initializing the chipset.
14h
The 8254 timer test will begin next.
19h
The 8254 timer test is over. Starting the memory refresh test next.
1Ah
The memory refresh line is toggling. Checking the 15 second on/off
time next.
2Bh
Passing control to the video ROM to perform any required configu-
ration before the video ROM test.
2Ch
All necessary processing before passing control to the video ROM
is done. Looking for the video ROM next and passing control to it.
2Dh
The video ROM has returned control to BIOS POST. Performing any
required processing after the video ROM had control.
23h
Reading the 8042 input port and disabling the MEGAKEY Green
PC feature next. Making the BIOS code segment writable and
performing any necessary configuration before initializing the
interrupt vectors.
24h
The configuration required before interrupt vector initialization
has completed. Interrupt vector initialization is about to begin.
Summary of Contents for SuperServer 6013L-8
Page 1: ...SUPERSERVER 6013L 8 USER SMANUAL 1 0 SUPER...
Page 5: ...v Preface Notes...
Page 10: ...Notes SUPERSERVER 6013L 8 User s Manual x...
Page 26: ...2 10 SUPERSERVER 6013L 8 Manual Notes...
Page 38: ...5 4 SUPERSERVER 6013L 8 User s Manual Figure 5 2 Heatsink Installation...
Page 69: ...Chapter 6 Advanced Chassis Setup 6 9 Figure 6 5 Removing Replacing the Power Supply...
Page 70: ...6 10 SUPERSERVER 6013L 8 Manual Notes...
Page 96: ...7 26 SUPERSERVER 6013L 8 Manual Notes...
Page 98: ...A 2 SUPERSERVER 6013L 8 User s Manual Notes...

