background image

SPECIFICATIONS: 

Car Type: 

Audi Q3 Style 

Battery Type: 

12V7AH 

Electric Motor: 

12V30W(Drive)  12V8W(Steering) 

Age Range: 

 5 Years 

Max. Weight: 

65 lbs 

Product Size: 

50

”L x 

34

”W x 2

5

”H


Avg. Speed: 

 3 MPH 

Charging time: 

8-12 hrs 

Avg. Use Time: 

1-2 Hrs (depending on use) 

Remote Battery: 

2 - AA (not included) 


IMPORTANT! 


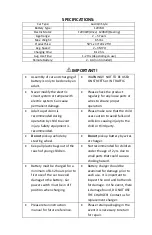
Assembly of car and charging of 
battery is only to be done by an 
adult. 


WARNING!!  NOT TO BE USED 
ON STREETS or IN TRAFFIC. 


Never modify the electric 
circuit system or tamper with 
electric system. Can cause 
permanent damage. 


Please check the product 
regularly for any loose parts or 
wires to ensure proper 
operation. 


Adult supervision is 
recommended during 
operation by child to avoid 
injury. Safety equipment is 
recommended. 


Please make sure that the child 
uses caution to avoid falls and 
collisions causing injury to the 
child or third party. 


Do not

 pick up vehicle by 

steering wheel. 


Do not

 pick up battery by wires 

or charger. 


Keep all plastic bags out of the 
reach of young children. 


Not recommended for children 
under the age of 2 yrs. due to 
small parts that could cause a 
choking hazard. 


Battery must be charged for a 
minimum of 8-12 hours prior to 
first use of the car to avoid 
damage to the battery. Car 
power switch must be in off 
position when charging. 


Battery charger should be 
examined for damage prior to 
each use.  It is important to 
inspect the cord and both ends 
for damage.  In the event, there 
is damage found, DO NOT USE 
THE CHARGER!  Contact us for 
replacement charger. 


Please retain instruction 
manual for future reference. 


Please retain packaging in the 
event it is necessary to return 
for repair. 

Summary of Contents for Audi Q3

Page 1: ...ion and Operation Instructions Please read this instruction manual carefully It is important to read and follow all of the steps during assembly to ensure proper operation and safety of the child Plea...

Page 2: ...is recommended Please make sure that the child uses caution to avoid falls and collisions causing injury to the child or third party Do not pick up vehicle by steering wheel Do not pick up battery by...

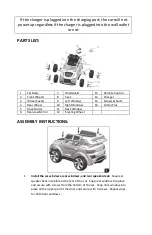
Page 3: ...Screws Nuts 4 Rear Wheel 10 Right Window 16 Cotter Pins 5 Drive Motor 11 Back Window 6 Rearview Mirror 12 Steering Wheel ASSEMBLY INSTRUCTIONS 1 Install the car windows rear windows and rear speaker...

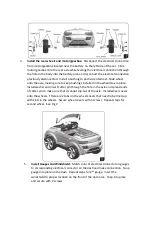
Page 4: ...the car until it snaps into place Install the exterior rearview mirrors into place and secure with screws from the bottom of the car 3 Install front wheels Install a washer on the front axle Install a...

Page 5: ...n place Install washer and insert cotter pin through the hole in the axle and spread ends of cotter pin to make sure that it cannot slip out of the axle Install wheel covers onto the wheels There are...

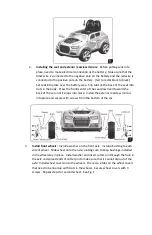
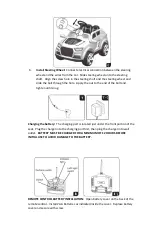
Page 6: ...olt and tighten until snug Charging the battery The charging port is located just under the front portion of the seat Plug the charger into the charging port first then plug the charger into wall outl...

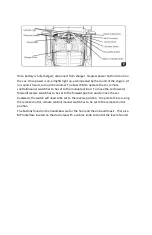
Page 7: ...to the manual position To move the car forward forward reverse switch has to be set to the forward position and to move the car backward the switch will need to be set to the reverse position To oper...

Page 8: ...let 3 Battery charger is damaged Re connect the battery connector to the car electrical connector Try another wall outlet Replace battery charger Shortened battery life Battery was not charged fully B...

Page 9: ...ease turn off power switch If not using for an extended period of time please disconnect the battery CHARGING and BATTERY MAINTENANCE IMPORTANT Battery must be charged for a minimum of 12 hours prior...

Reviews: