background image


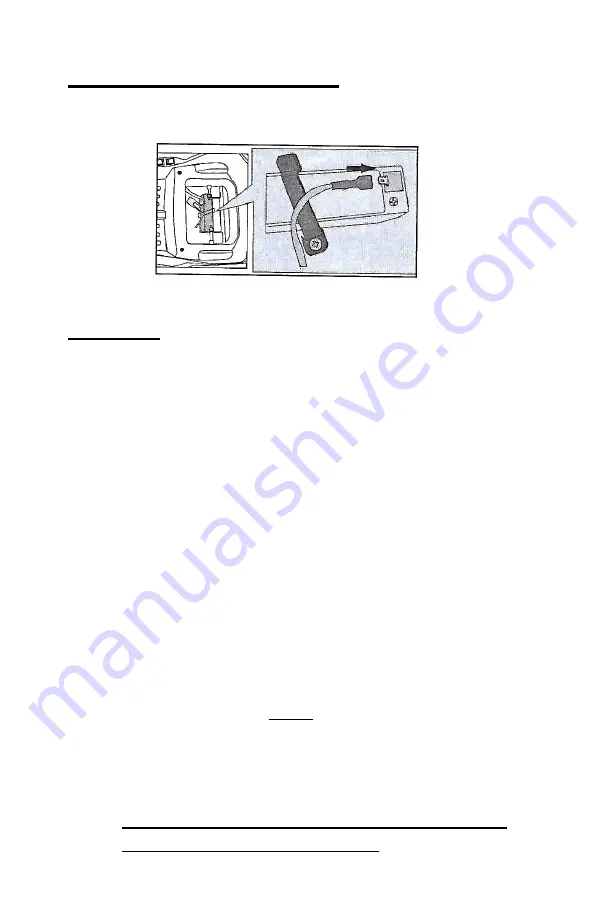
Power supply Connection: 

Connect the power as shown  in the diagram (most of the time this  will 
already been done for you). The red wire should be connected into the red 
port, and the black wire going to the black port.  


Charging: 

The charging port is located under the seat of the vehicle.  Plug the 
charger into the charging port first, then plug the charger into a wall 
outlet.


Please Note:


As a safety precaution and to avoid damage to the 

charger, the car will not power up while charger is plugged into the 
charging port of the car. 


BATTERY MUST BE CHARGED FOR A MINIMUM OF 8-12 HOURS 
BEFORE INITIAL USE TO AVOID DAMAGE TO THE


BATTERY. ONLY AN 

ADULT SHOULD CHARGE AND RECHARGE THE BATTERY! 


BATTERY REPLACEMENT AND DISPOSAL: 

The battery will eventually lose the ability to hold a charge. Depending 
on the amount of use, and varying conditions, the battery should 
operate for one to three years. Follow these steps to replace and/or 
dispose of the battery:


Disconnect the battery connectors 


Remove the battery bracket 


Carefully lift the battery - you may want to wear protective 
gloves before removal - 

Do Not

 lift the battery by its 

connectors or cables 


Place the dead battery in a plastic bag 


Replace the battery and reconnect the connectors 
Reinstall the battery bracket  

Please give us a call for your battery replacement needs 
or visit our website to place an order.


Summary of Contents for Rescue Response Kids Ride on Car

Page 1: ...ructions Please read this instruction manual carefully It is important to read and follow all of the steps during assembly to ensure proper operation and safety of the child Please keep this manual fo...

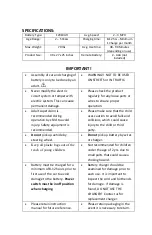
Page 2: ...s recommended Please make sure that the child uses caution to avoid falls and collisions which could cause injury to the child or third party Do not pick up vehicle by steering wheel Do not pick up ba...

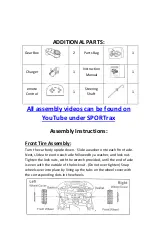
Page 3: ...the car will not power up regardless if the charger is plugged into the wall outlet or not PARTS LIST No Name of Part Qty No Name of Part Qty 1 Main Body 1 5 Rear Wing 1 2 Seat 1 6 Driving Wheel 4 3 W...

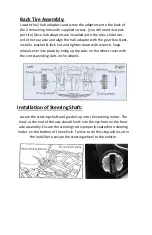
Page 4: ...Tire Assembly Turn the car body upside down Slide a washer onto each front axle Next slide a tire onto each axle followed by a washer and lock nut Tighten the lock nuts with the wrench provided until...

Page 5: ...nd tighten down with wrench Snap wheel cover into place by lining up the tabs on the wheel cover with the corresponding slots in the wheels Installation of Steering Shaft Locate the steering shaft and...

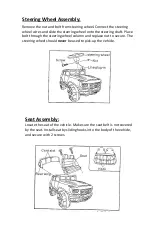
Page 6: ...the steering shaft Place bolt through the steering wheel column and replace nut to secure The steering wheel should never be used to pick up the vehicle Seat Assembly Locate the seat of the vehicle M...

Page 7: ...S BEFORE INITIAL USE TO AVOID DAMAGE TO THE BATTERY ONLY AN ADULT SHOULD CHARGE AND RECHARGE THE BATTERY BATTERY REPLACEMENT AND DISPOSAL The battery will eventually lose the ability to hold a charge...

Page 8: ...ht recommendations Do not pull anything with the vehicle Do not let water or any other liquids touch circuits battery or other parts Do not modify the structure or electric circuit system of this vehi...

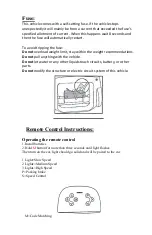
Page 9: ...Power Button Panel...
Page 10: ...pen the battery Battery contains lead acid and other materials that are toxic and corrosive Do not open the charger Exposed wiring and circuitry inside case could cause electric shock NEVER allow a ch...

Page 11: ...eat such as stoves and heaters Plastic parts may melt Recharge the battery after each use Only an adult should handle the battery Recharge the battery at least once a month when not being used Do not...

Page 12: ...path Vehicle is being used in harsh conditions Change the battery Charge the battery Do not exceed max weight limit Use on flat surfaces Avoid using car in harsh conditions Noise coming from motor ge...

Reviews: