V 01-2017
www.superwind.com
35
Remember to hold the rotor at the hub only (not by the blades)
as the sharp edges of the rotor blades could cause injuries or
the blades could be damaged.
Also remember, once the turbine is completely assembled, carry
the completed wind turbine by the generator unit (nacelle) only -
never by the blades. Graphic No. 7.4.2.1.
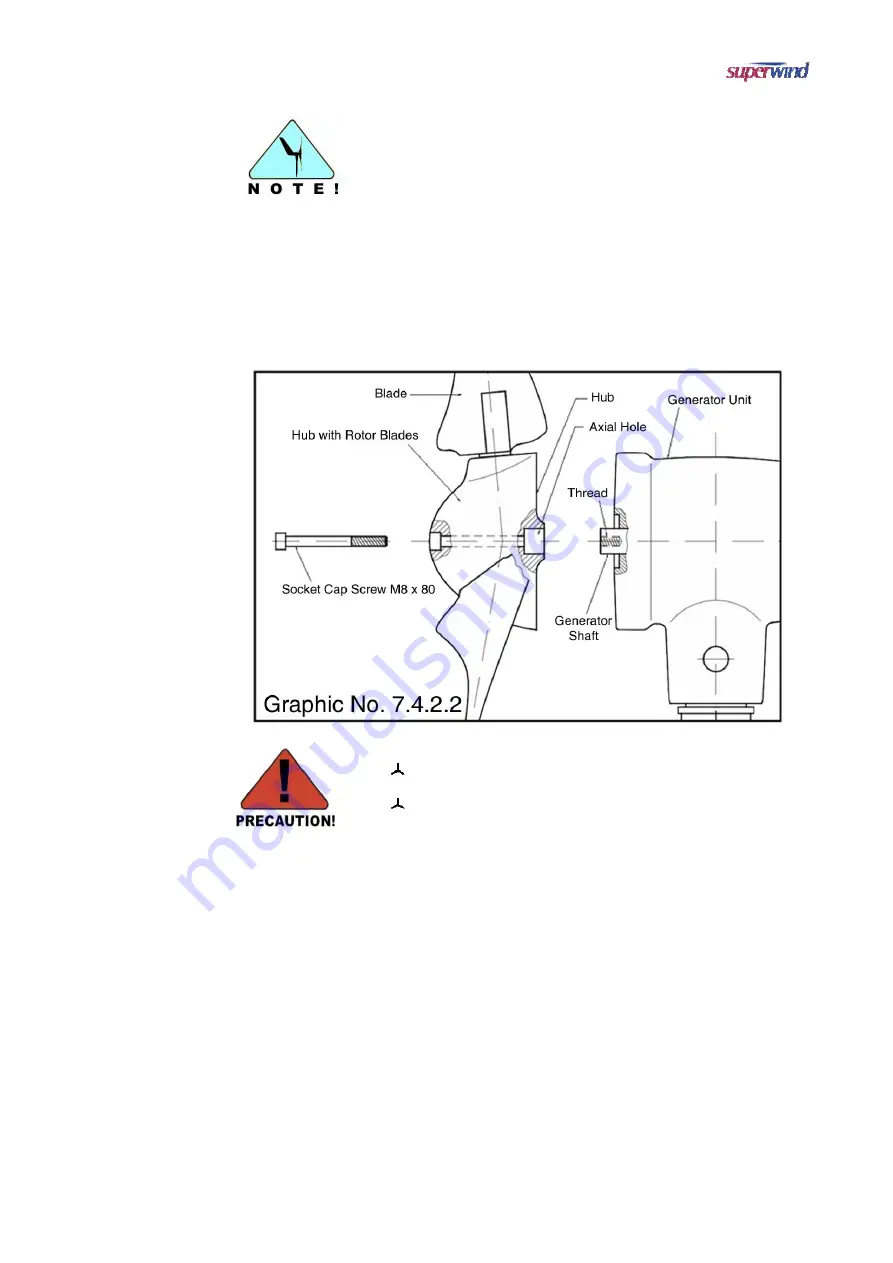
Take care not to push the generator shaft into the housing of the generator unit!
Insert the socket cap screw M8 x 80 through the hub and tighten it until you
cannot feel any axial play (the generator shaft should now be flush inside the
rotor assembly). Now tighten the screw at 18 Nm (13.3 ft. lbs.). Graphic No.
7.4.2.2.
To avoid damage inside the generator, do not push the
generator shaft into the generator housing.
This could void the Warranty!
Summary of Contents for 350 12V
Page 1: ...www superwind com Superwind 350 12V 24V Manual North Central and South America regions 01 2017...
Page 2: ...V 01 2017 www superwind com 1 Page intentionally left blank...
Page 52: ...V 01 2017 www superwind com 51 ATTACHMENT A Stop Switch Mounting Guidelines...
Page 53: ...V 01 2017 www superwind com 52 STOP SWITCH Mounting Guidelines Manual 01 2017...
Page 60: ...V 01 2017 www superwind com 59 ATTACHMENT B Superwind Charge Regulator 12V Marine...
Page 61: ...V 01 2017 www superwind com 60 Charge Regulator 12V Marine Instructions Manual 01 2017...
Page 70: ...V 01 2017 www superwind com 69 ATTACHMENT C Superwind Charge Regulator 24V Marine...
Page 71: ...V 01 2017 www superwind com 70 Charge Regulator 24V Marine Instructions Manual...


