

REV1-040720
Questions, problems, missing parts? Contact technical support department at
657-341-0362, 8:00 a.m. - 5 p.m., PST, Monday - Friday or visit us on-line at
www.lifesmartgrills.com or email us at cs@scsources.com.
Please have your model and serial number ready
ATTACH YOUR RECEIPT HERE
Purchase Date ____________Serial Number (
located on back of unit
) __________________
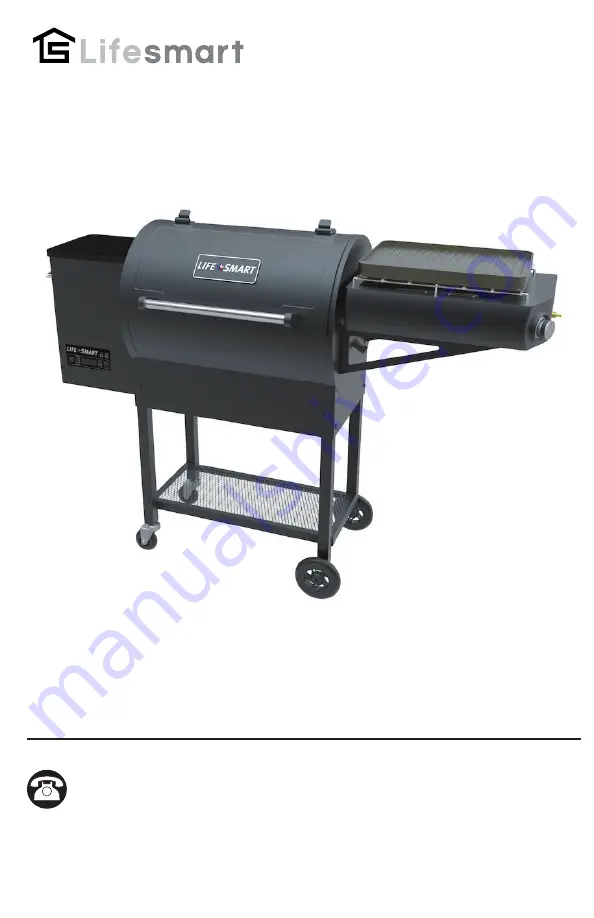
LIFE SMART
®
is a registered trademark of
Supply Chain Sources LLC., All Rights Reserved.
1
COMBO PELLET SMOKER
GRILL AND GRIDDLE
model / customer number:
SCS-P760
(Pellet Grill) /
SG160
(Griddle)


