36
Chapter 2
Getting Started
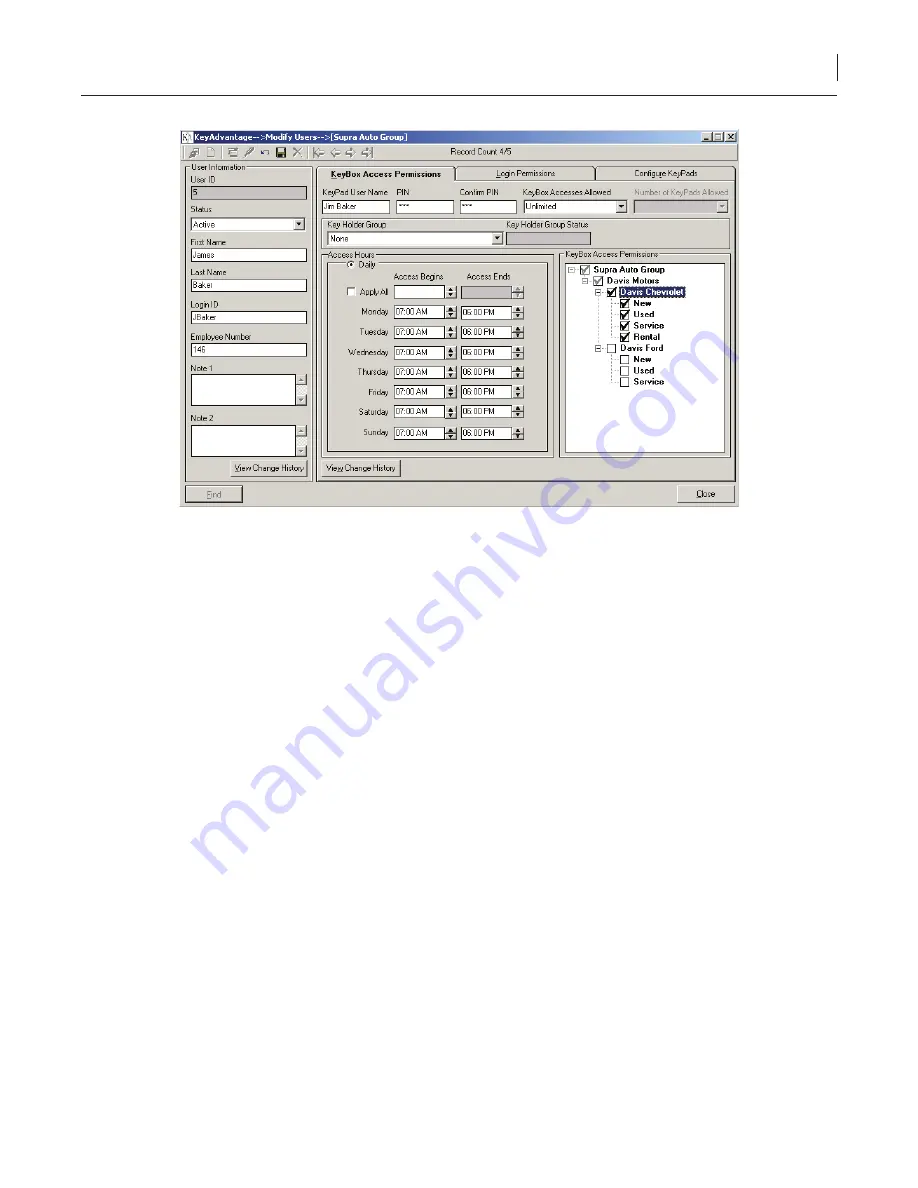
Figure 8. KeyBox Access Permission tab
5. Enter a login ID for the user. The login ID is used when the user logs onto the KeyAdvantage software or
when checking out a KeyPad.
6. Enter the employee number and any applicable notes.
7. Enter the KeyPad user name. This displays on the KeyPad when it is powered on.
8.
Enter and confirm a four-digit PIN code for the key holder. The key holder uses his PIN code when
checking out a KeyPad and accessing KeyBoxes.
9. Enter the maximum number of KeyBox accesses the user can use in a shift.
10. Enter the maximum number of KeyPads the user can check out at a time.
11. To enter the access hours and KeyBox access permissions, do one of the following:
a. If the key holder belongs to a key holder group, select the group from the dropdown list. The key
holder group settings automatically fill in the access hours and KeyBox access permissions, which
cannot be changed.
b. If the key holder does not belong to a key holder group, manually enter the access hours and KeyBox
access permissions by doing the following:
•
Enter the hours the key holder is allowed to access vehicles. If the hours are the same each day of
the week, enter the hours in the first line and check the
Apply all
box.
•
Check the dealerships and departments the key holder can access.
Note:
If a new dealership department is added to your KeyAdvantage system at a later date, you will
need to add the new department to the KeyBox access permissions of all users needing access to the
department. If the KeyBox access permissions are not updated in the user profiles, those employees will
not be able to access the new department KeyBoxes.
12. If the user only needs to be able to check in and check out KeyPads, you can skip the following steps
and save the user record. This saves the user as a key holder and does not allow the user to access any
other function of the KeyAdvantage system.
13. If the user needs to access the KeyAdvantage software menus, click the
Login Permissions
tab. The
Login Permissions
tab becomes active, as shown in
Figure 9
.
Summary of Contents for KeyAdvantage
Page 1: ...KeyAdvantage System User Manual ...
Page 2: ...This page was intentionally left blank ...
Page 38: ...31 KeyAdvantage User Manual ...
Page 52: ...45 KeyAdvantage User Manual Figure 18 Unassign KeyTag ...
Page 64: ...57 KeyAdvantage User Manual ...
Page 72: ...65 KeyAdvantage User Manual ...
Page 76: ...69 KeyAdvantage User Manual ...
Page 78: ......
Page 79: ......
Page 80: ......


