Universal MotorHome Ladder
501L
1) Insert the Top of the ladder into the Middle section of the ladder. Use the 10-24 x 1 1½” screw to secure it.
2) Check if the RV has a straight or curved roof. If the roof is straight skip to step 7, if it is curved continue to step 3.
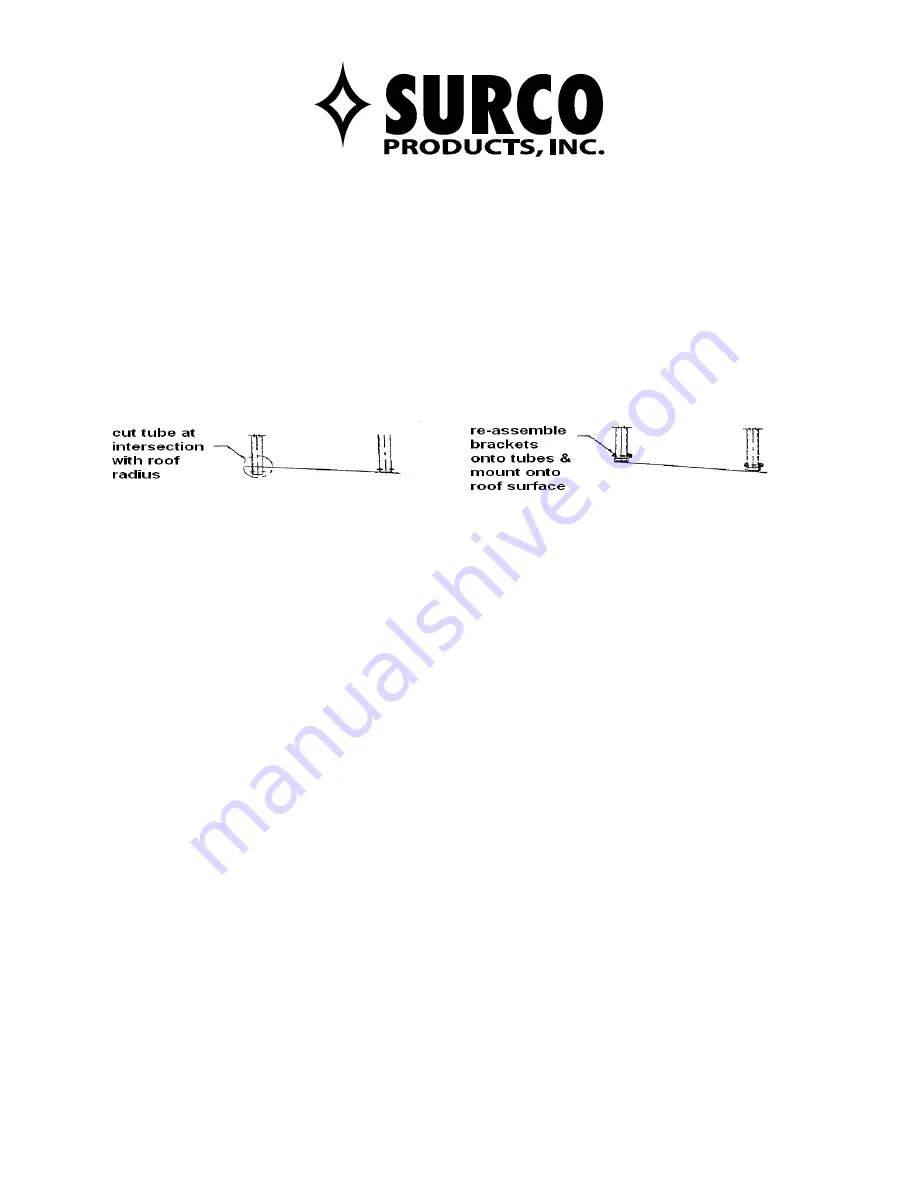
3) Hang the ladder on the roof of the RV. Align the ladder so it is parallel to the side of the R
V.
4) The outside tube of the ladder should be elevated. Measure the space between the outside tube and roof of the
RV.
5) Use this measurement and cut off that amount off the bottom of the inside tube. Use a 3/16” drill bit and drill a
hole through the bottom of the newly cut tube.
6) Use the 10-24 x 1 ½” screws to attach the mounting brackets to the top of the ladder.
7A)
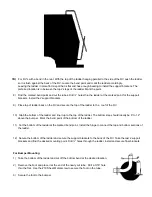
For Straight RV’s: with the top of the ladder hanging parallel to the side of the RV, line up the bottom of the ladder
with the top. The bottom step should be 6” to 12” above the bumper. Mark the top and bottom sections trying to
keep the hinge piece as center as possible.
8) Cut the tubes of the ladder and install the hinge bracket connecting the top and bottom sections of the ladder,
using the 10-24 x 1½” screws.
9) Secure the Top and Bottom of the ladder with the # 10 Sheet Metal screws.
10) Take the 4 support brackets find the spots that are flat and have enough backing to install them. Mark the 4
points.
11) Drill ¼” holes thru the ladder at the marked points and install the support brackets.
12) Secure the support bracket with the # 10 sheet metal screws.


