background image

COMMUNICATIONS PORTS 

(RS232 and USB)

The RS232 communication port is a standard DB9 female with both RS232 and

simulated contact closure capability.  The UPS will poll the port and activate

the port for RS232 or contact closure in accordance with the type of cable it

finds connected to the port.  To change the port configuration requires the unit

be turned off and restarted with the desired cable connected.  The pinout for the

port is depicted per the chart below:

Pin 1: Simulated contact closure Low Battery Warning, NO

Pin 2: /TXD

Pin 3: /RXD and receive UPS shutdown command (connect to pin 9 for 4-

seconds.  The shutdown command is only active in the battery mode)

Pin 4: Not Used

Pin 5: Ground

Pin 6: Not Used

Pin 7: Not Used

Pin 8: Simulated contact closure AC fail, NO

Pin 9: Atx Signal (high level: +12V +/-2V, low level: -15V +/- -2V)

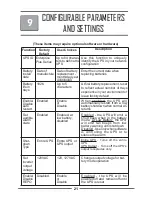
DIPSWITCH SETTINGS

The dipswitch setting may be changed by the user to set the desired Inverter

(On-Battery) output voltage.  The dipswitch must be set to the desired Inverter

(On-Battery) output voltage and then the UPS must be turned off and restarted

to reconfigure the microprocessor and save the changes.  The Inverter (On-

Battery) output voltage setting can be either 120VAC (208VAC) default or 127VAC

(240VAC).  Changing the Inverter (On-Battery) output voltage to 127VAC, will

also change the Buck setpoint.  Changing the Inverter (On-Battery) output volt-

age to 240VAC, will also change the Brownout, Boost, Buck and Overvoltage

setpoints.

SELF TEST

The self test feature is useful to verify the correct operation of the UPS and the

condition of the batteries.  With the UPS in the AC normal mode, press and

hold the On/Off/Test Button for four beeps, then release the button.  The UPS

will perform a ten-second self test.  During the self test, the UPS will switch to

battery power and the On-Battery LED will illuminate and the audible alarm will

sound.  The length of the test that is automatically performed every two weeks

is longer than the start-up or user invoked test.  This test will run for approxi-

mately fifteen-seconds to measure the battery’s capability to provide an ac-

ceptable amount of runtime.  If the UPS fails a self test, one of the LEDs will

remain illuminated indicating the type of problem.

NOTE:

 The UPS will auto-

matically perform a self test on start-up and every two weeks.

LOAD SHEDDING FUNCTION

The output receptacles are electrically wired into two segments to support the

"Load Shedding Function".  The user can control the two segments individually

or both at the same time.   The Load Shedding Function is controllable by the

Power Monitoring Software or the SNMP card.

12

Summary of Contents for SU-2000Li

Page 1: ...Ver 1 0 Rev A The most trusted name in power protection USER MANUAL UPS OPERATION SU 2000Li...

Page 2: ...t a l l a t s n I 3 11 n o i t a r e p O 4 14 g n i t o o h s e l b u o r T 5 15 y r e t t a B e h t g n i c a l p e R 6 18 e c i v r e S g n i n i a t b O 7 19 s n o i t a c i f i c e p S 8 9 Configu...

Page 3: ...tion product It has been designed and manufactured to provide many years of trouble free service This symbol indicates ATTENTION This symbol indicates Risk of Electrical Shock This symbol indicates Al...

Page 4: ...grounding AC wall outlet The receptacle must be connected to the appropriate branch protection circuit breaker or fuse Connection to any other type of receptacle may result in a shock hazard and viola...

Page 5: ...are designed to provide reasonable protection against such interference in a residential installation This equip ment generates and uses radio frequency and if not installed and used properly that is...

Page 6: ...under the circumstances Examples of devices considered to be life support devices are neonatal oxygen analyzers nerve stimulators whether used for anesthesia pain relief or other purposes auto transfu...

Page 7: ...ED illuminates in a blinking state when the UPS is operating in the Buck mode The Buck LED will extinguish when operating in the AC normal Boost and Battery modes The Fault red LED illuminates in a st...

Page 8: ...tery s capacity drops below 80 ca pacity and then it will extinguish LED 70 70 battery capacity green yellow LED will be yellow and illuminated until the battery s capacity drops below 60 ca pacity an...

Page 9: ...s 6 The output circuit breaker will trip in the event the load exceeds the UPS s power rating 7 The Battery Backup output power receptacles The output receptacles are electrically wired into two segme...

Page 10: ...r heat ing devices water or excessive humidity or where the UPS is exposed to direct sunlight Route power cords so they cannot be walked on or damaged Operating Temperature Maximum 0 to 40 degrees C 3...

Page 11: ...he UPS NOTE The mounting brackets can also be mounted in the middle of the UPS 2 Align the mounting bracket with the mounting bracket screw holes 3 Attach the mounting bracket with the retaining screw...

Page 12: ...d OUT NOTE Connecting to the Network Phone Fax Modem modular connectors is optional The UPS works properly without this connection CONNECTING YOUR EQUIPMENT Plug the equipment into the output receptac...

Page 13: ...or unacceptable When the commercial power returns or is at an acceptable level the UPS will auto matically transfer back to the AC normal mode and start recharging the batter ies During an extended ou...

Page 14: ...default or 127VAC 240VAC Changing the Inverter On Battery output voltage to 127VAC will also change the Buck setpoint Changing the Inverter On Battery output volt age to 240VAC will also change the Br...

Page 15: ...POWER MONITORING SOFTWARE The UPS comes with a Power Monitoring Software CD See the software CD for the installation of the Power Monitoring Software USB PORT The USB protocol is HID The HID USB drive...

Page 16: ...t LED is illuminated Have a Qualified Electrician correct the service wiring The batteries may be weak or at the end of useful service life Charge the batteries for 8 hours and retest If the runtime i...

Page 17: ...present a risk of electrical shock These batteries produce sufficient current to burn wire or tools very rapidly producing molten metal Observe these precautions when replacing the batteries 1 Remove...

Page 18: ...n on the front panel to turn the UPS OFF NOTE Turn the input circuit breaker to the off position for the 208V models 3 Unplug the UPS s AC power cord from the AC wall outlet 4 Unplug the equipment fro...

Page 19: ...rify proper polarity Reconnect the battery negative black wire 19 Verify proper polarity Reconnect the battery positive red wire 20 Slide the battery module into the UPS 21 Verify proper polarity Reco...

Page 20: ...on and if possible help solve your problem over the phone In the event that the unit requires factory service the technician will issue you a Return Material Authoriza tion Number RMA G If the UPS is...

Page 21: ...logy Line Interactive Sine Wave OUTPUT NON BATTERYOPERATION INPUT 1 e l g n i S e s a h P f o r e b m u N 2W G Nominal Voltage 120VAC Low Voltage Transfer Point 80V 150V resets to Utility Power at 85V...

Page 22: ...t through as a percentage of an applied ANSI C62 41 Cat A 6 kV Surge Response Time Surge Current Capability Surge Energy Rating 800 J 600 J 0 ns instantaneous normal mode 5 ns common mode 5 normal and...

Page 23: ...ience in your environment or leave factory default Enter the current date when replacing batteries Use this function to uniquely identify the UPS in your network configuration Changes output voltage f...

Page 24: ...THE SOLE AND EXCLUSIVE WARRANTY MADE BY SURGEX WITH RESPECT TO THE PRODUCT ALL IMPLIED WARRANTIES WITH RESPECT TO THE PRODUCT INCLUDING BUT NOT LIMITED TO IMPLIED WARRANTIES OF MERCHANTABILITY OR FIT...

Reviews: