81
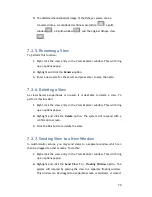
7.2.8.
Switching Between Views
To switch between saved views, simply click and drag the view entry from the
View Explorer
window into the main view window. Note that the current view is
always indicated in
Bold
lettering in the
View Explorer
window.
7.2.9.
Switching Between Different Screen Divisions
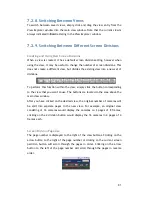
Creating and Using New Screen Divisions
When a view is created, it has a default screen division setting, however when
using the view, it may be useful to change the number of screen divisions. This
does not create a different view, but divides the existing view into a new set of
divisions.
To perform this function within the view, simply click the button corresponding
to the view that you want to use. The buttons are located in the area above the
main view window.
After you have clicked on the desired view, the original number of cameras will
be split into separate pages in the new view. For example, an original view
consisting of 16 cameras would display the cameras on 2 pages of 8 frames,
clicking on the 4 division button would display the 16 cameras in 4 pages of 4
frames each.
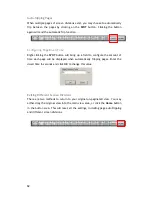
Screen Division Page Use
The page number is displayed to the right of the view buttons. Clicking on the
arrow button to the right of the page number or clicking on the current screen
partition button will scroll through the pages in order. Clicking on the arrow
button to the left of the page number will scroll through the pages in reverse
order.

