9C-5 Combination Meter / Fuel Meter / Horn:
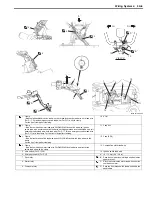
3) Connect the variable resister (2) between the Y/B and B lead wires from the wire harness.
4) Turn the ignition switch ON.
5) Check the display of fuel level indicator (LCD) as shown in the figure.
If any abnormality is found, replace the combination meter with a new one. Refer to “Combination Meter Removal
and Installation (Page 9C-2)”.
NOTE
It takes approx. 13 seconds that the fuel level indicator indicates the detected fuel level.
6) Connect the fuel level gauge coupler and reinstall the removed parts.
Fuel Level Gauge Inspection
B931H29306008
Inspect the fuel level gauge in the following procedures:
1) Remove the fuel pump. Refer to
“Fuel Pump
Assembly Removal and Installation: in Section
1G”
.
2) Measure the resistance at each fuel level gauge in
float position. If the resistance is incorrect, replace
fuel pump with a new one.
Special tool
: 09900–25008 (Multi-circuit tester set)
Tester knob indication
Resistance (
Ω
)
3) Install the fuel pump. Refer to
“Fuel Pump
Assembly Removal and Installation: in Section
1G”
.
2
I931H1930009-01
Resistance
Fuel level
meter
16.5
– 21.5
Ω
23.5
– 30.5
Ω
33
– 41
Ω
53
– 65
Ω
82 – 100
Ω
164.5
– 207.5
Ω
Flicker
Flicker
Flicker
Less than
16
Ω
ON
ON
ON
ON
ON
I931H1930010-01
Float position
Resistance
Full “a”
6.4 – 8.4
Ω
Empty “b”
216 – 222
Ω
“a”: 27.7 mm (1.09 in)
“b”: 166 mm (6.54 in)
“ a ”
“ b ”
I831G1930014-01
Summary of Contents for 2009 LT-A500XP
Page 2: ......
Page 4: ......
Page 14: ...00 9 Precautions ...
Page 224: ...1E 3 Engine Lubrication System EXHAUST SIDE INTAKE SIDE I931H1150003 02 ...
Page 304: ...1K 4 Exhaust System ...
Page 346: ...2D 5 Wheels and Tires ...
Page 438: ...3D 26 Propeller Shafts ...
Page 482: ...4D 6 Parking Brake ...
Page 512: ...5A 28 Automatic Transmission ...
Page 624: ...Prepared by December 2008 Part No 99500 44080 03E Printed in U S A 624 ...


