1J-10 Charging System:
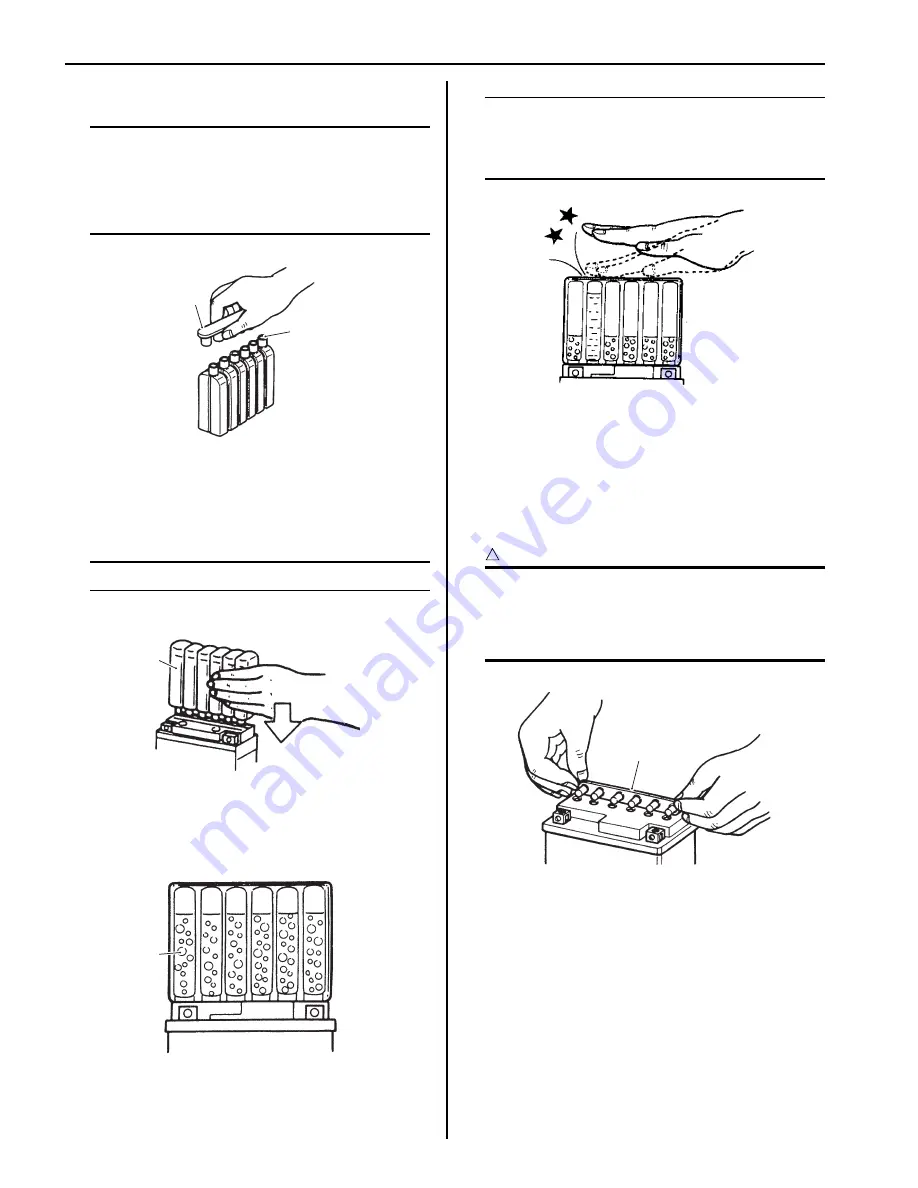
2) Remove the caps (2) from the electrolyte container.
NOTE
• Do not remove or pierce the sealed areas
“B” of the electrolyte container.
• After filling the electrolyte completely, use
the removed cap (2) as sealing caps of
battery-filler holes.
3) Insert the nozzles of the electrolyte container (3) into
the electrolyte filler holes of the battery.
4) Hold the electrolyte container firmly so that it does
not fall.
NOTE
Do not allow any of the electrolyte to spill.
5) Make sure that air bubbles (4) rise to the top of each
electrolyte container, and leave in this position for
about more than 20 minutes.
NOTE
If no air bubbles come out from a filler port,
tap the bottom of the electrolyte container
two or three times.
Never remove the container from the battery.
6) After confirming that the electrolyte has entered the
battery completely, remove the electrolyte containers
from the battery.
7) Wait for about 20 minutes.
8) Insert the caps (2) into the filler holes, pressing in
firmly so that the top of the caps do not protrude
above the upper surface of the battery’s top cover.
CAUTION
!
• Once the caps are installed to the battery,
do not remove the caps.
• Do not tap the caps with a hammer when
installing them.
2
“B”
I649G11A0040-03
3
I649G11A0041-03
4
I649G11A0042-03
I310G11A0024-01
2
I718H11A0027-01
Summary of Contents for 2009 LT-A750XK9
Page 2: ......
Page 4: ......
Page 5: ...SUPPLEMENTS L LT A750XK9 09 MODEL 10 LT A750XPK9 09 MODEL 11 ...
Page 29: ...0A 15 General Information 99565 01010 013 CD ROM Ver 13 ...
Page 57: ...0B 28 Maintenance and Lubrication 09915 40610 Oil filter wrench Page 0B 12 Page 0B 12 ...
Page 68: ...0C 11 Service Data ...
Page 310: ...1K 5 Exhaust System ...
Page 482: ...4D 6 Parking Brake ...
Page 528: ...6B 13 Steering Handlebar ...
Page 581: ......


