FI SYSTEM DIAGNOSIS 5-55
Step 2
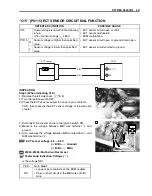
1) Connect the TO sensor coupler.
2) Insert the needle pointed probes to the lead wire coupler.
3) Turn the ignition switch ON.
4) Measure the voltage at the wire side coupler between Br/W
and B/Br wires.
&
TO sensor voltage: 0.4 – 1.4 V
(
+
Br/W –
-
B/Br)
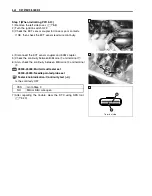
Also, measure the voltage when leaning the vehicle.
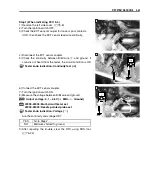
5) Dismount the TO sensor from its bracket and measure the
voltage when it is leaned 65 ° and more, left and right, from
the horizontal level.
&
TO sensor voltage: 3.7 – 4.4 V
(
+
Br/W –
-
B/Br)
%
09900-25008: Multi-circuit tester set
09900-25009: Needle pointed probe set
4
Tester knob indication: Voltage (
5
)
Is the voltage OK?
6) After repairing the trouble, clear the DTC using SDS tool.
(
$
5-23)
2
2
65 ˚
YES
• Red, B/Br or Br/W wire open or shorted to
ground, or poor
6
,
N
or
0
connection.
• If wire and connection are OK, intermittent trou-
ble or faulty ECM.
• Recheck each terminal and wire harness for
open circuit and poor connection.
• Replace the ECM with a known good one, and
inspect it again.
NO
• Loose or poor contacts on the ECM coupler.
• Open or short circuit.
• Replace the TO sensor with a new one.
Wire harness side
Summary of Contents for LT-A700X 2004
Page 25: ...2 8 PERIODIC MAINTENANCE INTAKE SIDE ...
Page 26: ...PERIODIC MAINTENANCE 2 9 EXHAUST SIDE ...
Page 46: ...PERIODIC MAINTENANCE 2 29 ...
Page 59: ...3 8 ENGINE Remove the engine from the right side ...
Page 133: ...3 82 ENGINE Pull the rope and check that the ratchet is pushed out ...
Page 155: ......
Page 263: ......
Page 301: ...7 20 COOLING AND LUBRICATION SYSTEM EXHAUST SIDE INTAKE SIDE ...
Page 302: ......
Page 312: ...CHASSIS 8 9 REAR CARRIER Remove the rear carrier 1 ...
Page 386: ......
Page 420: ...ELECTRICAL SYSTEM 9 33 HEADLIGHT INSTALLATION Head light coupler Head light R Adjusting point ...
Page 453: ...10 26 SERVICING INFORMATION Rear box Rear fender Right mud guard Left mud guard ...
Page 477: ......
Page 480: ...Prepared by September 2004 Part No 99500 46060 01E Printed in U S A 472 ...


