ELECTRICAL SYSTEM 9-29
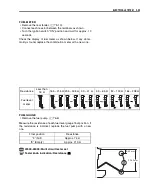
FUEL METER
• Remove the rear fender. (
!
8-10)
• Connect each resistor between the terminals as shown.
• Turn the ignition switch “ON” position and wait for approx. 13
seconds.
Check the display of fuel meter as shown below, If any abnor-
mality is found, replace the combination meter with a new one.
FUEL GAUGE
• Remove the fuel pump. (
!
6-6)
Measure the resistance at each fuel level gauge float position. If
the resistance is incorrect, replace the fuel pump with a new
one.
"
09900-25008: Multi circuit tester set
(
Tester knob indication: Resistance (
Ω
)
Resistance
Less than
16
Ω
16.5 – 21.5
Ω
23.5 – 30.5
Ω
33 – 41
Ω
53 – 65
Ω
82 – 100
Ω
164 – 208
Ω
Fuel level
meter
Float position
Resistance
“F” (Full)
Approx. 7.4
Ω
“E” (Empty)
Approx. 219
Ω
E:42 mm
F:180 mm
Summary of Contents for LT-A700X 2004
Page 25: ...2 8 PERIODIC MAINTENANCE INTAKE SIDE ...
Page 26: ...PERIODIC MAINTENANCE 2 9 EXHAUST SIDE ...
Page 46: ...PERIODIC MAINTENANCE 2 29 ...
Page 59: ...3 8 ENGINE Remove the engine from the right side ...
Page 133: ...3 82 ENGINE Pull the rope and check that the ratchet is pushed out ...
Page 155: ......
Page 263: ......
Page 301: ...7 20 COOLING AND LUBRICATION SYSTEM EXHAUST SIDE INTAKE SIDE ...
Page 302: ......
Page 312: ...CHASSIS 8 9 REAR CARRIER Remove the rear carrier 1 ...
Page 386: ......
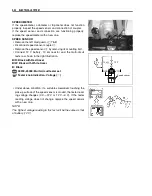
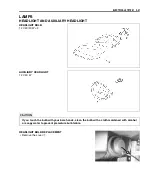
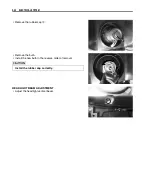
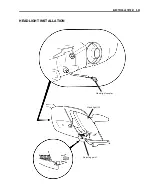
Page 420: ...ELECTRICAL SYSTEM 9 33 HEADLIGHT INSTALLATION Head light coupler Head light R Adjusting point ...
Page 453: ...10 26 SERVICING INFORMATION Rear box Rear fender Right mud guard Left mud guard ...
Page 477: ......
Page 480: ...Prepared by September 2004 Part No 99500 46060 01E Printed in U S A 472 ...


